|
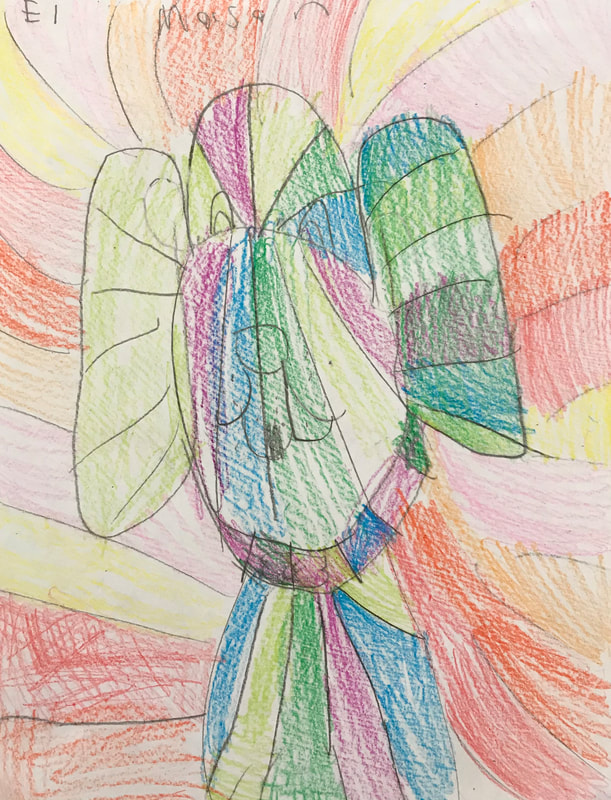
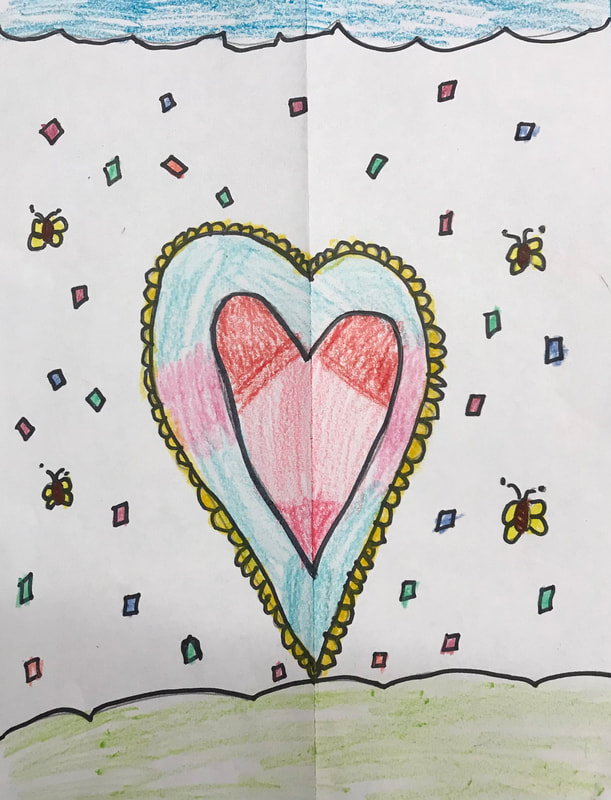
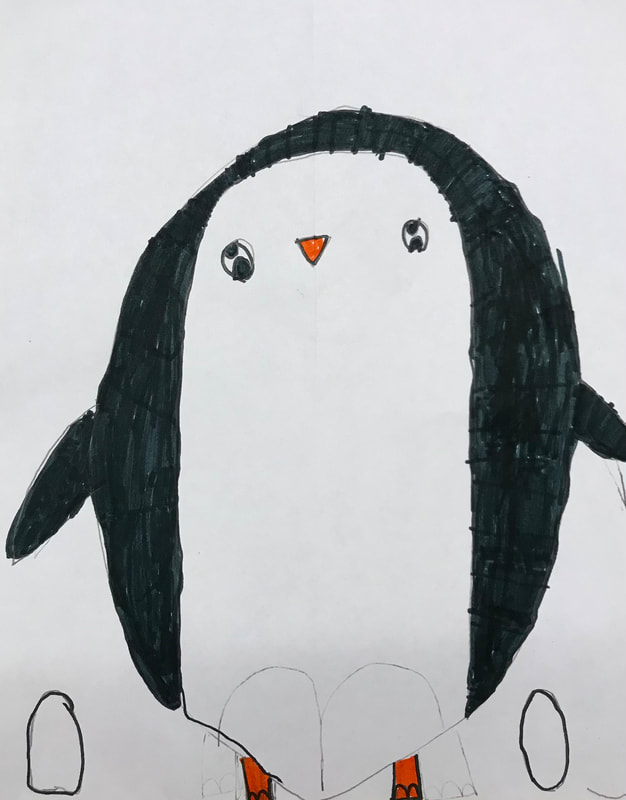
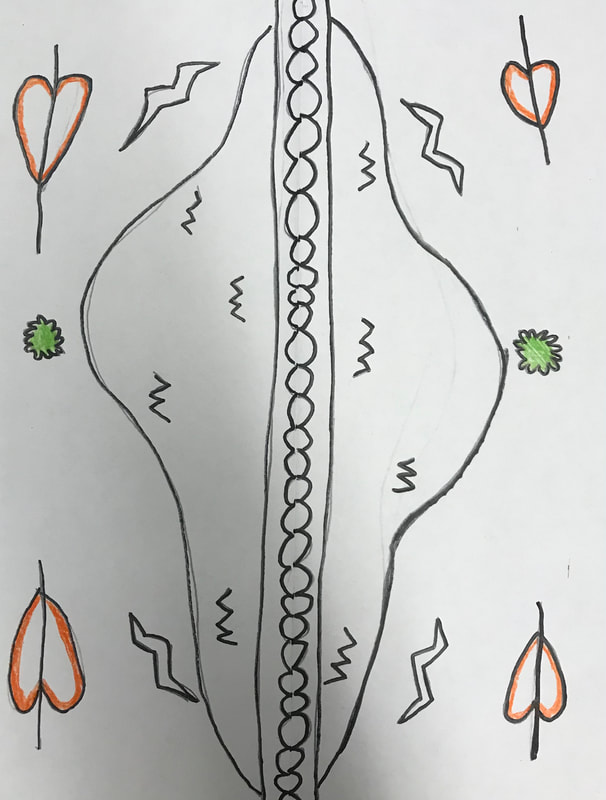
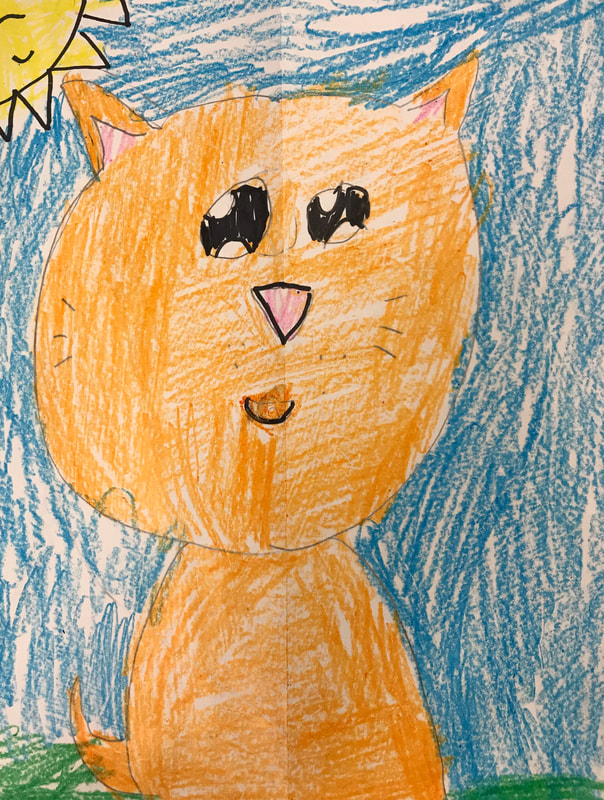
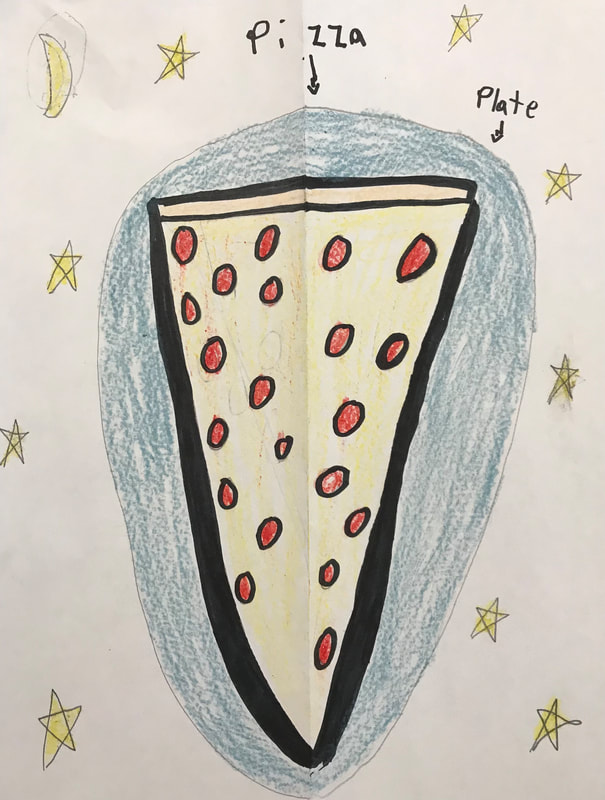
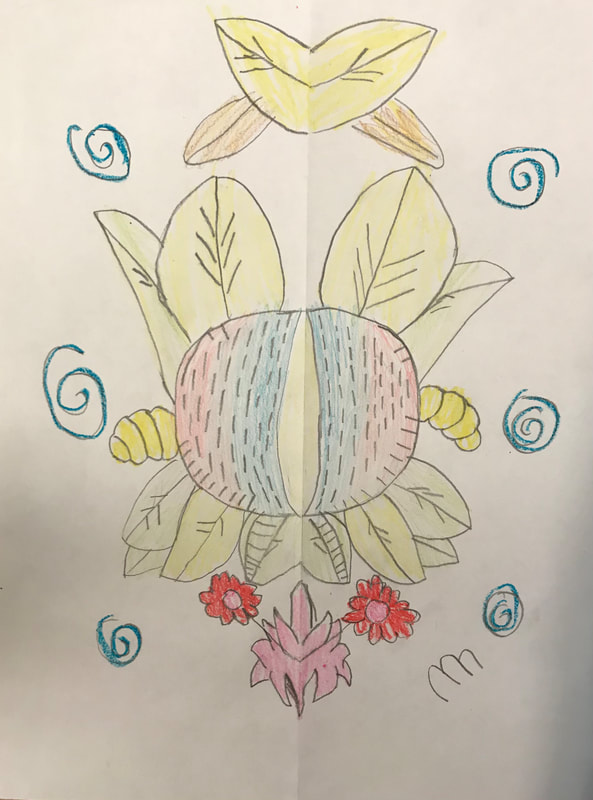
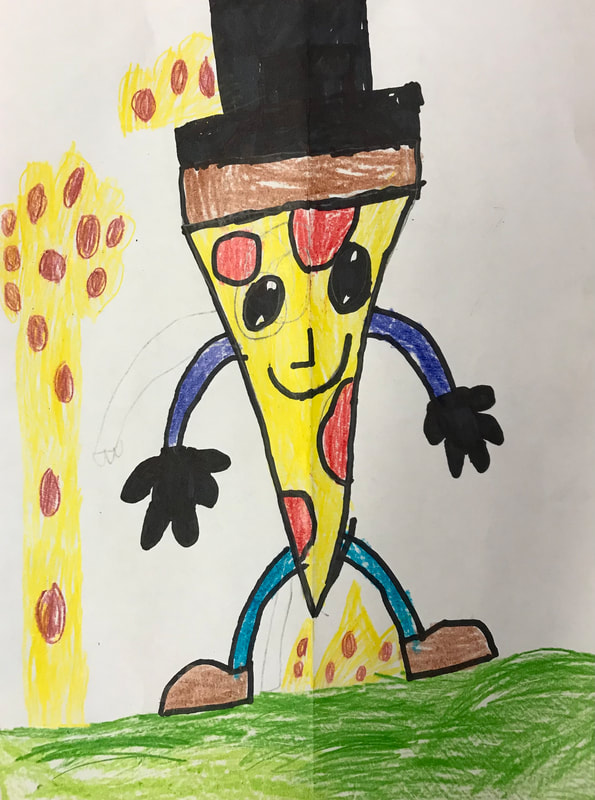
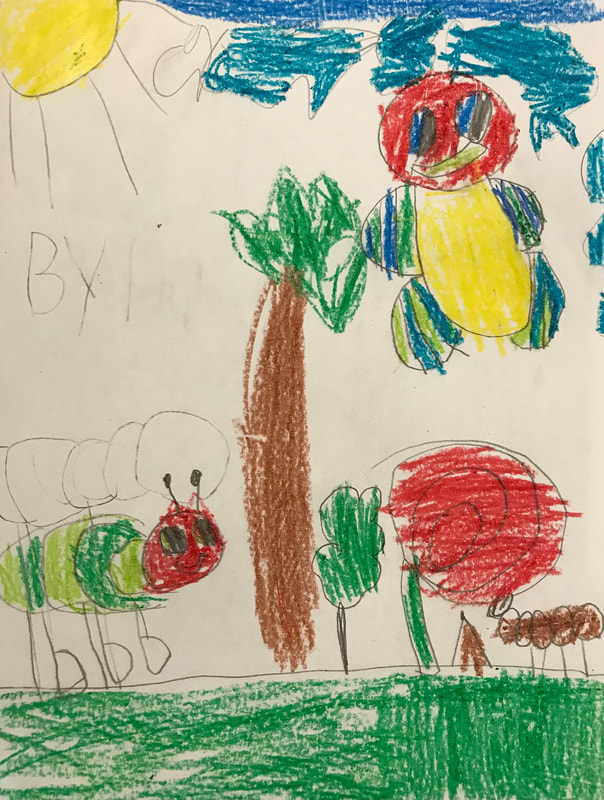
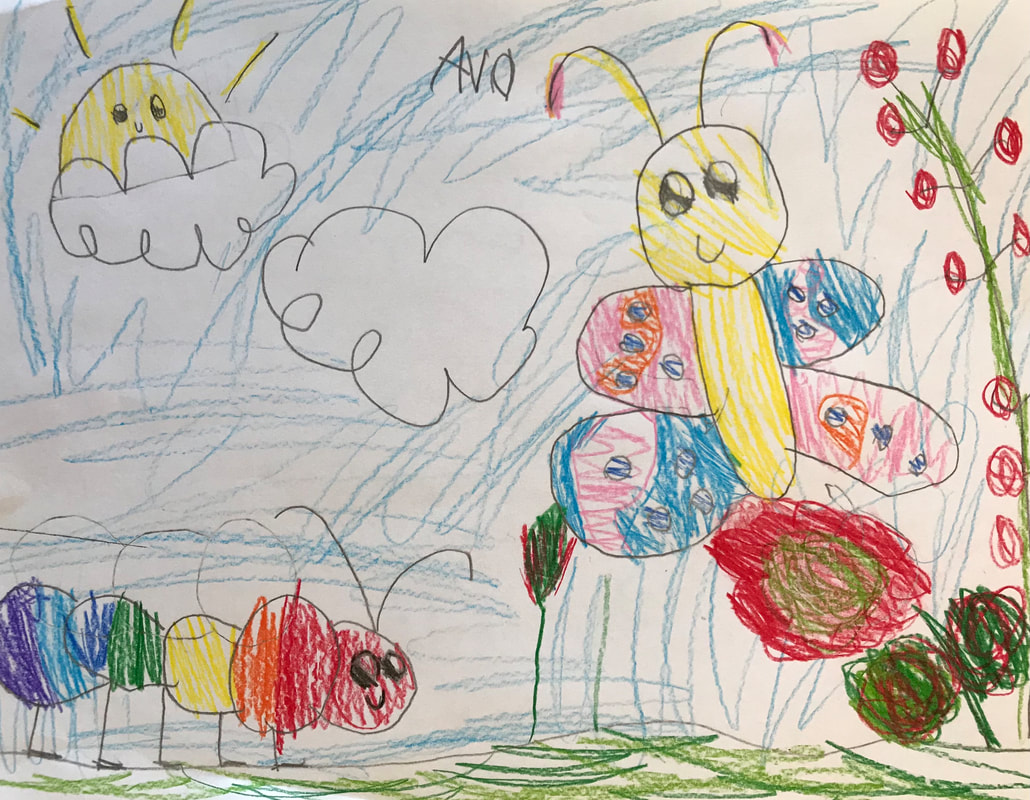
This was such a fun collab done with kindergarten (butterflies), first grade (honey bees), second grade (flowers), and fourth grade (Earth hearts).
0 Comments
  This lesson is for elementary or middle school. It teaches collaborative art, line, mural, color, movement, repetition
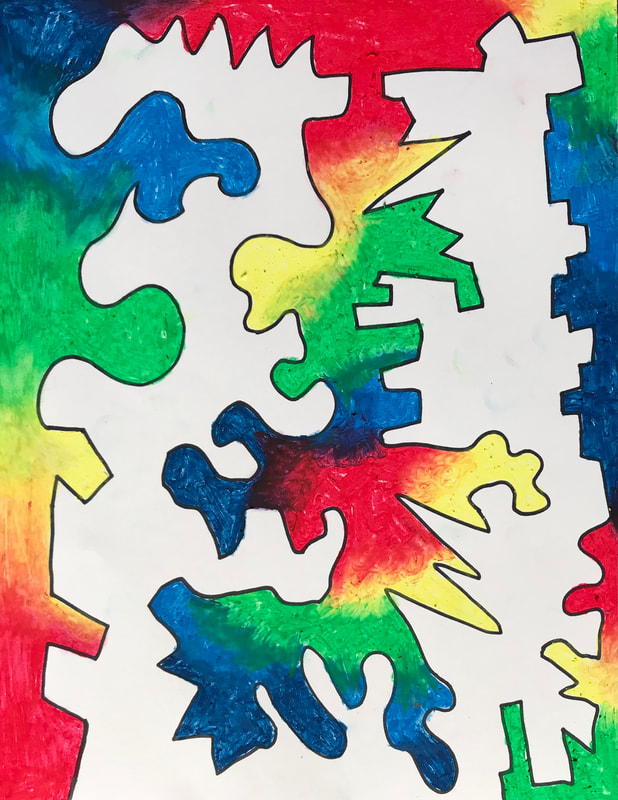
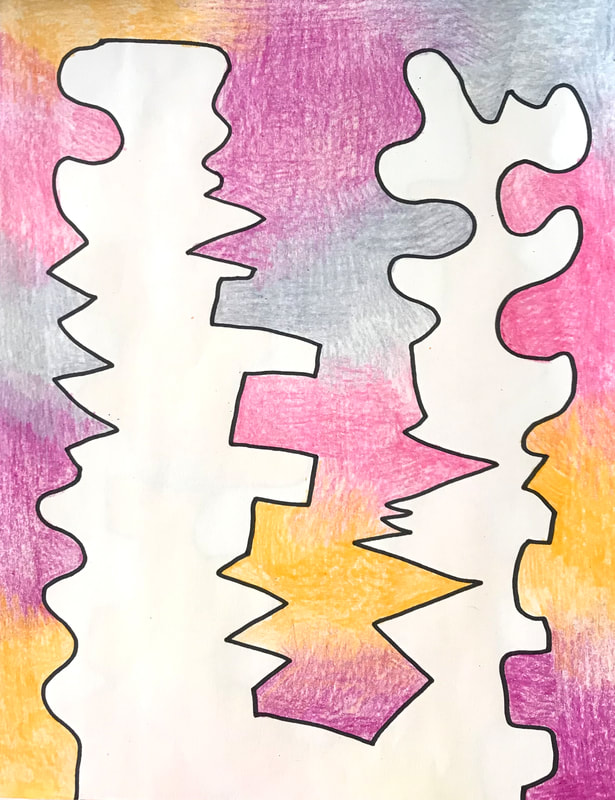
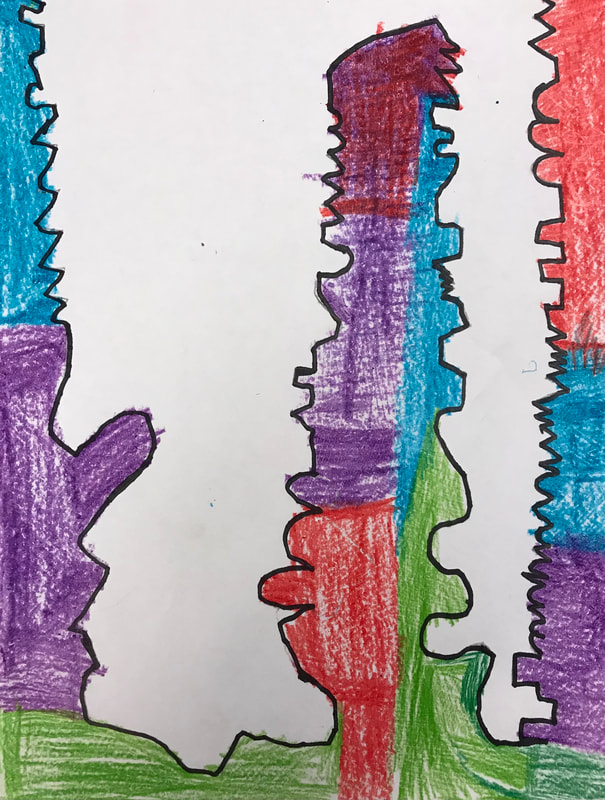
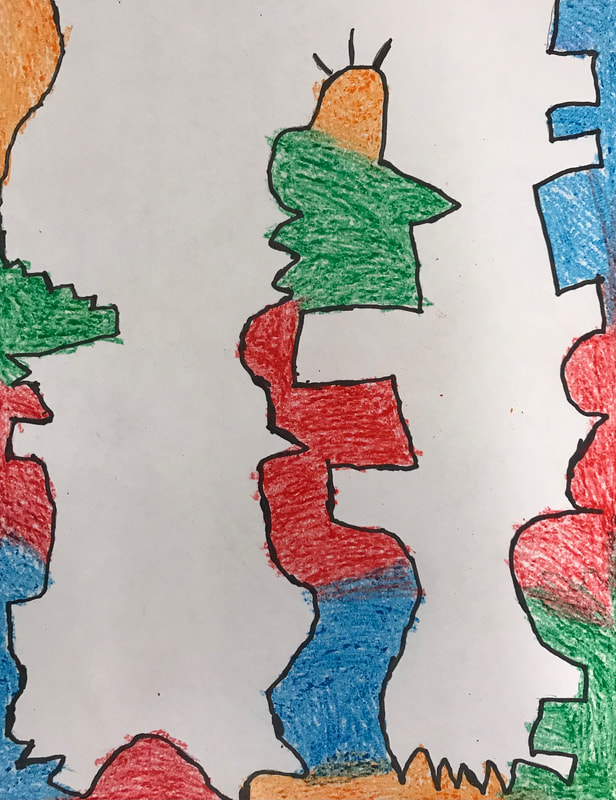
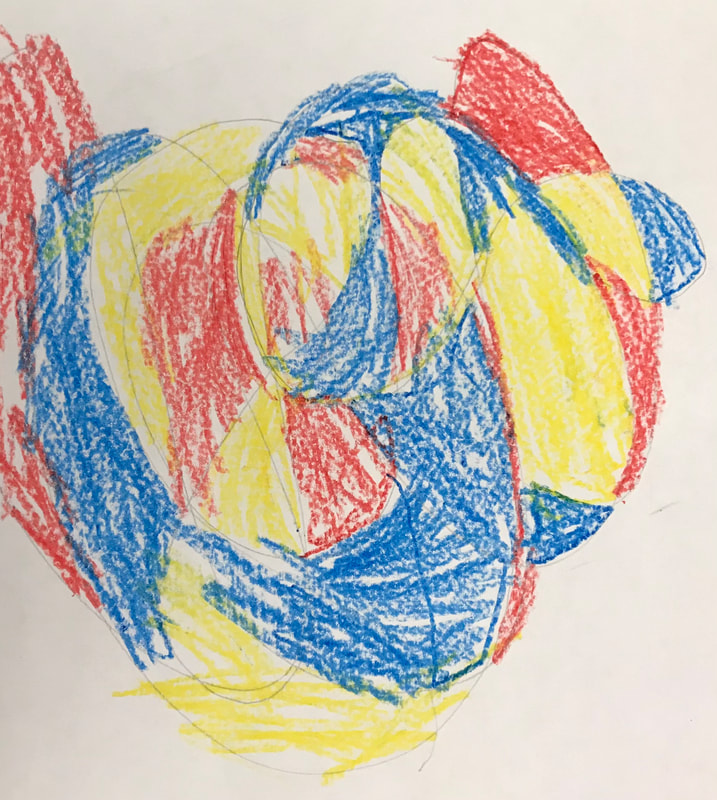
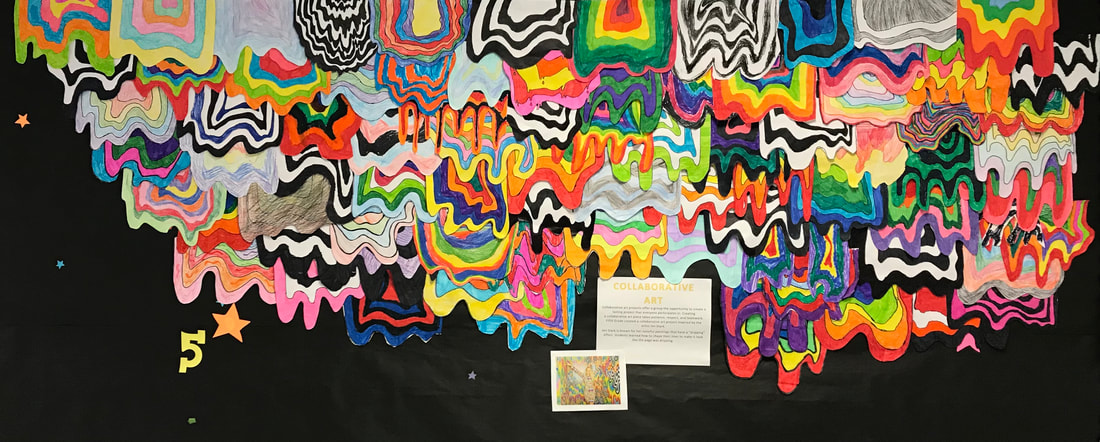
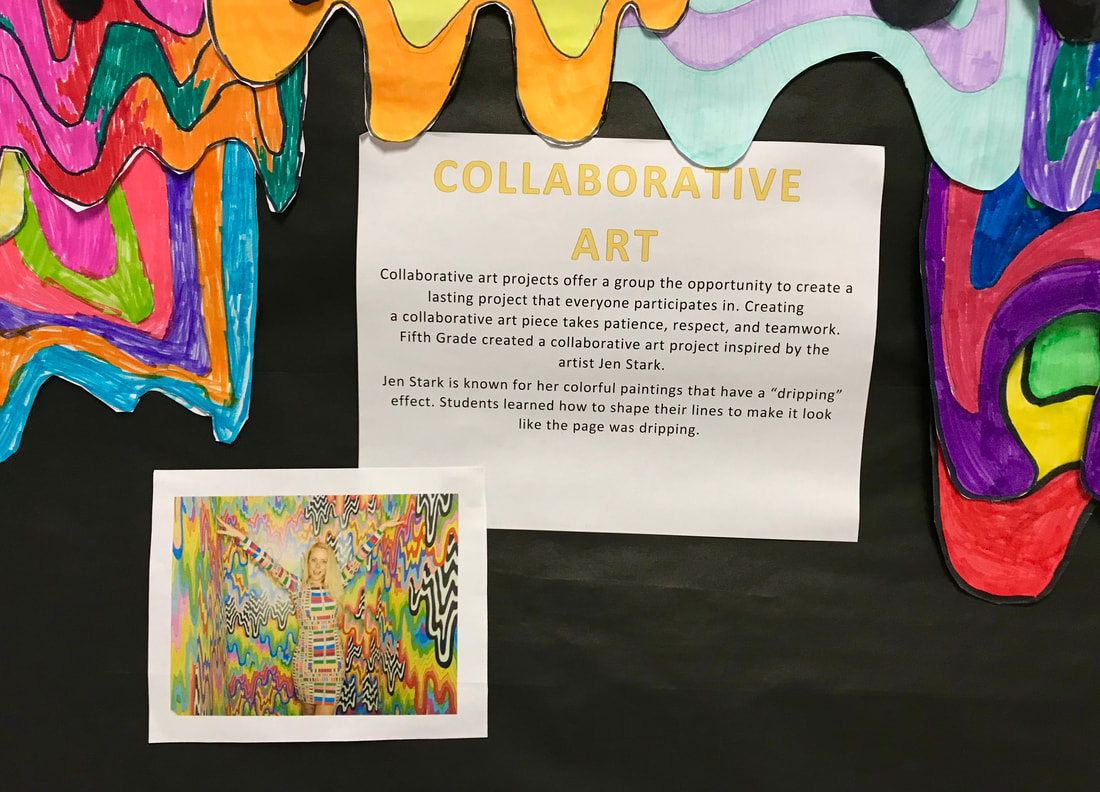
Materials: -Drawing paper -Pencil -Markers -Colored pencils -Crayons Teaching and Work Time: 1. Students will be introduced to collaborative art. We will look through famous examples as well as examples of collaborative murals from classrooms. They will then be introduced to artist Jen Stark and look at examples of her artwork. We will discuss the colors and the movement created with lines. We will talk about the balance that is created with the repetition of black and white layered with the rainbow colors. 2. Students will create a collaborative mural inspired by Jen Stark. They will draw a curvy line on their paper and then add curvy lines following the shape behind it. They will then color it in either black and white or rainbow colors. They will then be hung together in the hall to create a collaborative mural with their peers. 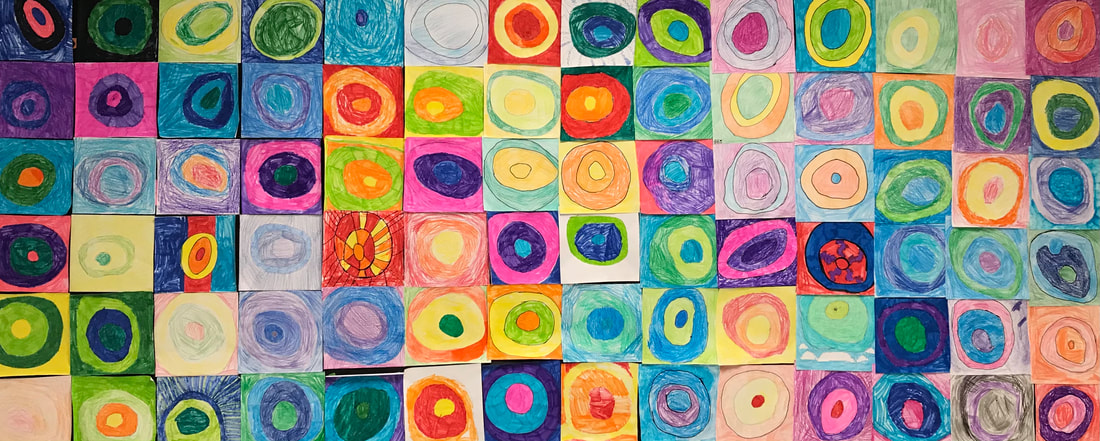 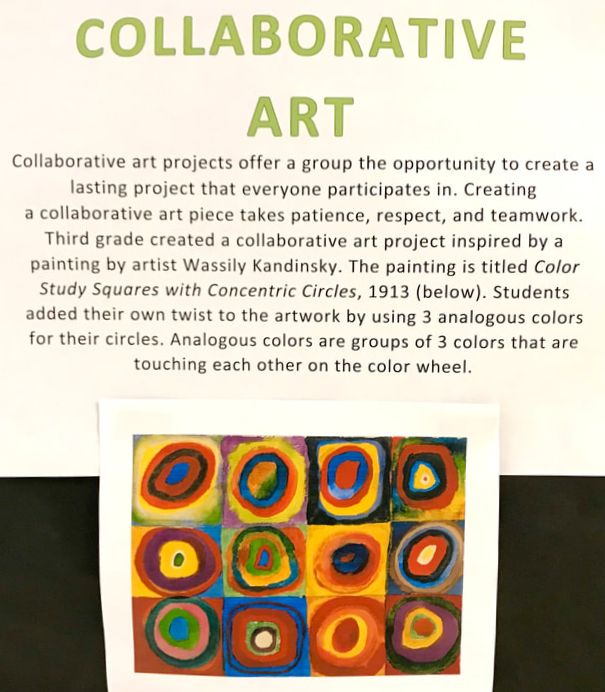 This lesson is for elementary or middle school. It teaches collaborative art, shape, analogous colors, mural
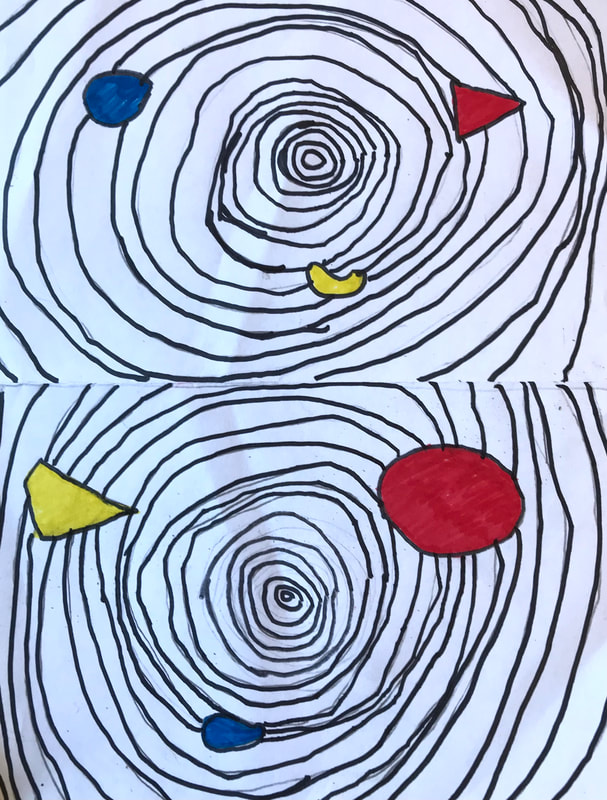
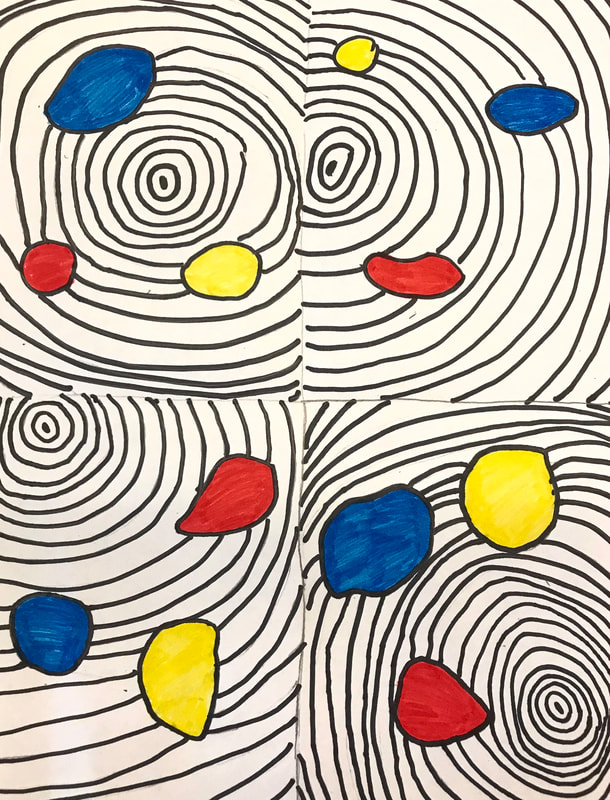
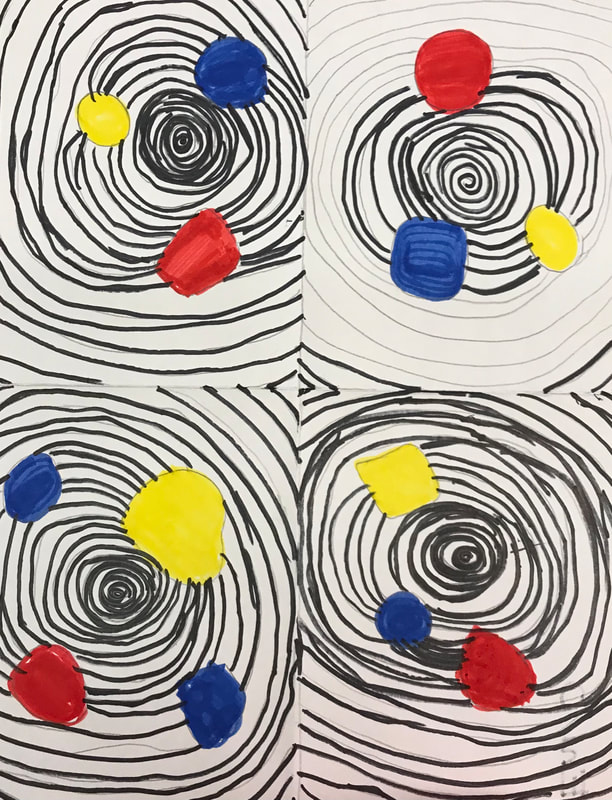
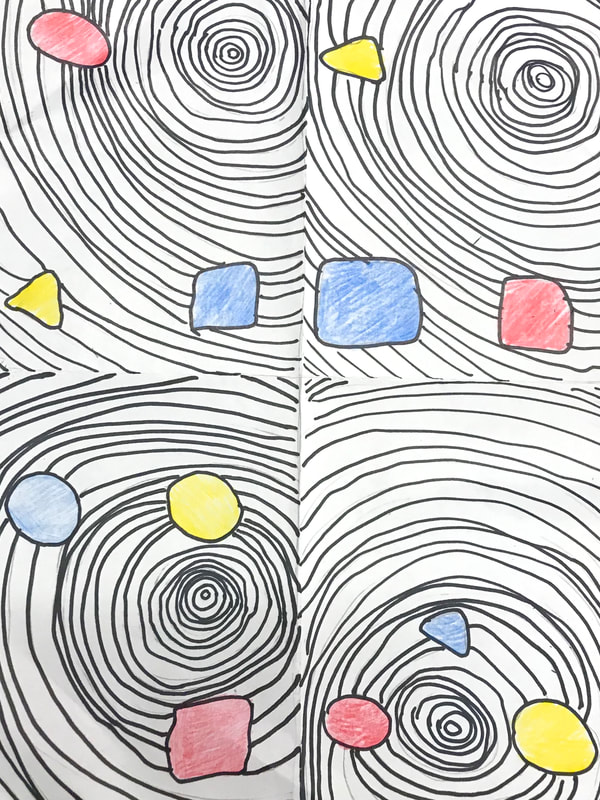
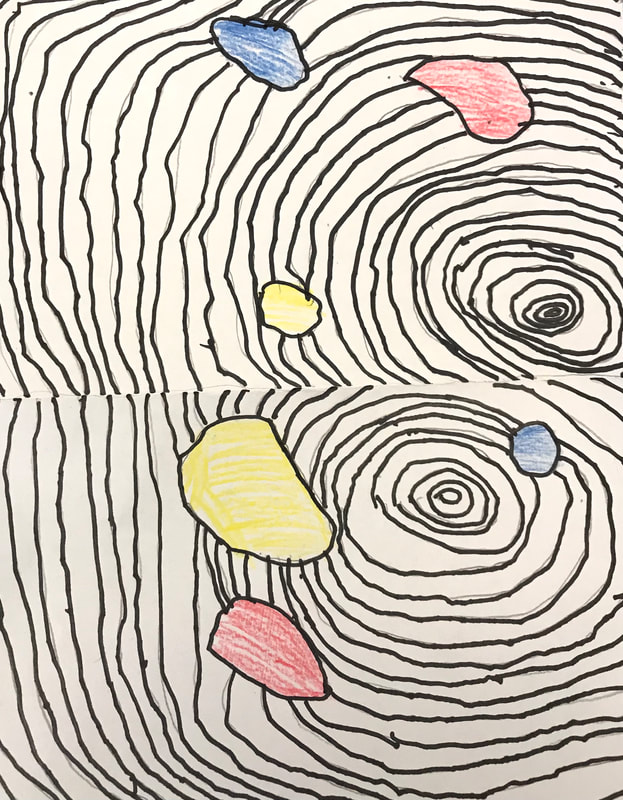
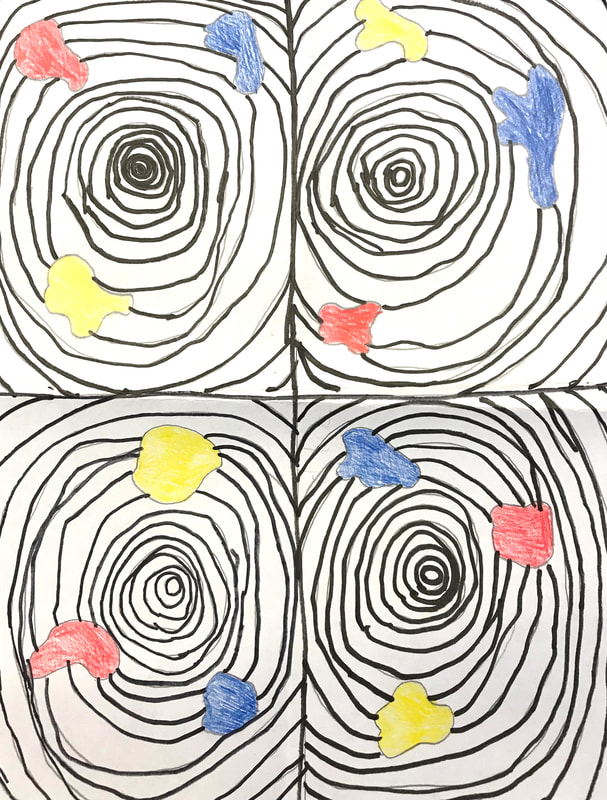
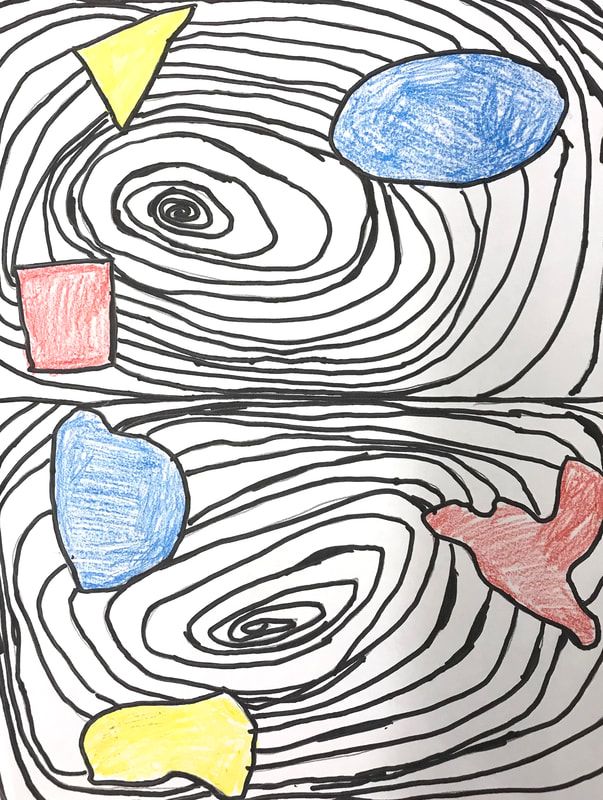
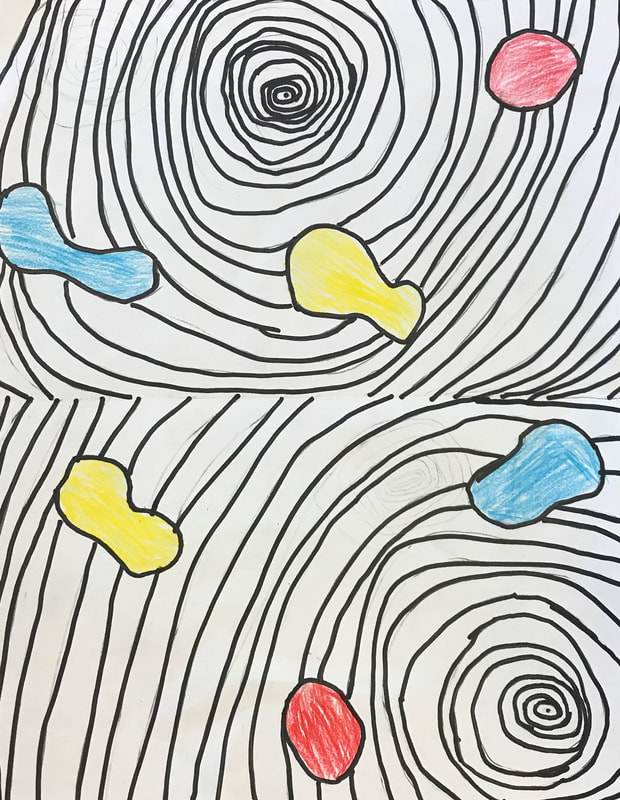
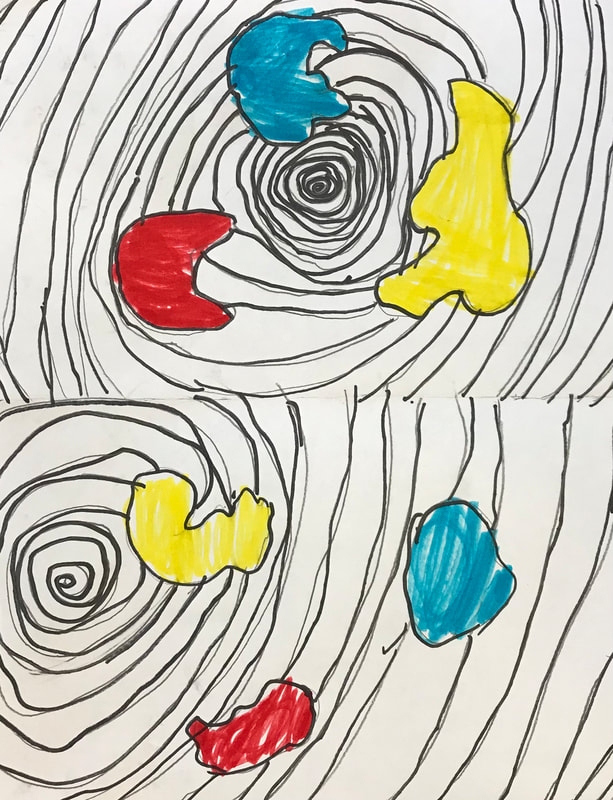
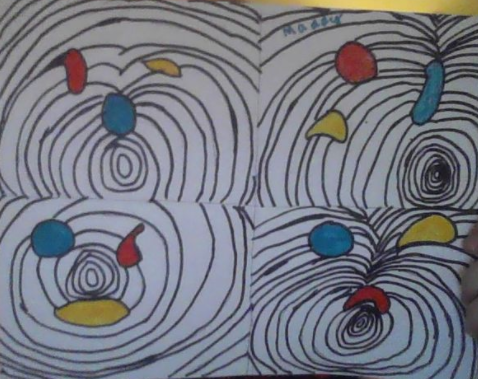
Materials: -Drawing paper -Pencil -Markers -Colored pencils -Crayons Teaching and Work Time: 1. Students will be introduced to collaborative art. We will look through famous examples as well as examples of collaborative murals from classrooms. Show students example of Kandinsky’s concentric circle color study painting and discuss the unity created with the repeating circles. Talk to students about the collaborative mural they’ll be making and then discuss what analogous colors are. 2. Students will start with a square piece of paper and then draw three concentric circles. They will choose three analogous colors to color the circles with. They will fill the entire page with the analogous colors.
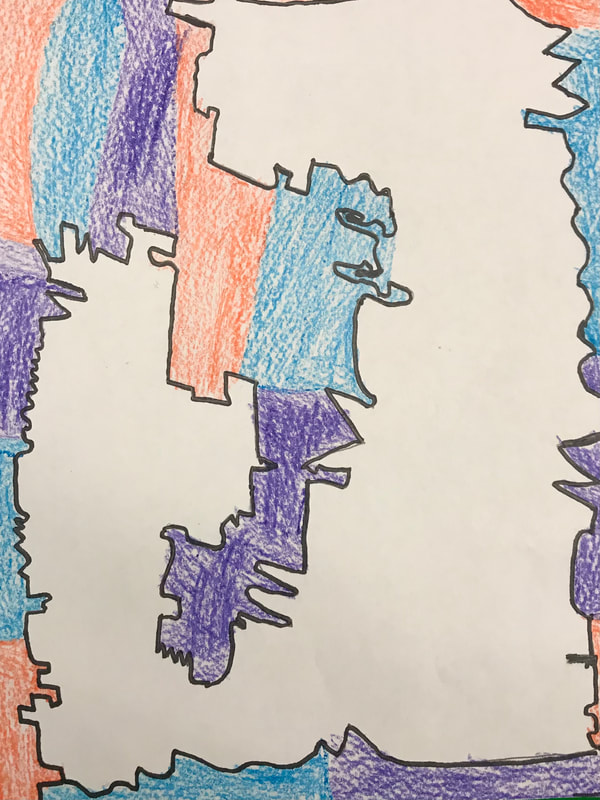
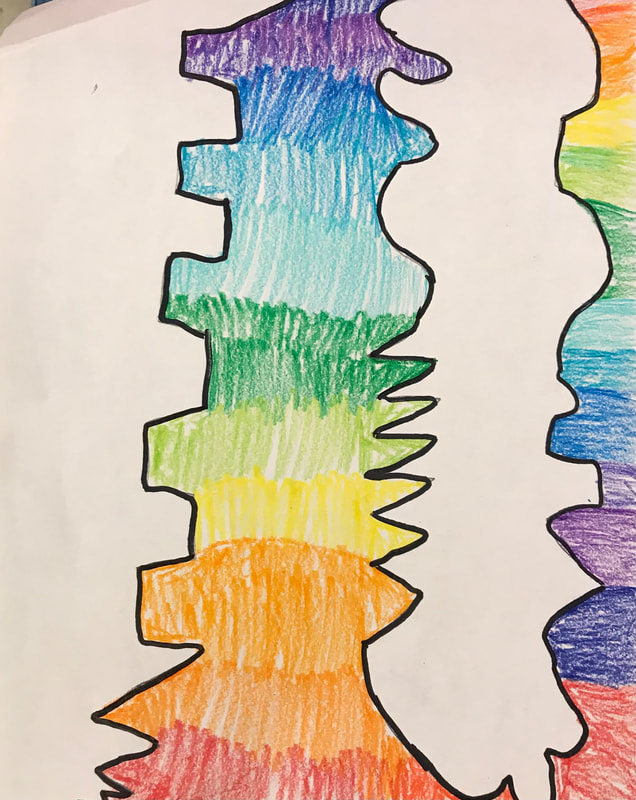
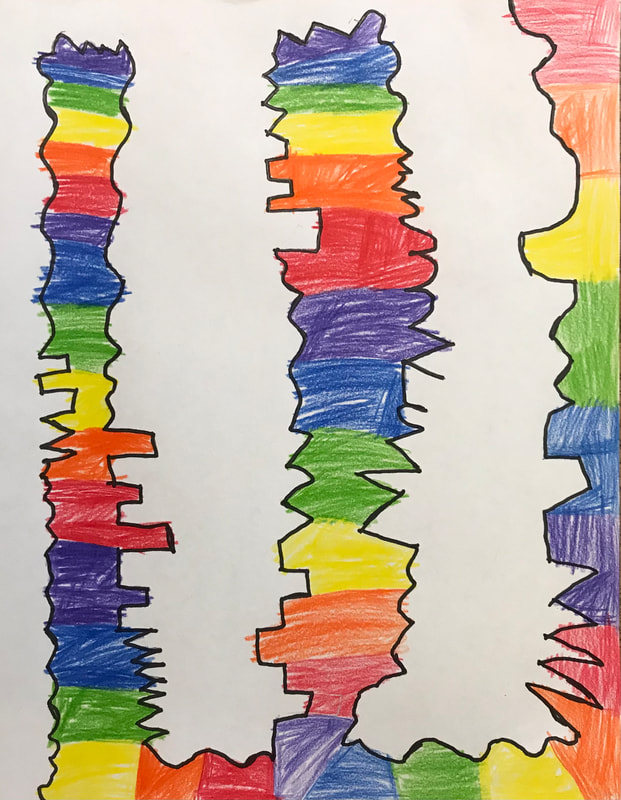
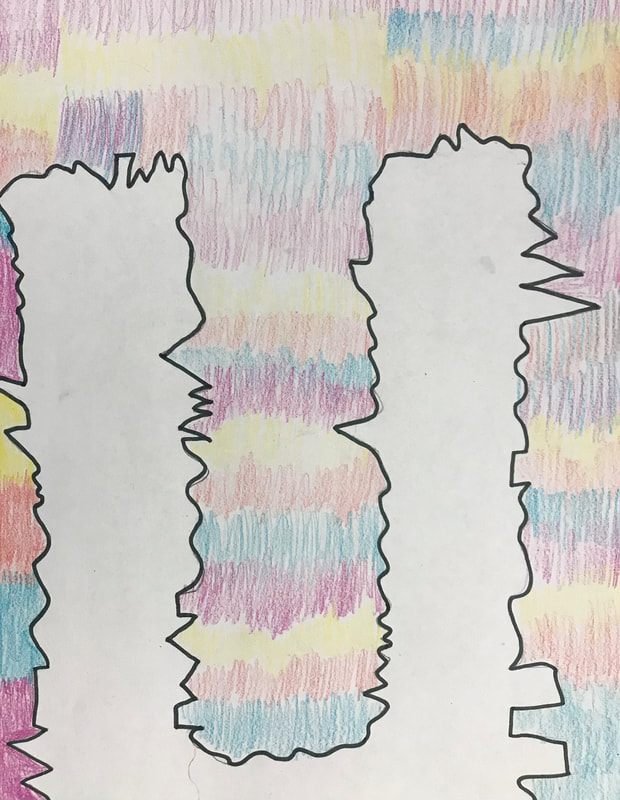
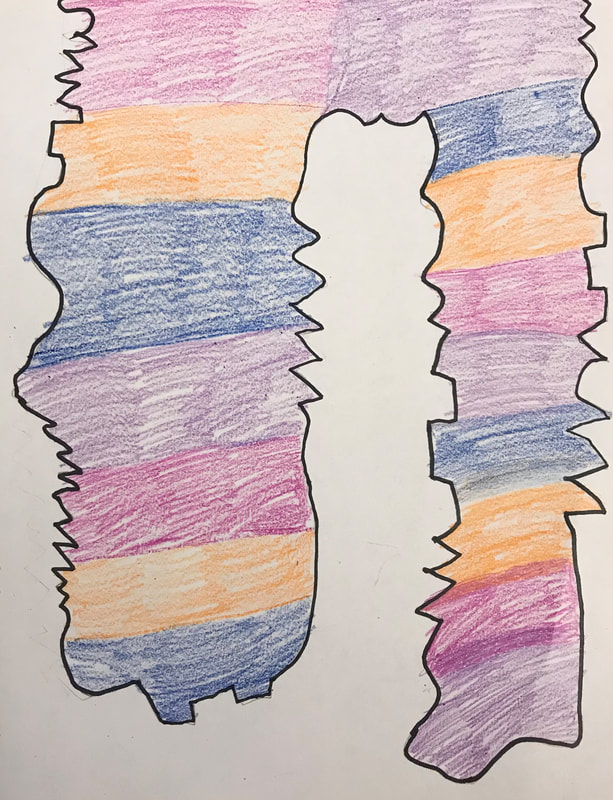
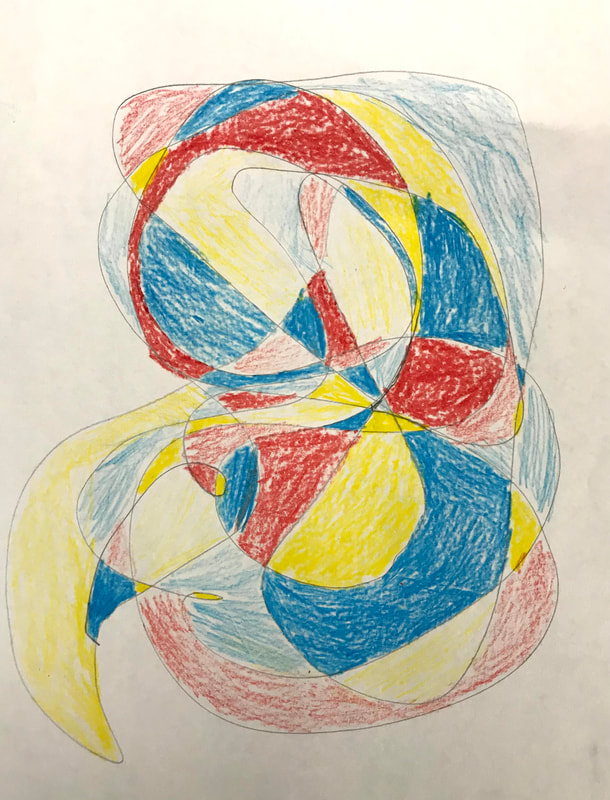
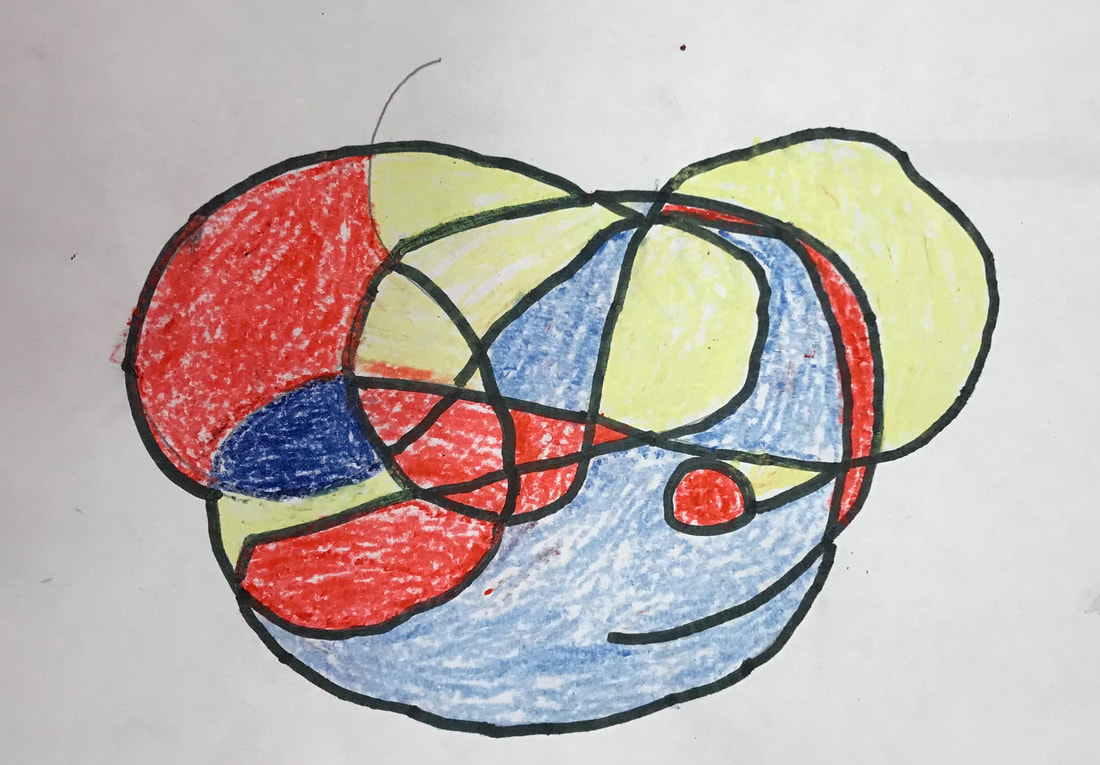
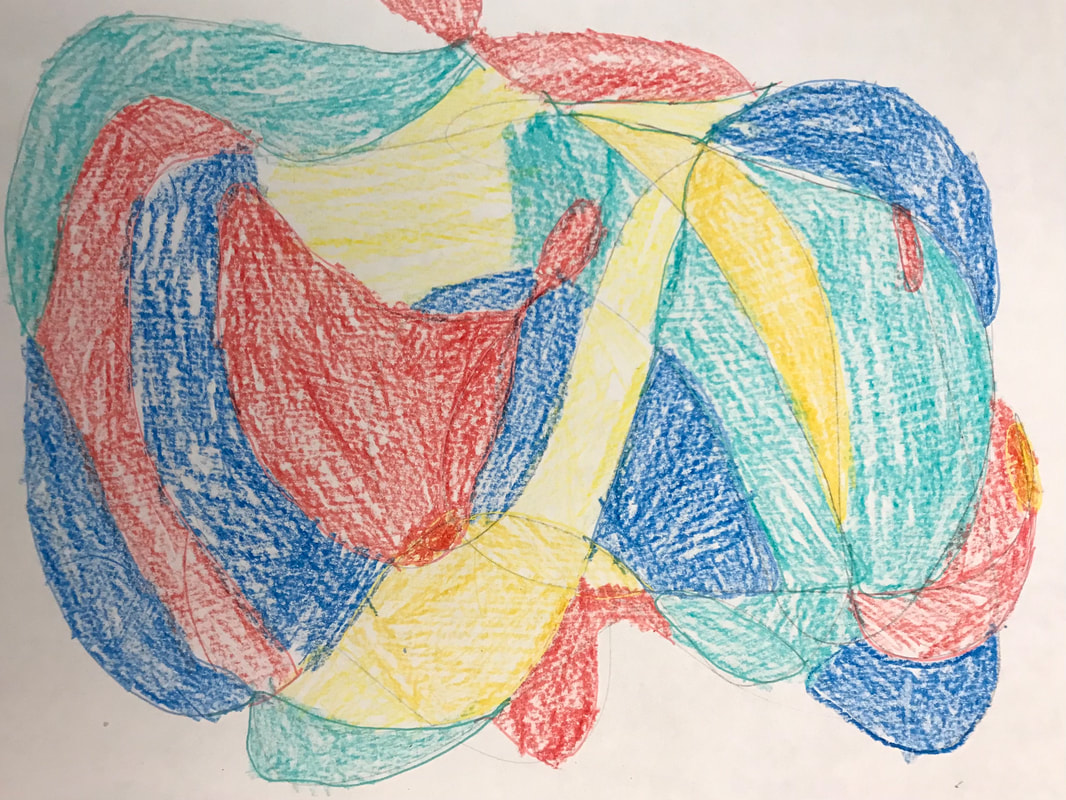
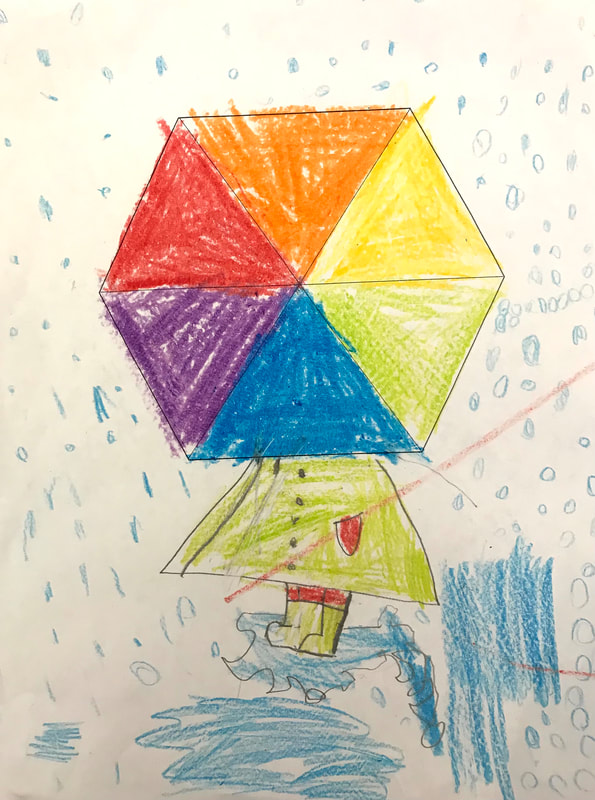
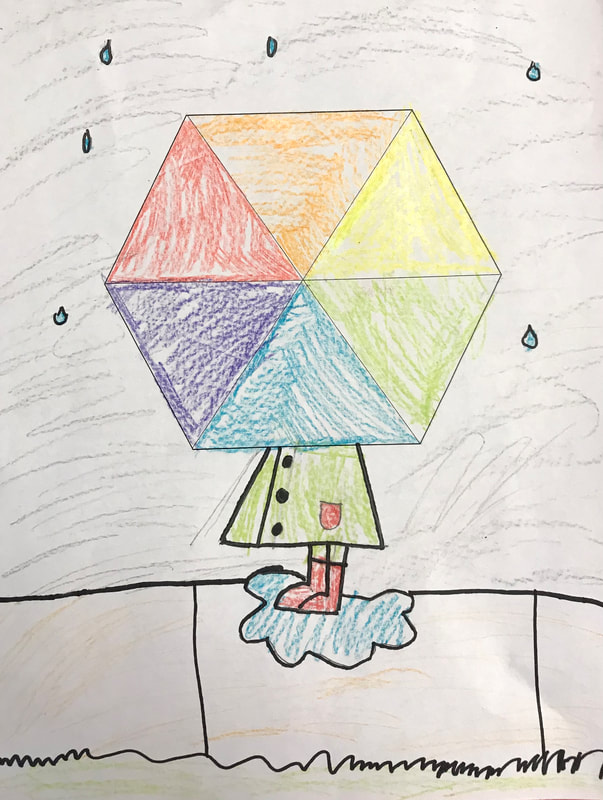
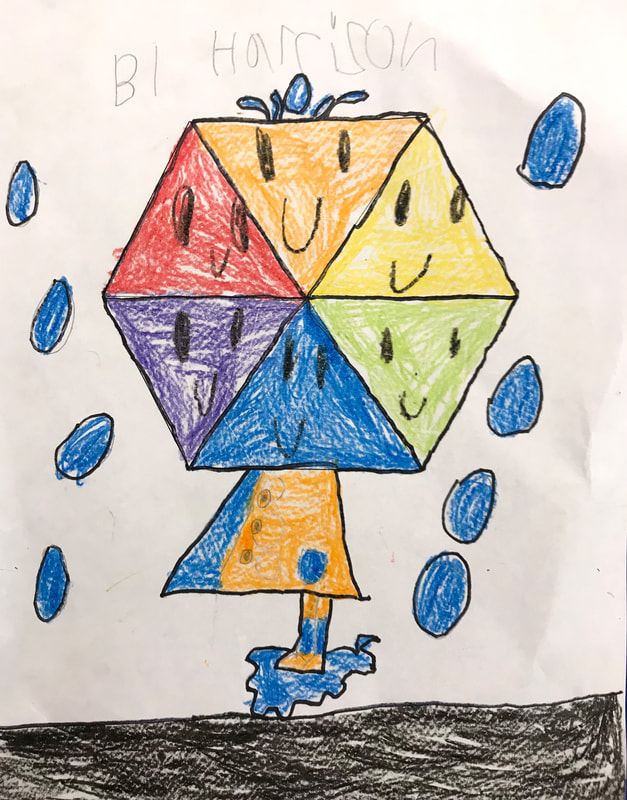
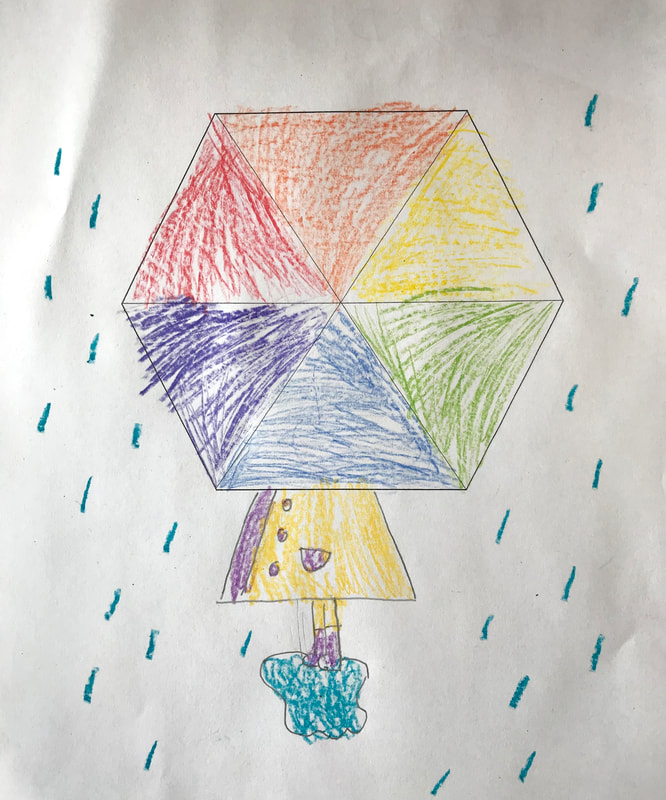
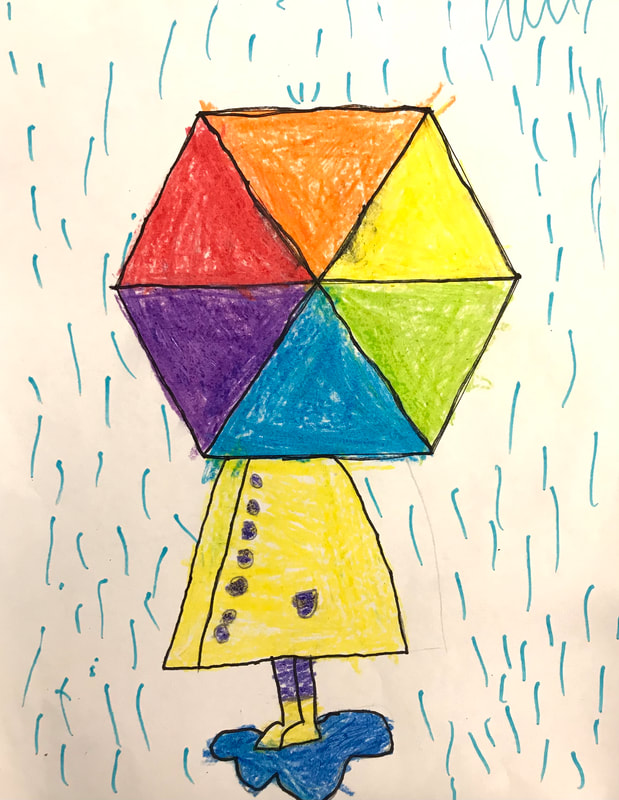
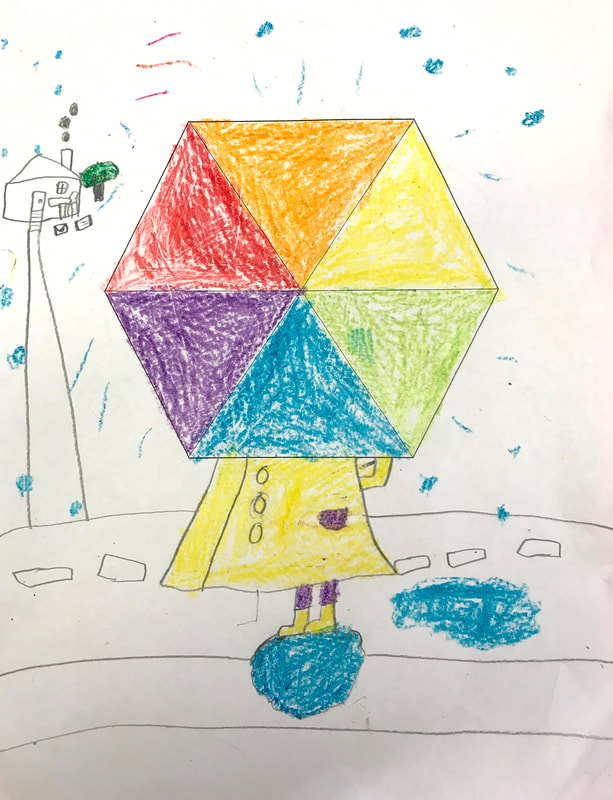
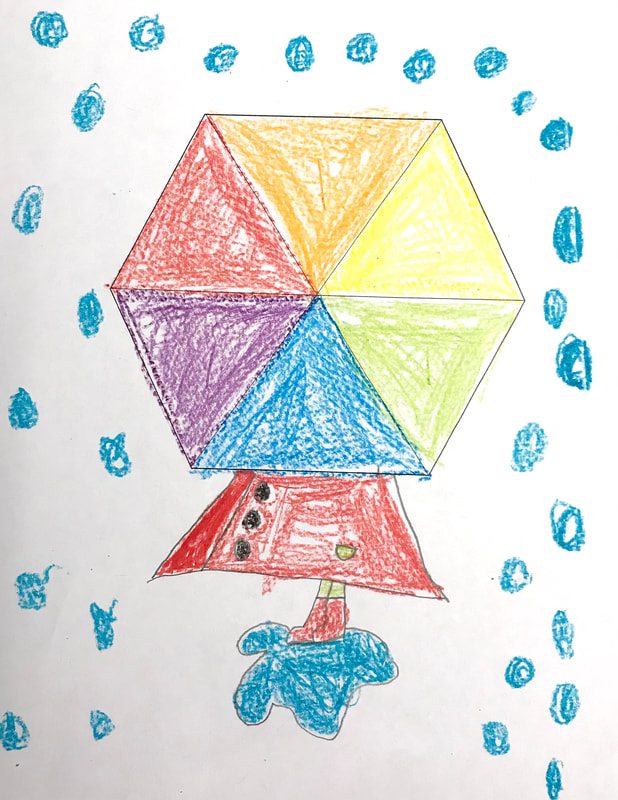
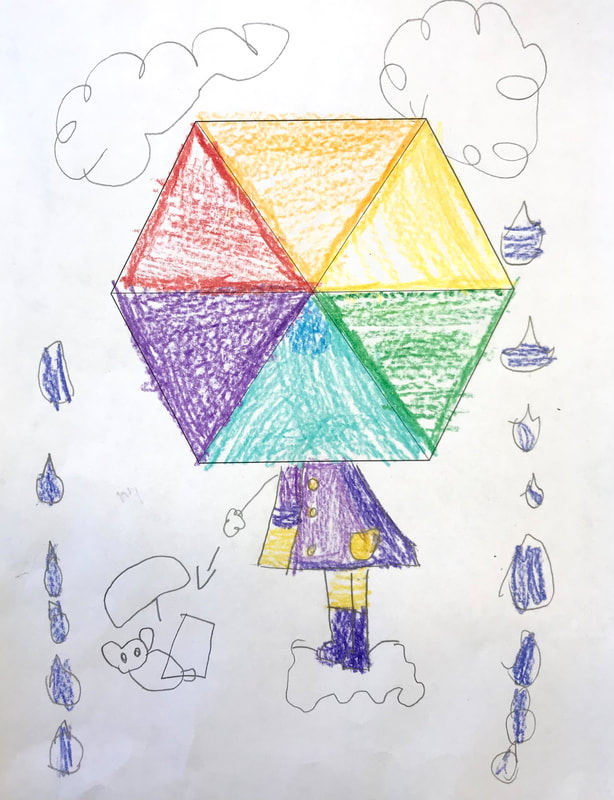
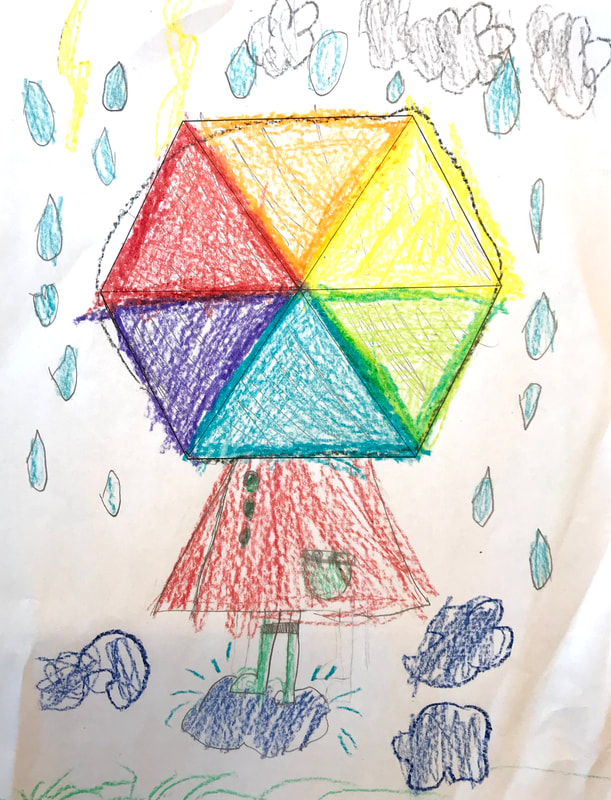
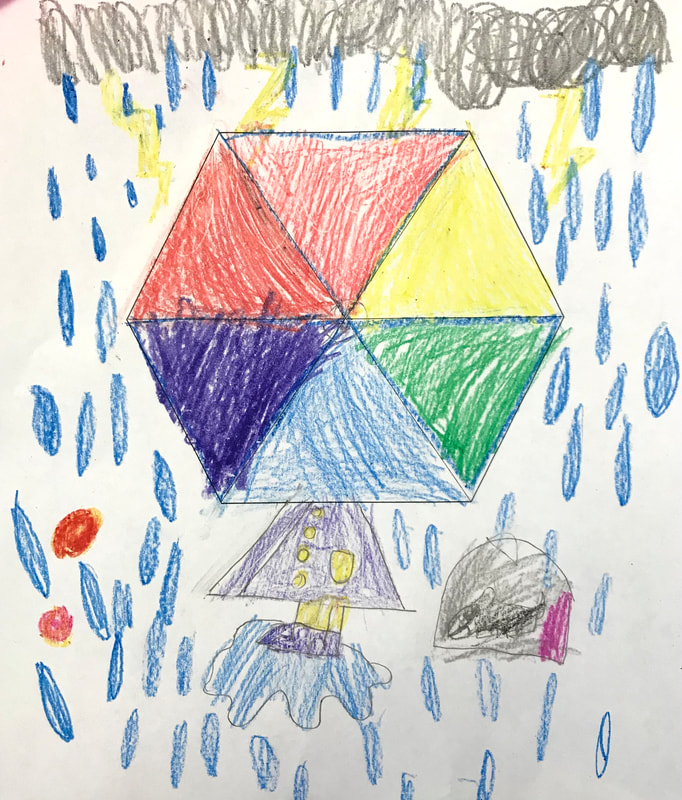
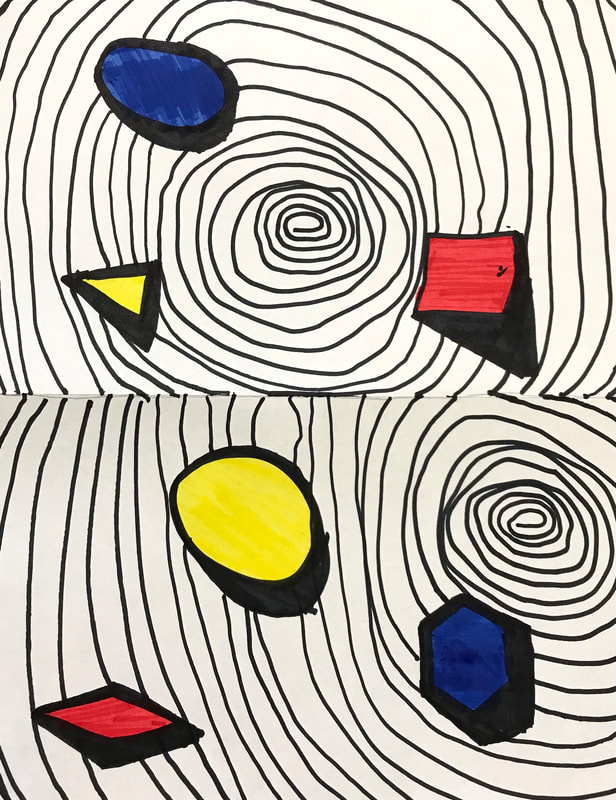
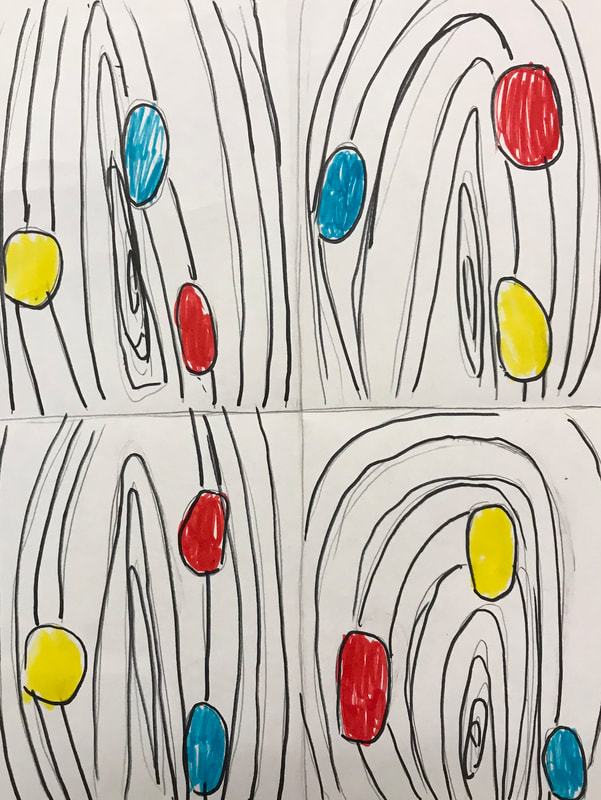
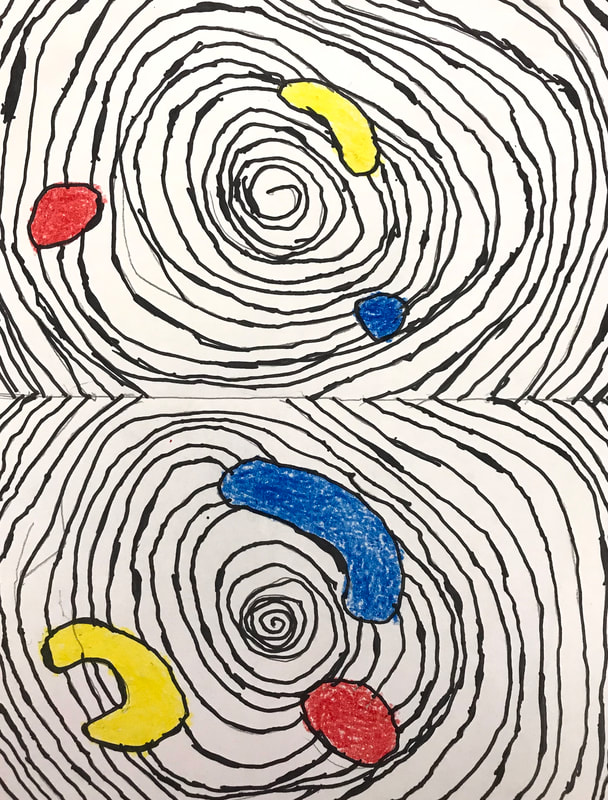
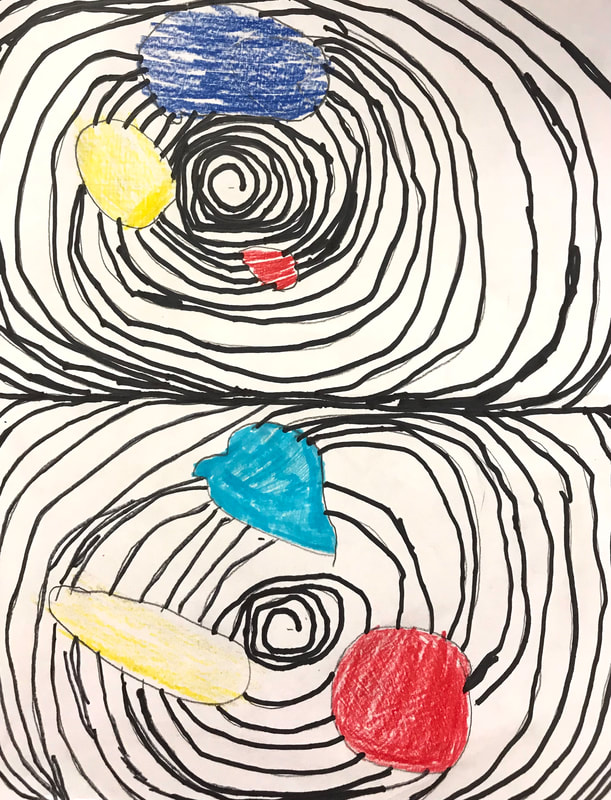
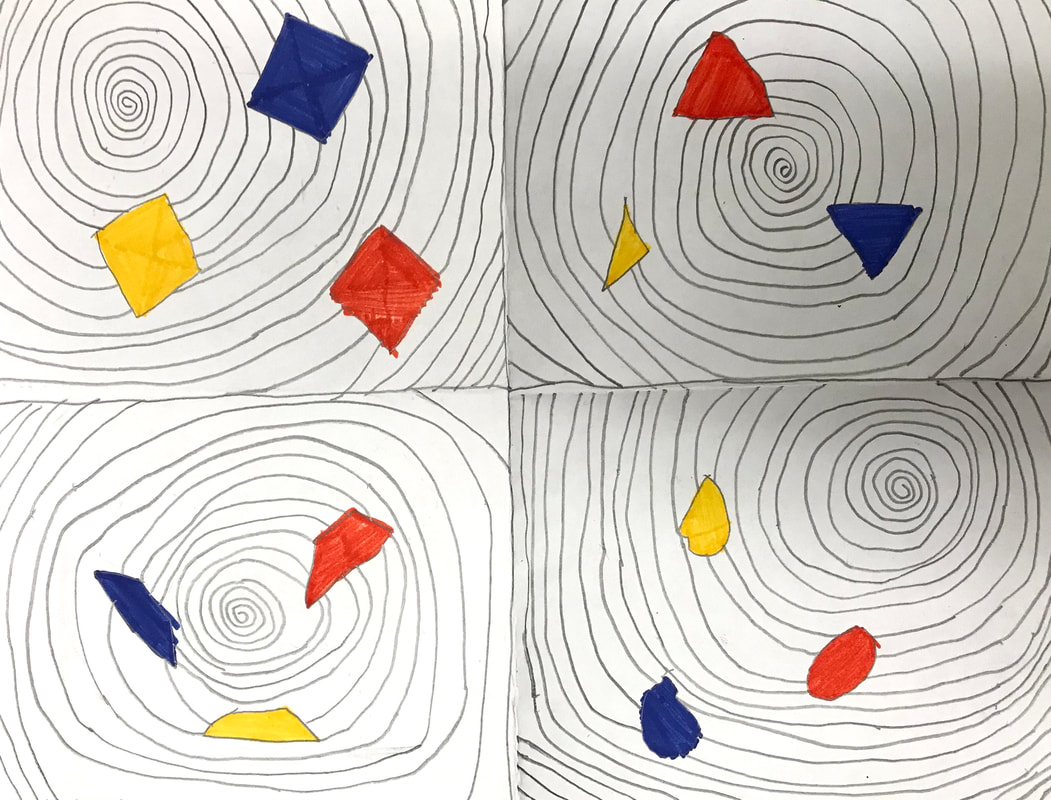
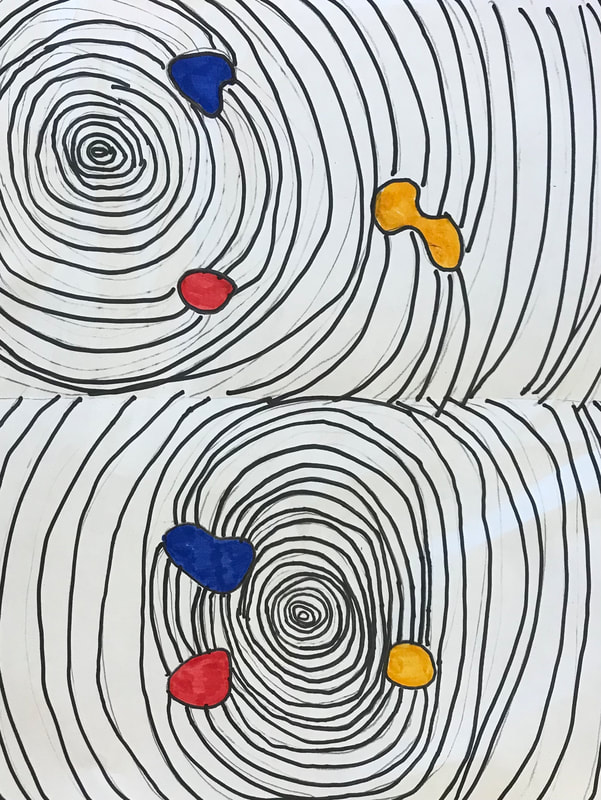
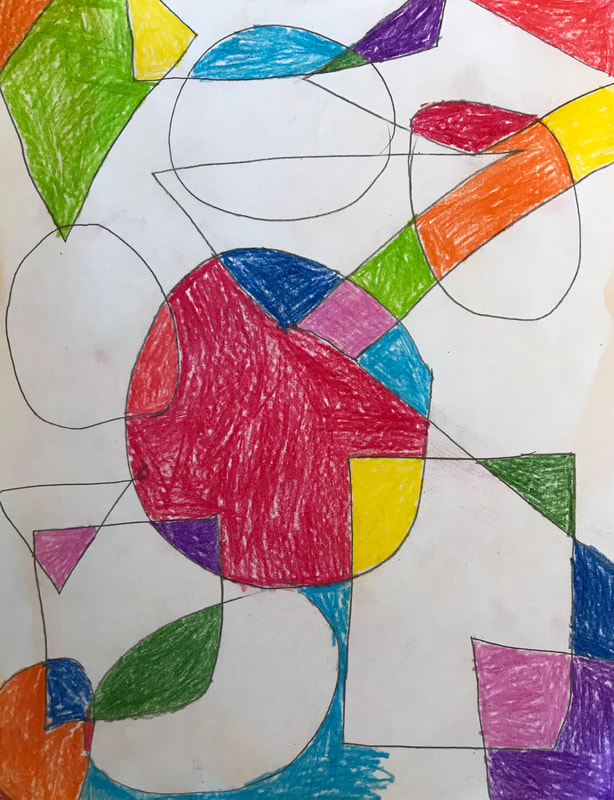
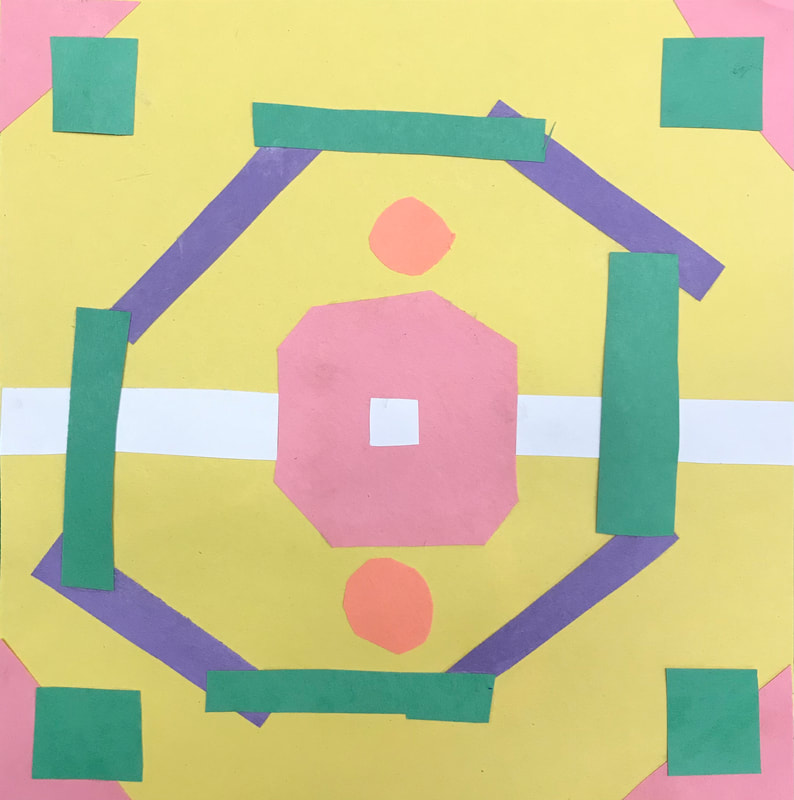
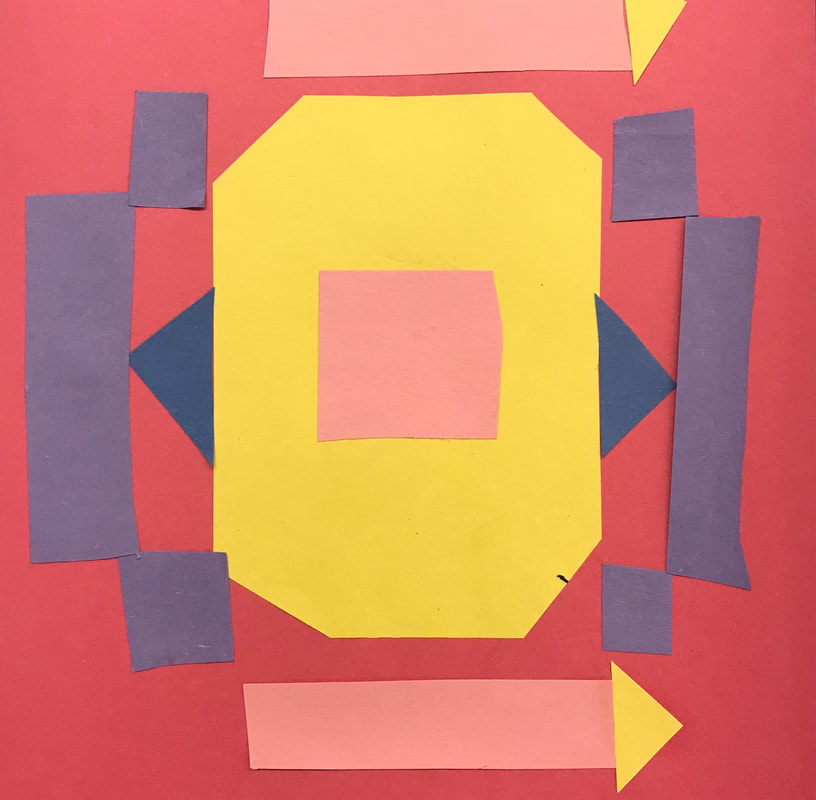
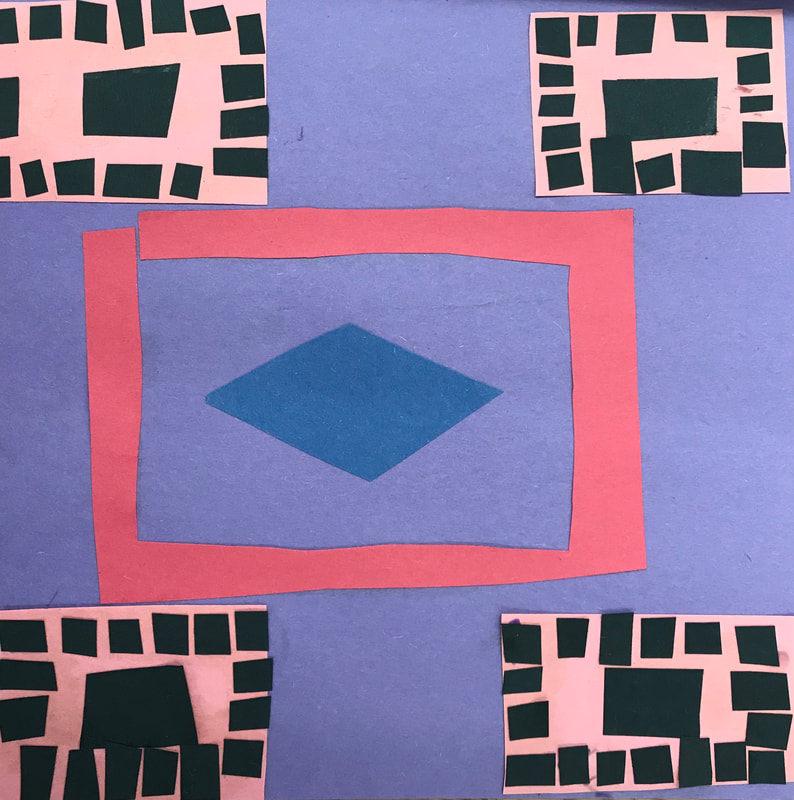
This lesson is for elementary or middle school. It teaches line, shape, color, balance, movement, unity, variety, repetition Materials: -Drawing paper -Pencil -Markers -Colored pencils -Crayons Teaching and Work Time: 1. Show students an artwork by artist Paul Klee and ask them what they see. Talk about the lines and areas of color. Then talk to students about what exactly a line is. Have students look at another painting by Klee and ask them what kinds of lines they see. Then show a variety of lines. Show students examples of today’s assignment. Talk about the movement created by the “traveling” line. 2. Students will start in one corner of their paper and draw one type of line for a few inches, then change the type of line and continue. Students will leave wide spaces between the lines they draw and will not cross them. They are encouraged not to lift their pencil off their paper. They will fill the page with the line and finish in the opposite side of the paper. Students in the classroom will then use oil pastels (students at home will use crayons) and begin coloring between two lines (or between a line and the edge of the paper). They will continue coloring the space between the same two lines until they reach the end. The colors will alternate and blend together.  This lesson is for elementary school. It teaches line, shape, color, balance, unity, primary colors, automatic drawing, and abstract art. Materials: -Drawing paper -Pencil -Markers -Colored pencils -Crayons Teaching and Work Time: Day one: 1. Students will be introduced to an artwork by Joan Miro. They will talk about what they see. We will discuss the lines and colors. They will then be introduced to automatic drawing. They will be shown the example for today’s assignment. Talk about the primary colors and the balance and unity created within the drawing. Discuss abstract art. 2. Students will use their pencil to slowly create a line drawing without lifting their pencil or looking at their paper. They will then use the primary colors to color in the small shapes created with their overlapping lines. 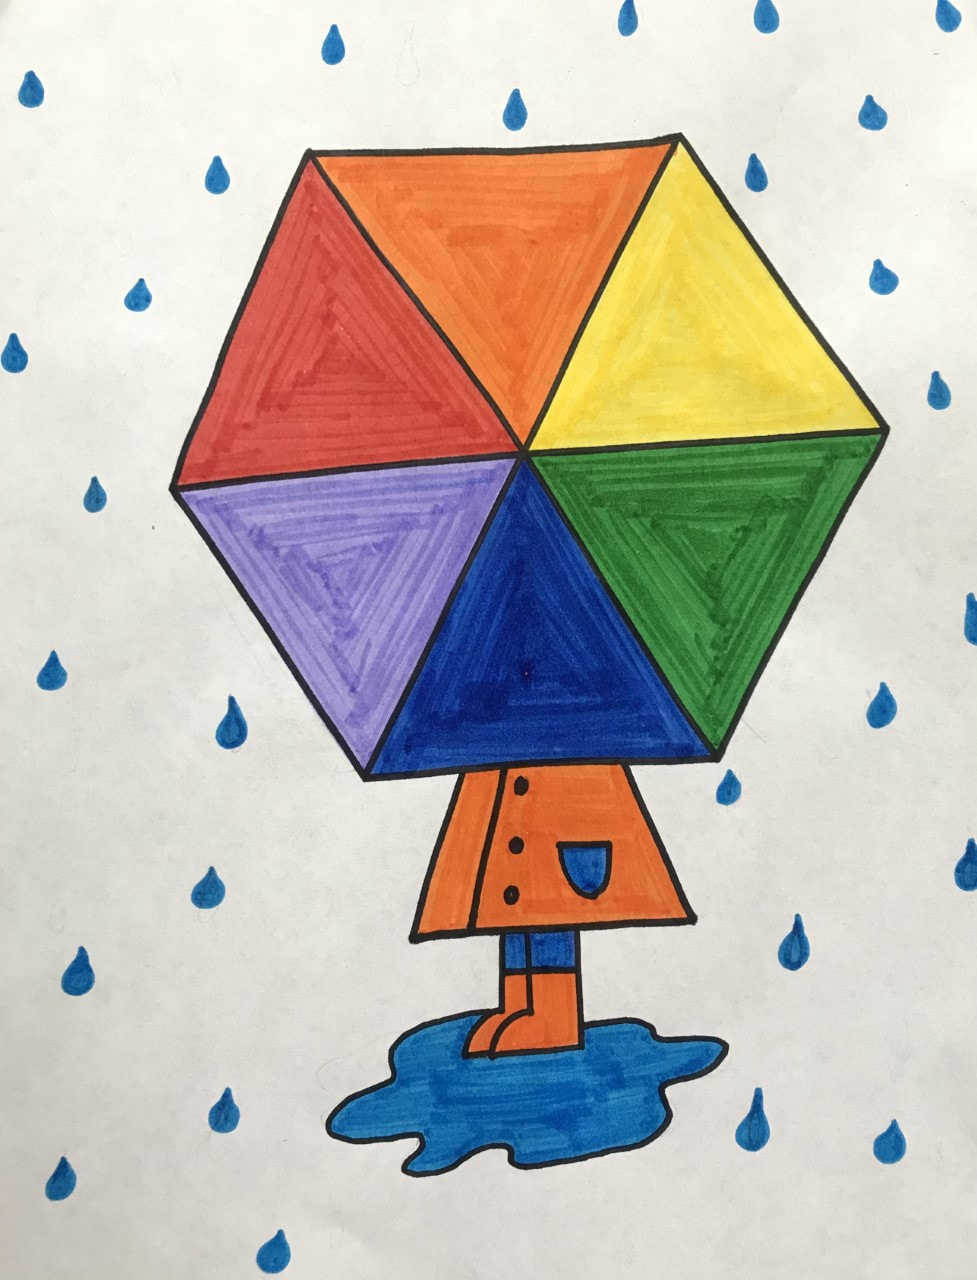 This lesson is for elementary school. It teaches the color wheel, primary, secondary, and complimentary colors. Materials: -Drawing paper -Pencil -Markers -Colored pencils -Crayons Teaching and Work Time: 1. Have a PowerPoint slide of a color wheel. Discuss the primary colors, secondary colors, and complementary colors. 2. Students will follow along to fill in the colors of the color wheel as we discuss each one. Students will call out the primary colors and we will color them together. Students will then call out the secondary colors and we will color them together. Finally, students will then choose 1 set of complimentary colors to color the rain jacket and boots. They will then add the raindrops and the background.
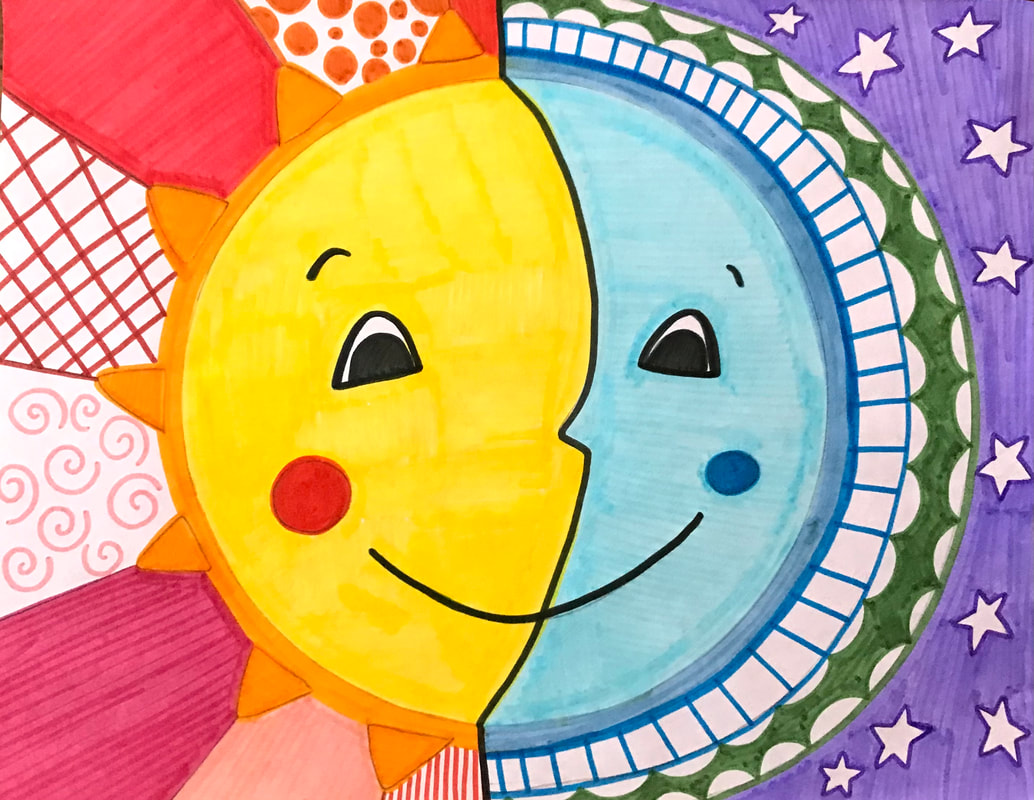
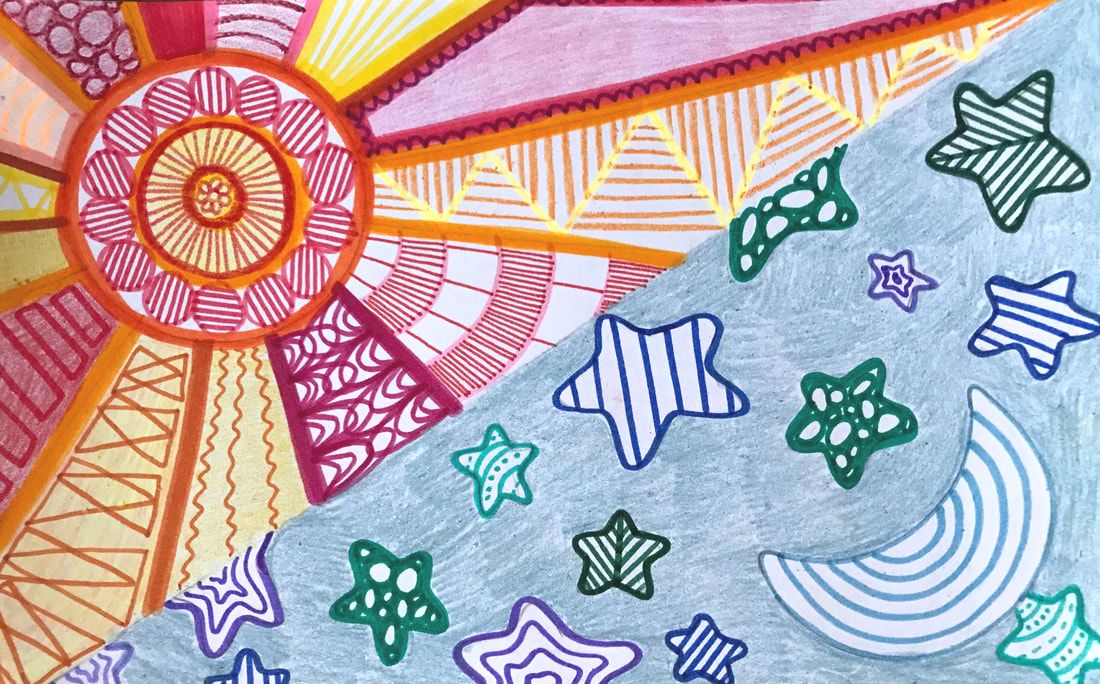
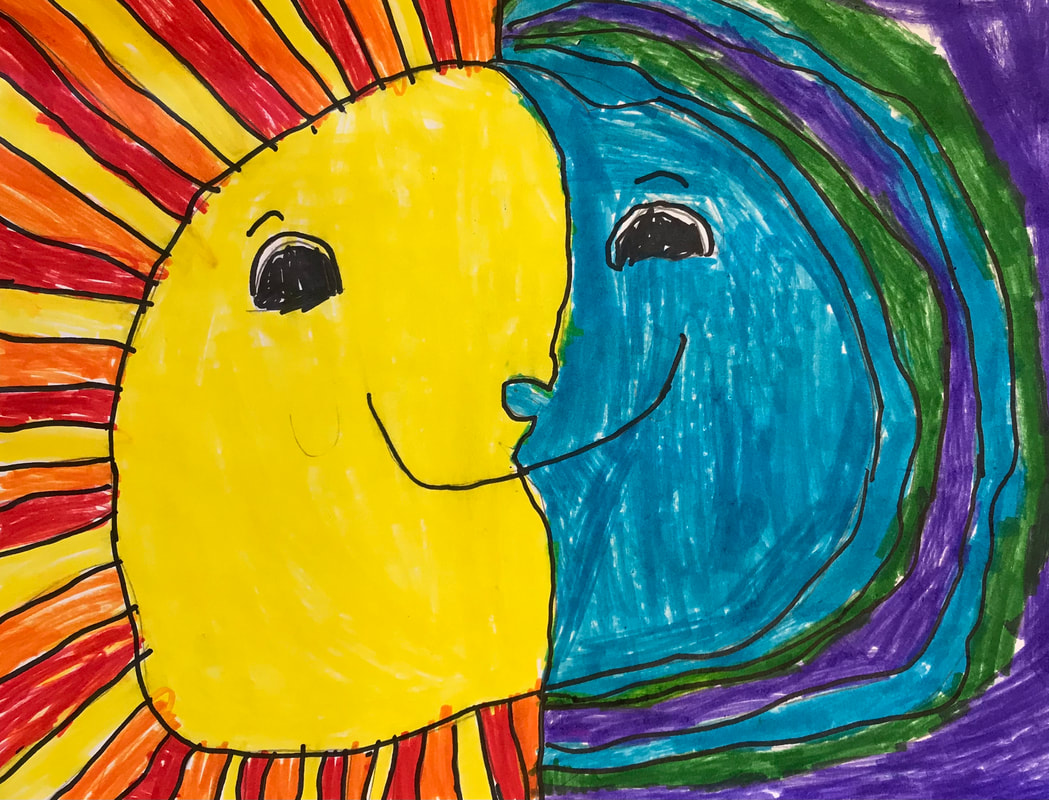
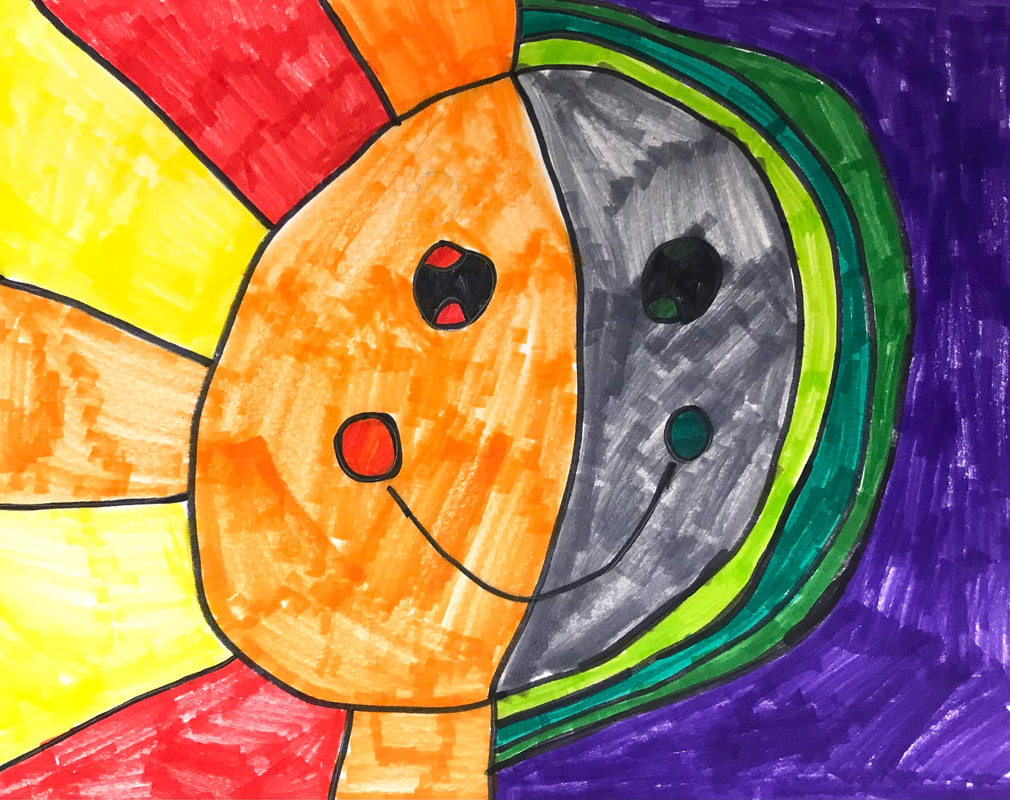
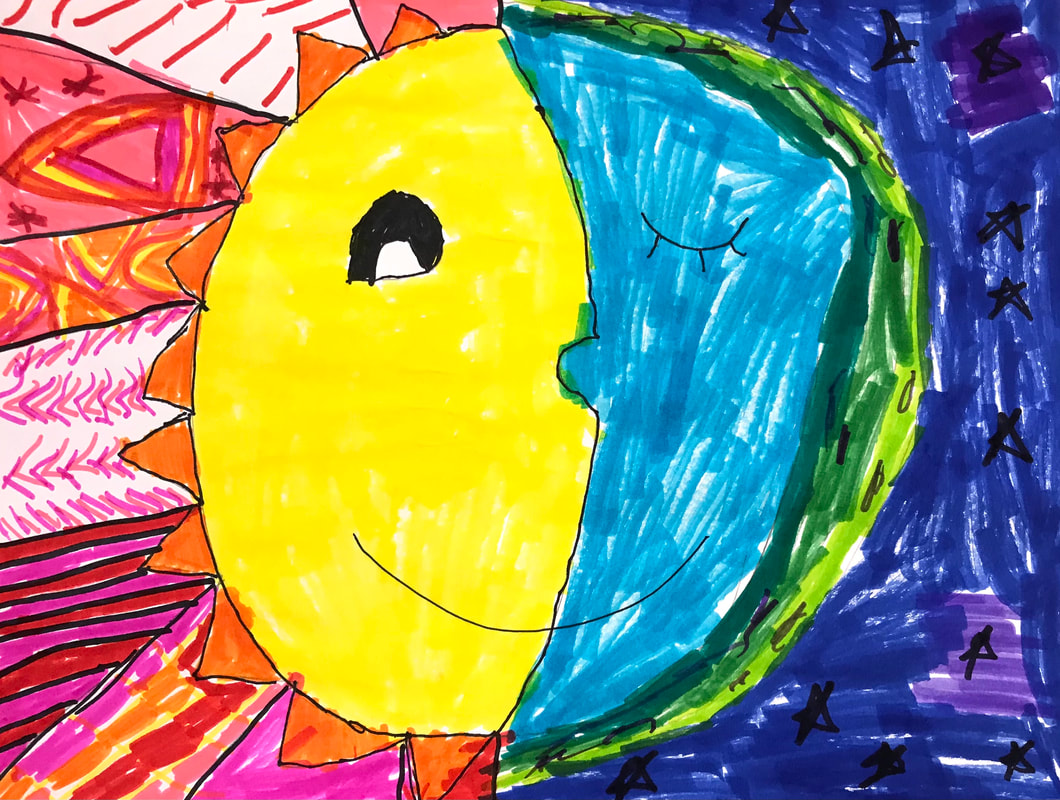
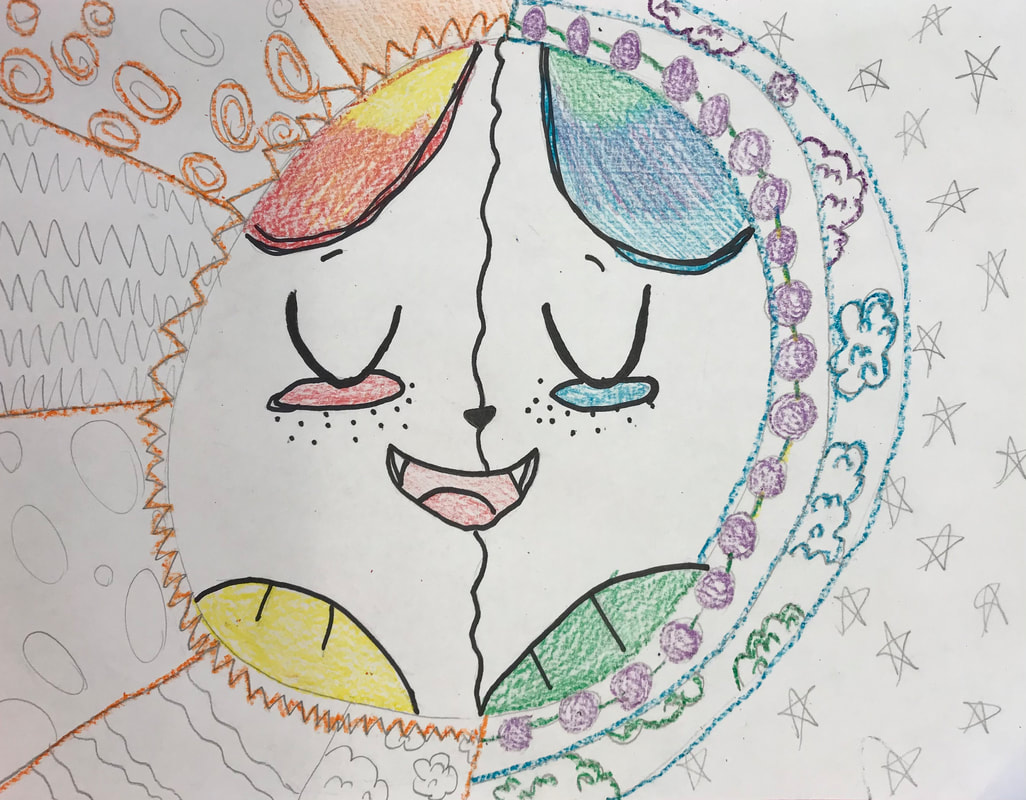
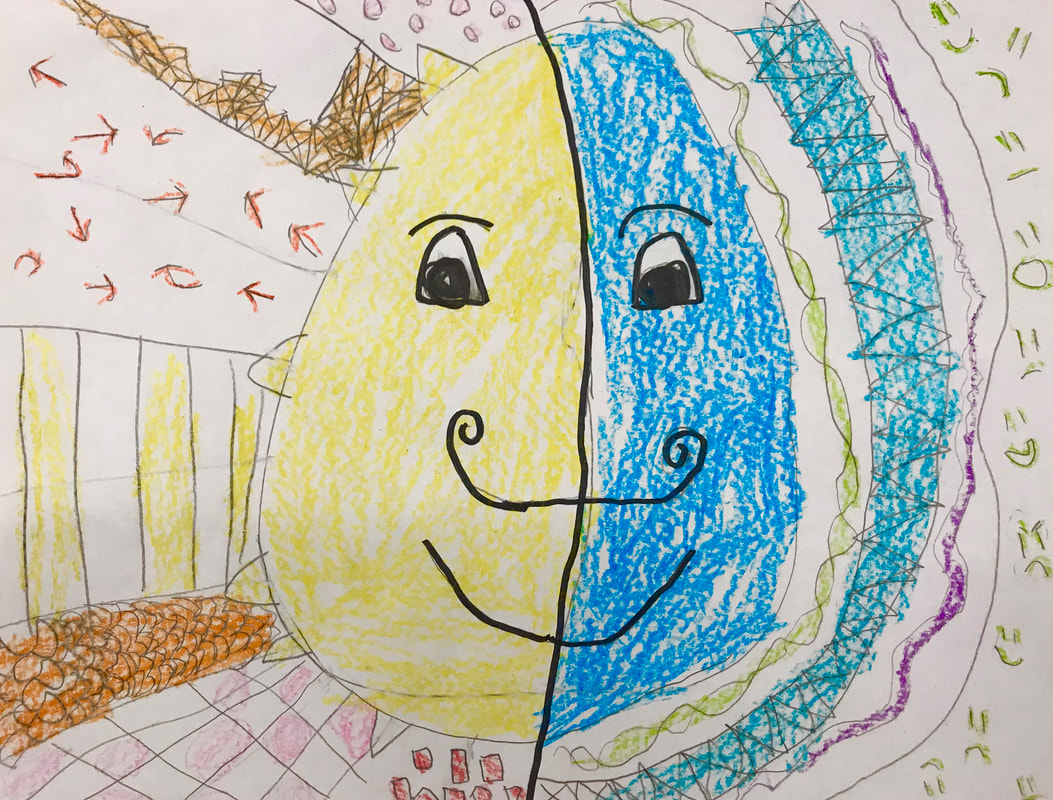
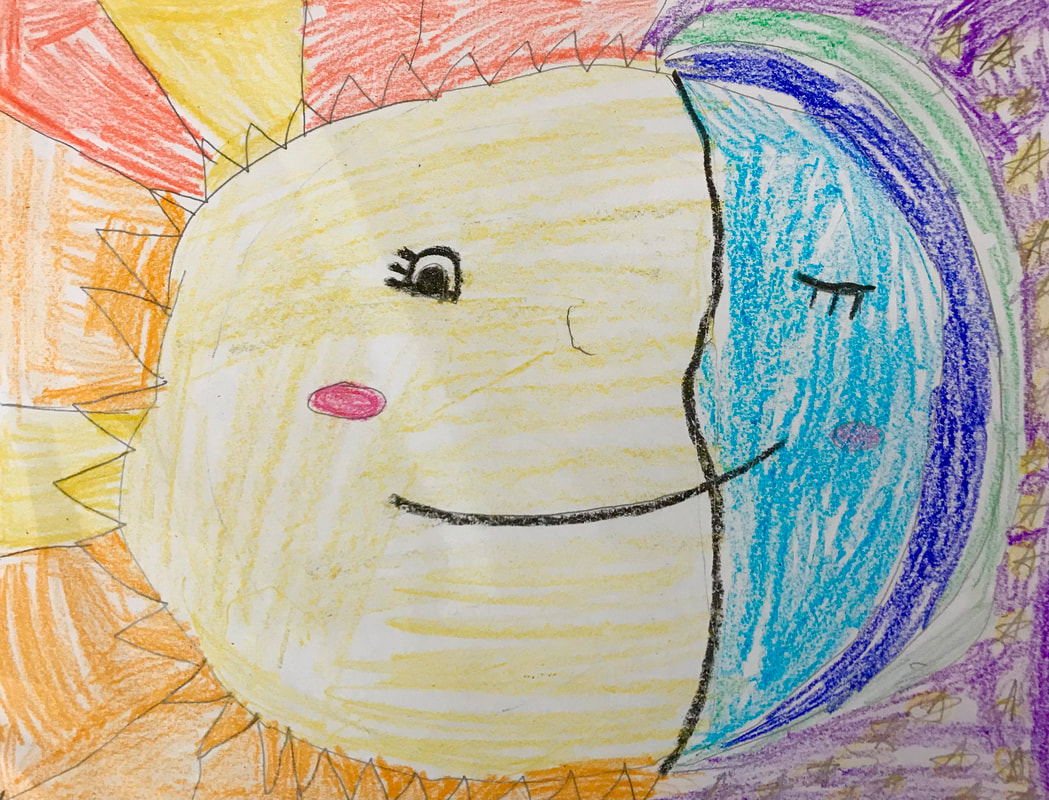
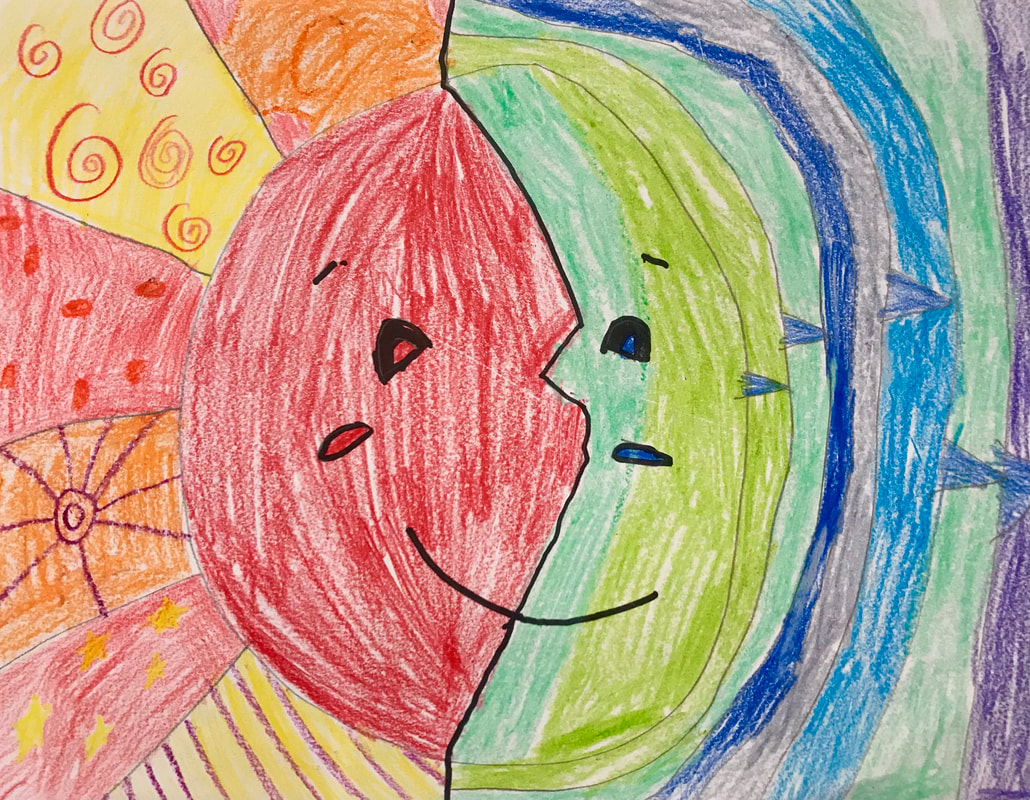
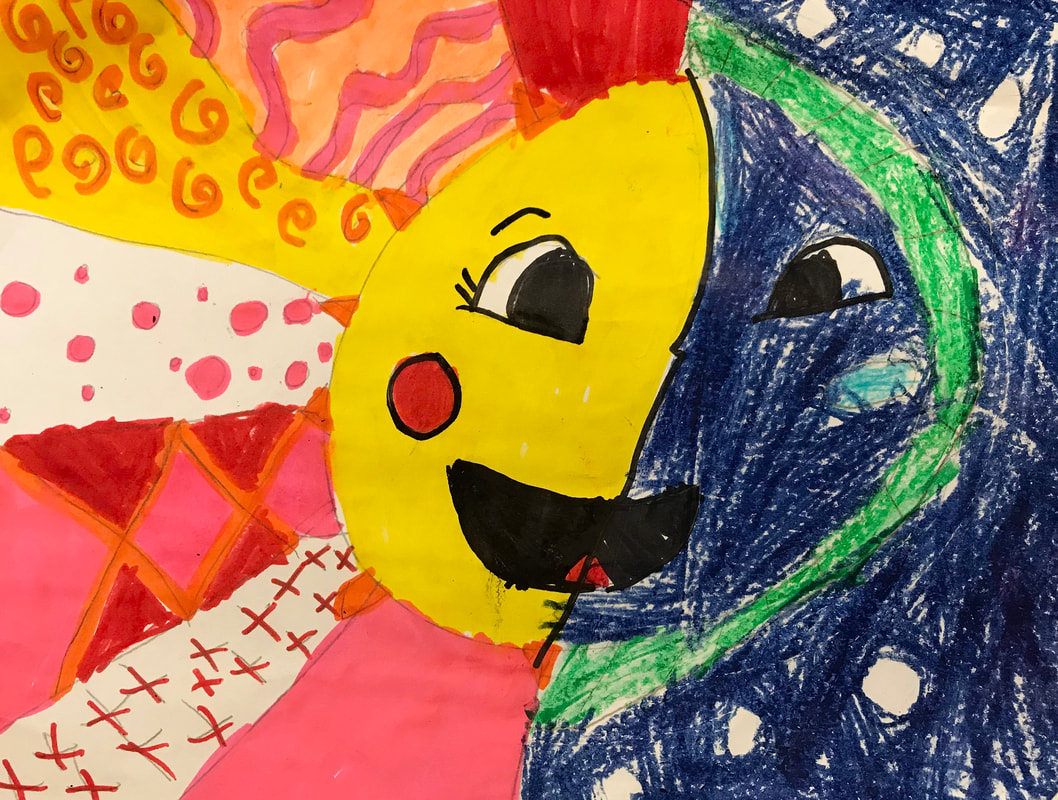
This lesson is for elementary or middle school. It teaches zentangle, contrast, line, color, balance, unity, variety, pattern Materials: -Drawing paper -Pencil -Markers -Colored pencils -Crayons Teaching and Work Time: 1. Students will be asked, “if you were to paint the sun, what colors would you use? If you were to paint the moon, what colors would you use?” Talk about the similarities and differences between the sun and the moon. Students will take a look at some zentangles and the variety of patterns created with lines. They will be shown the project example and we will discuss the assignment. We will talk about the contrast of warm and cool colors and the unity created with the balance of designs and patterns. 2. Students will draw a large circle in the middle of their paper and split it down the middle to create half of a sun face and half a moon face. The sun face/half of the paper will be the warm colored half and the student will fill in the space around the circle with a variety of patterns. The moon face/half of the paper will be the cool colored half and the space around the circle will be filled in with a variety of patterns. (Middle school students would divide paper in half diagonally and draw their sun and moon separately in each half) (Some students examples are unfinished due to my school's current Covid-19 regulations for one-day projects).
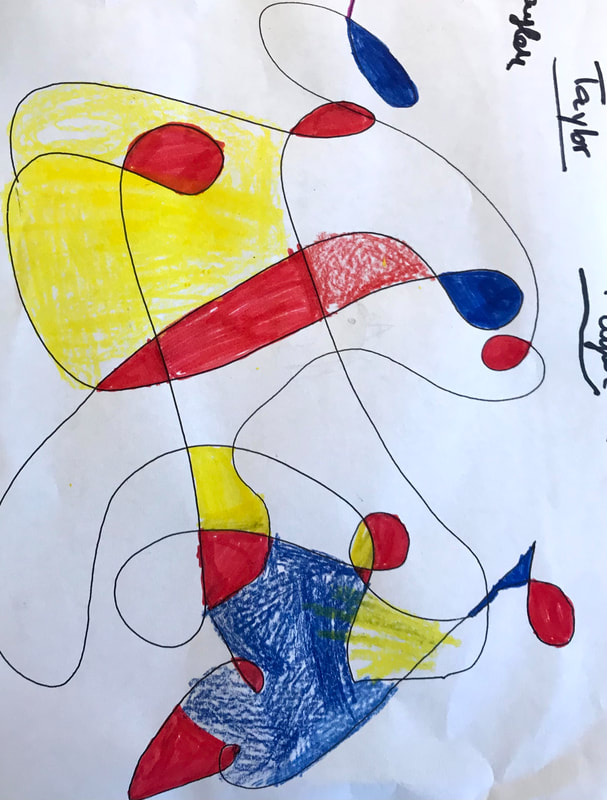
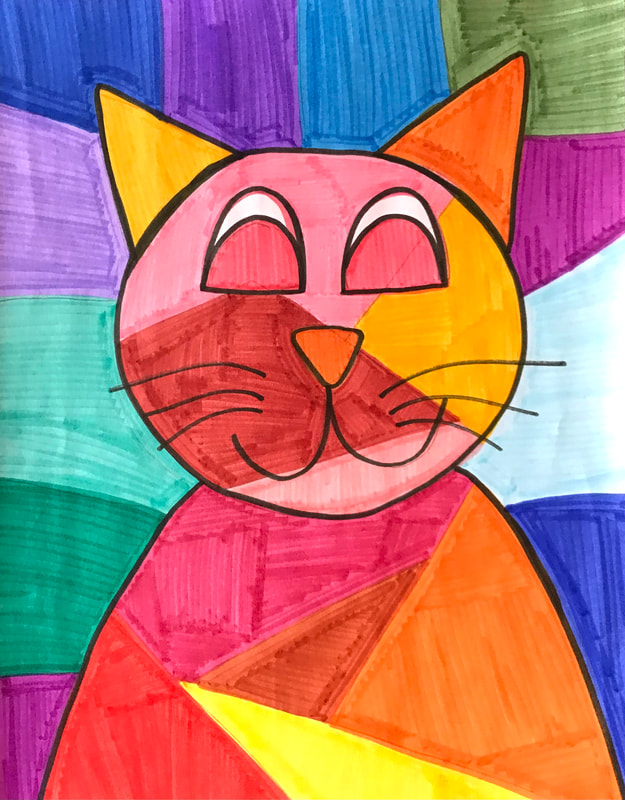
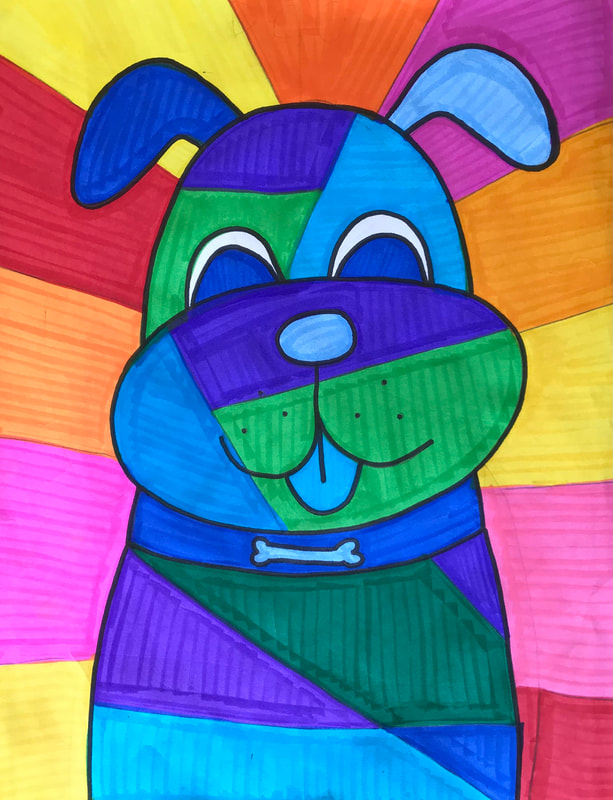
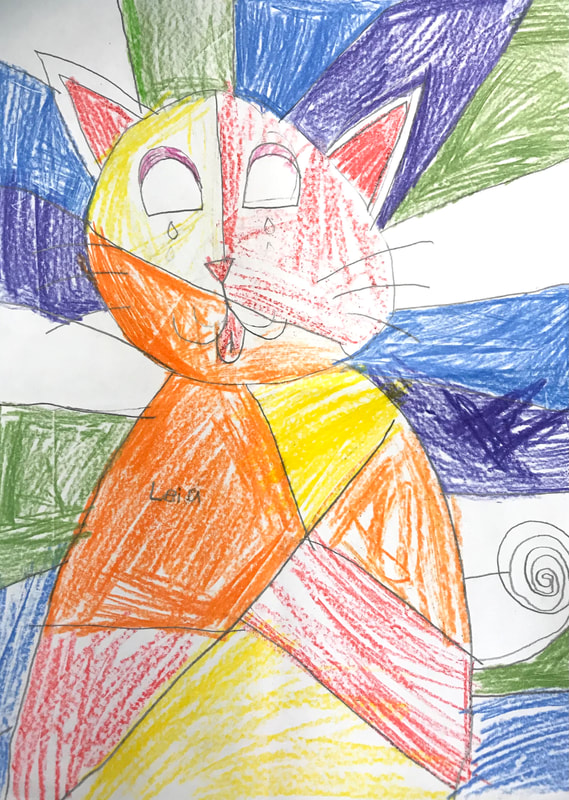
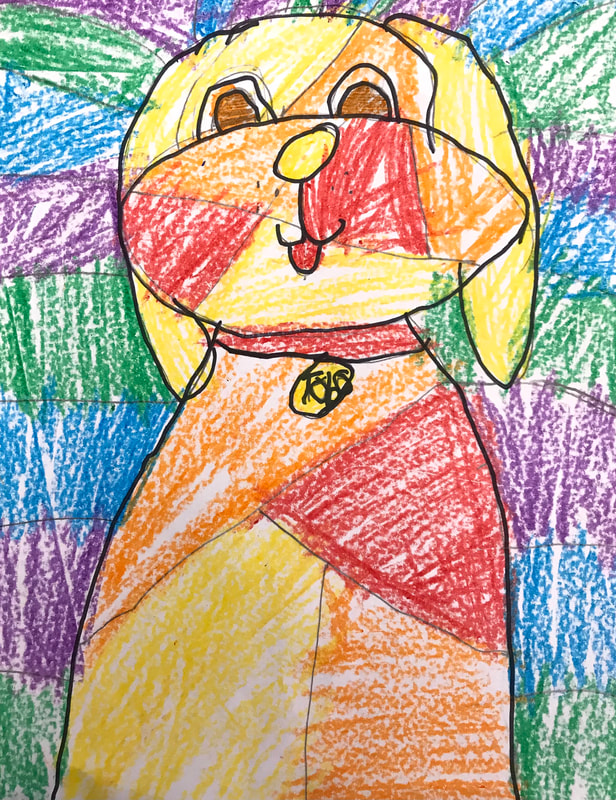
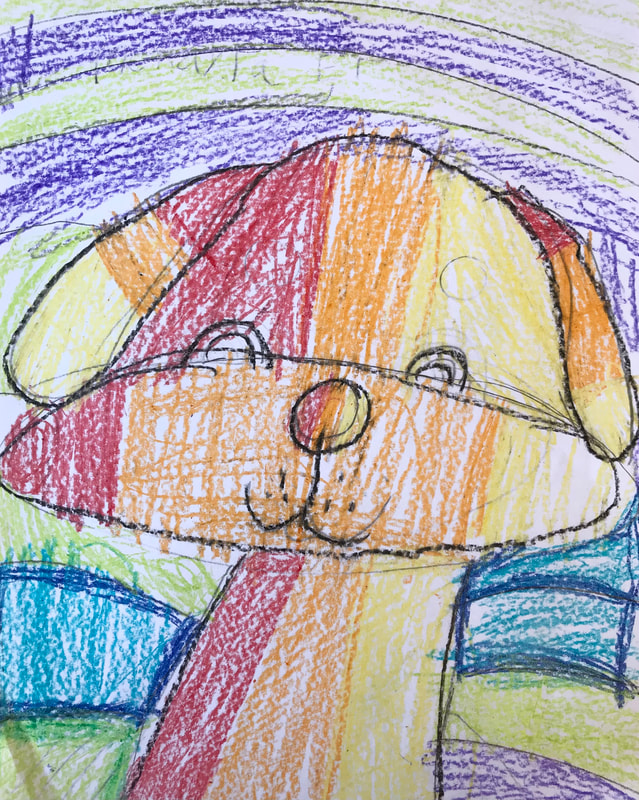
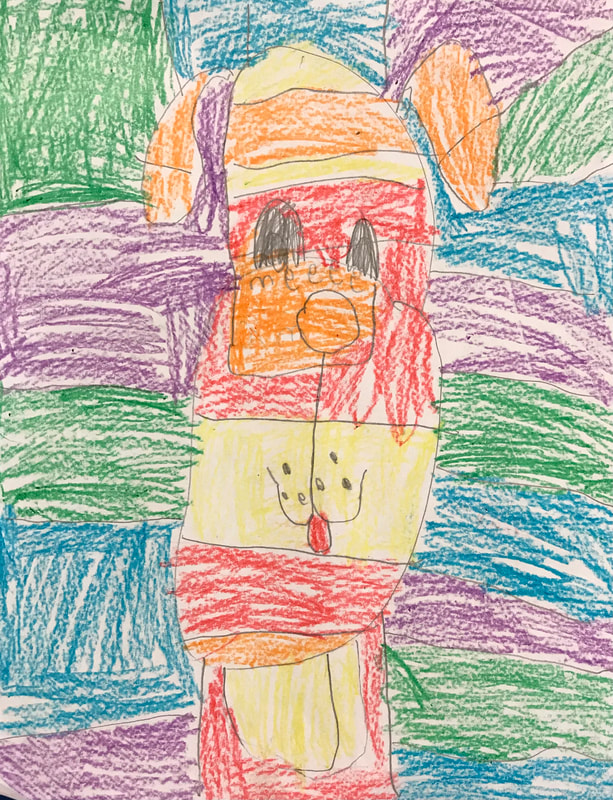
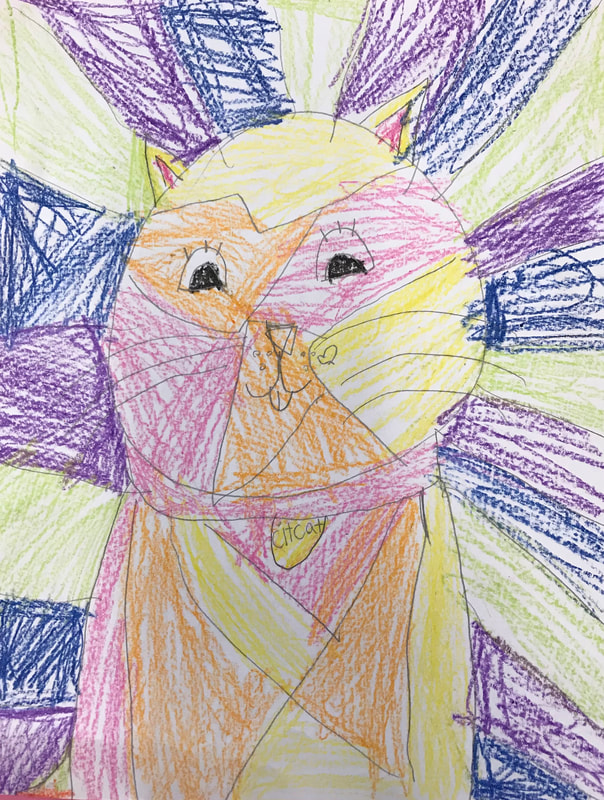
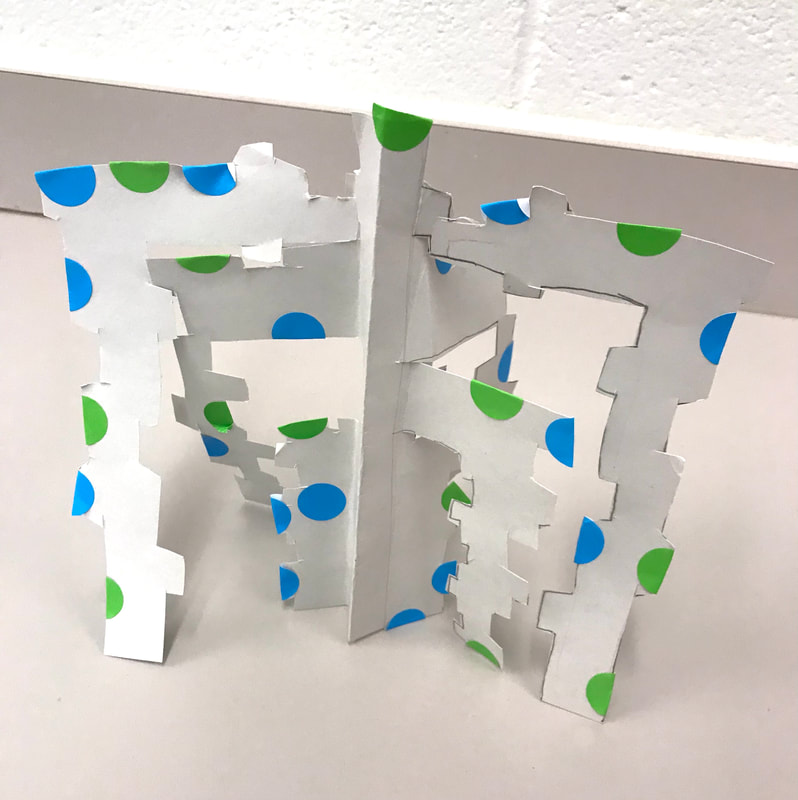
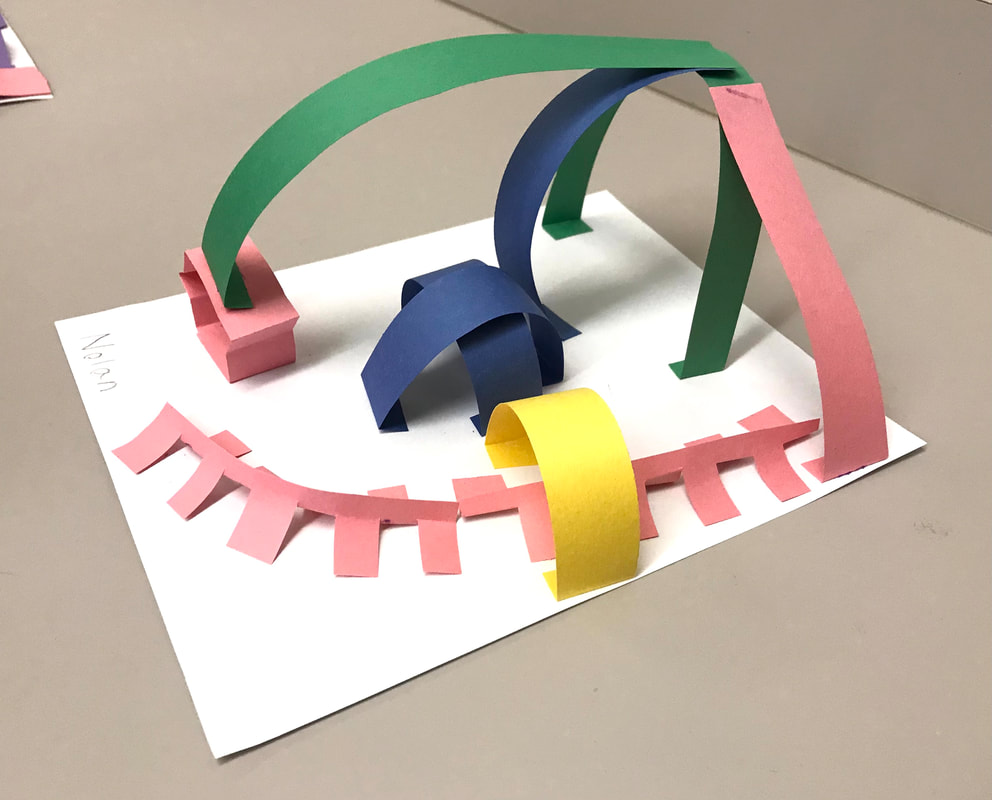
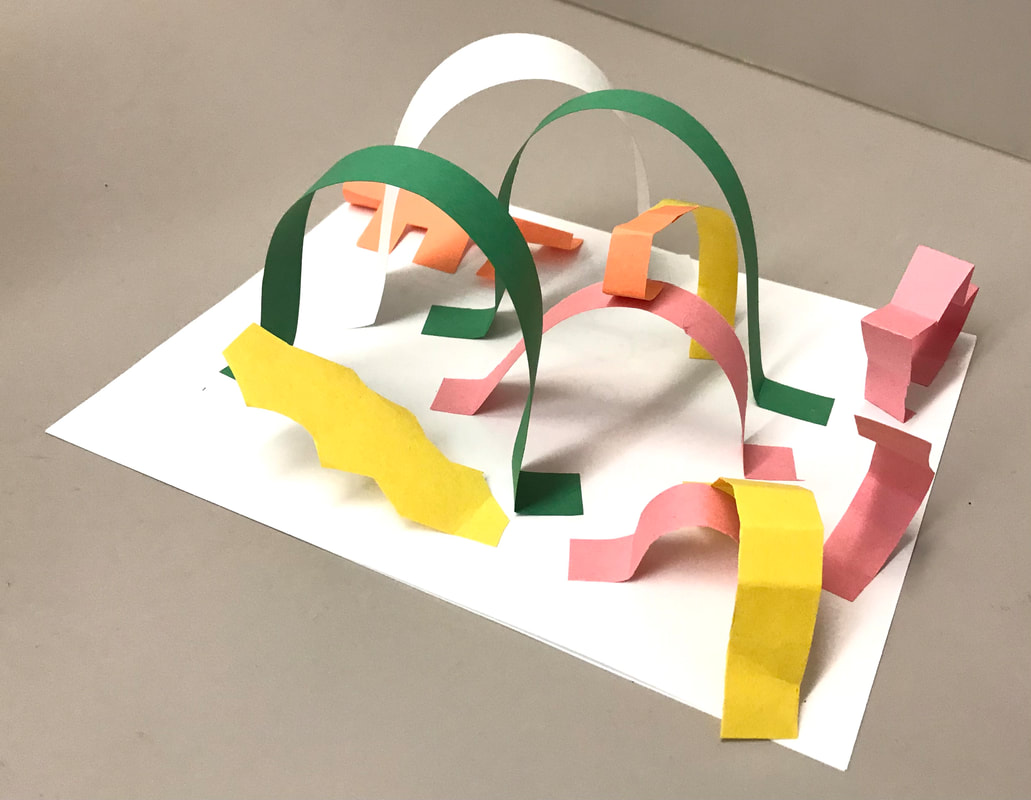
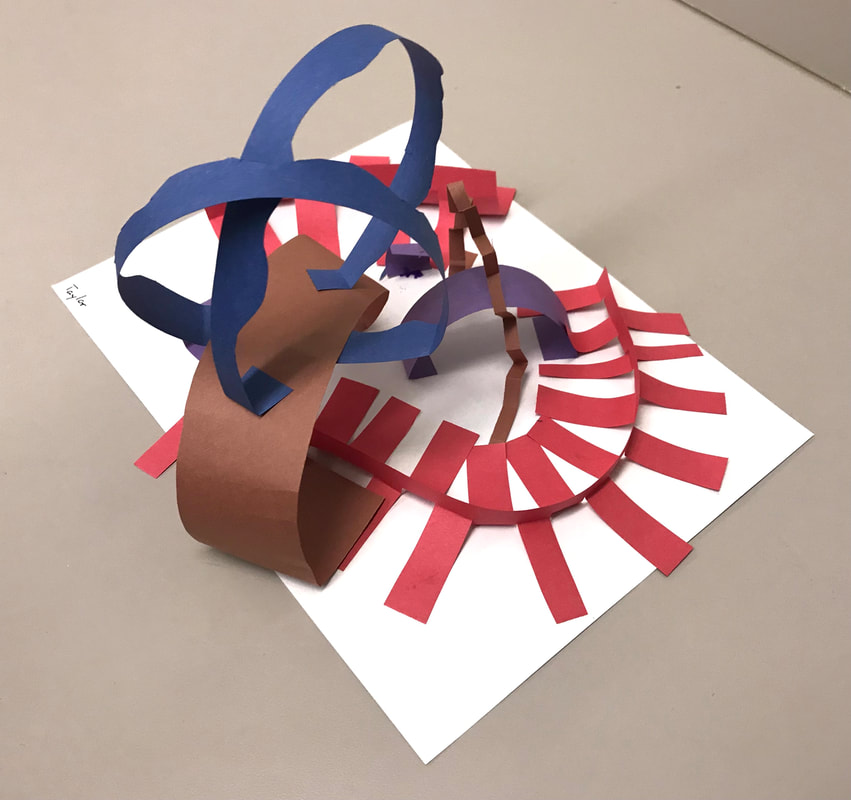
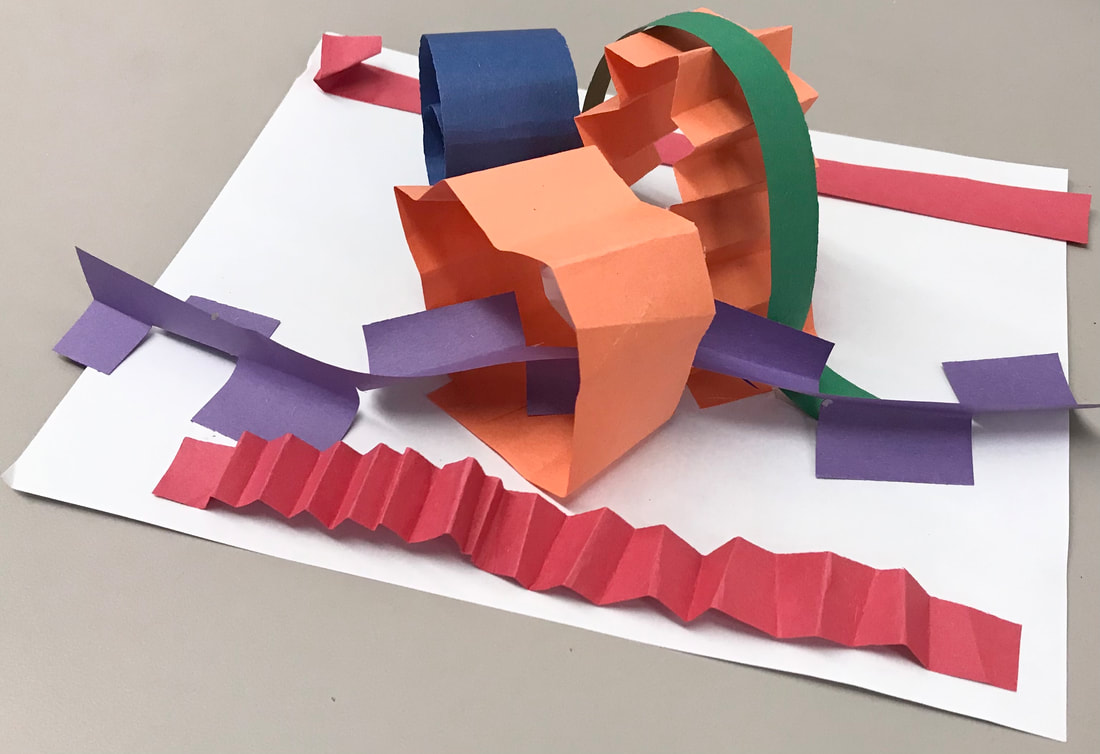
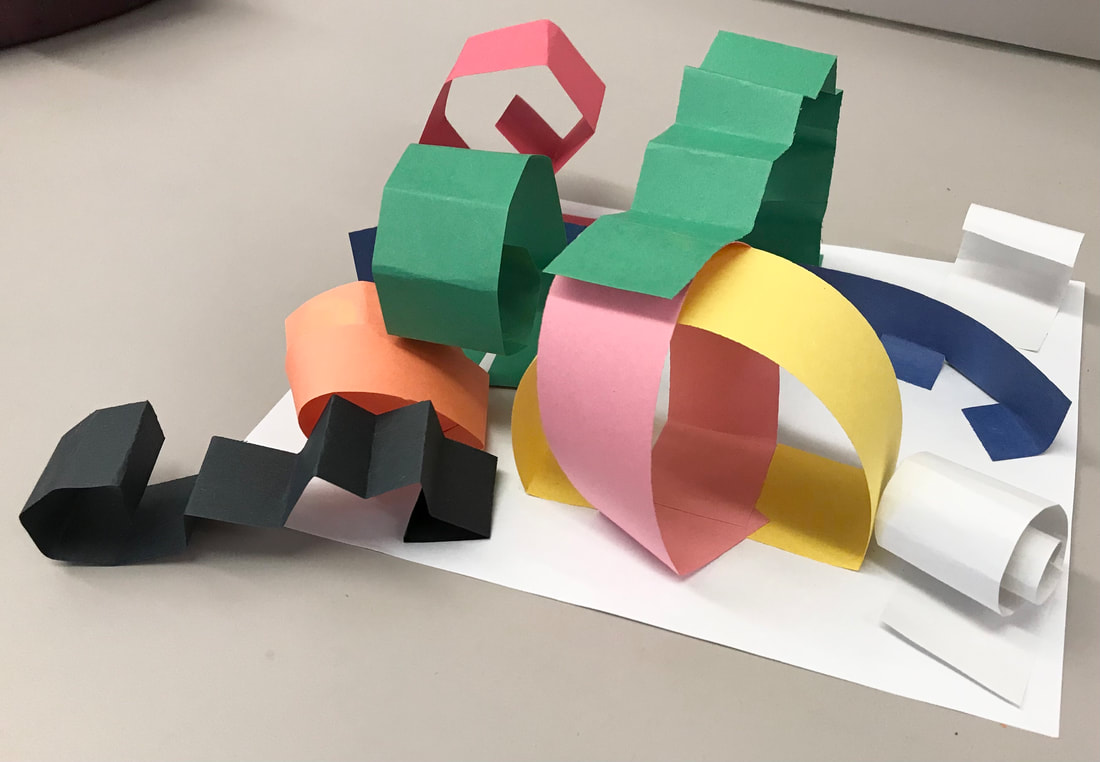
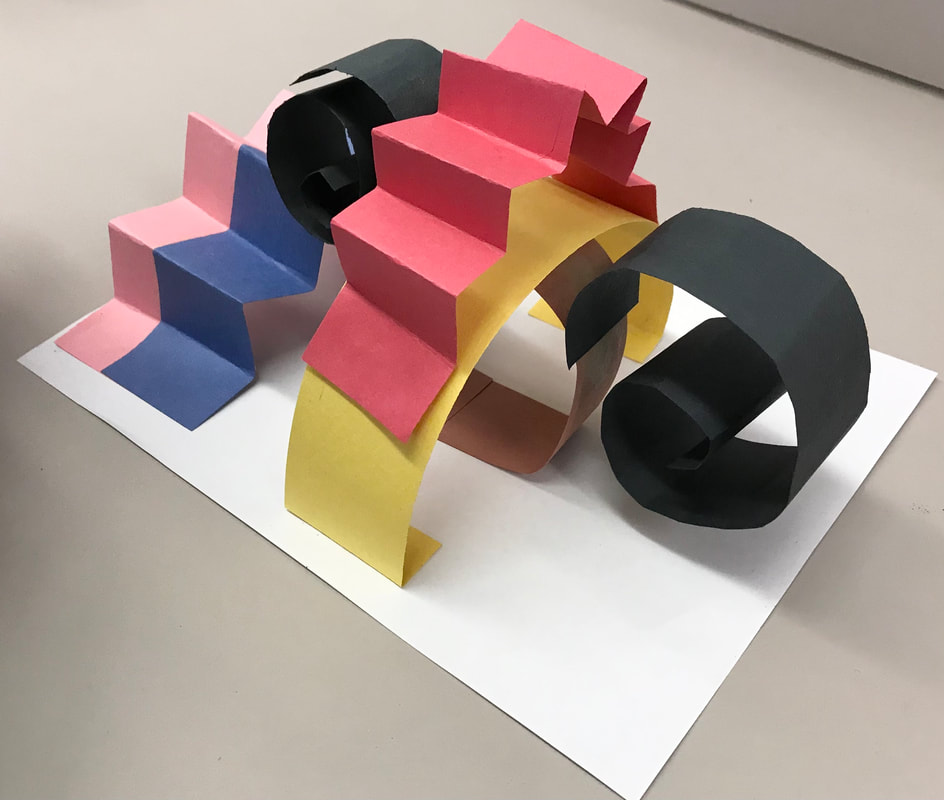
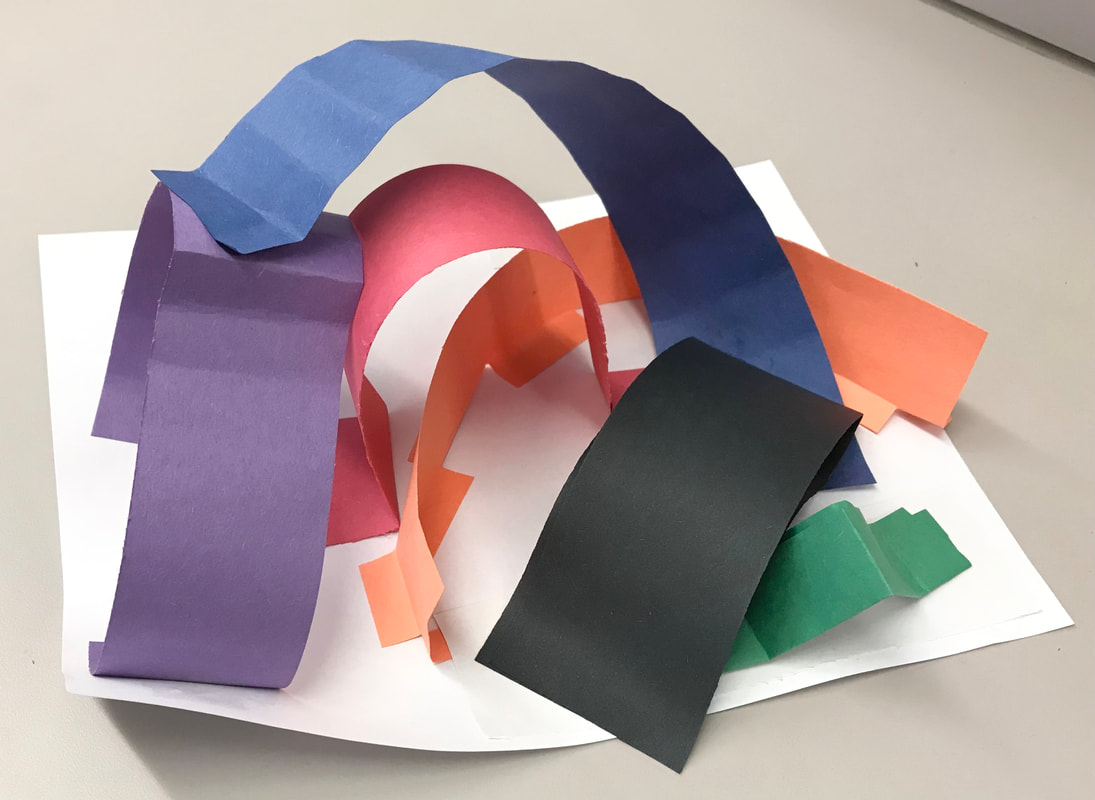
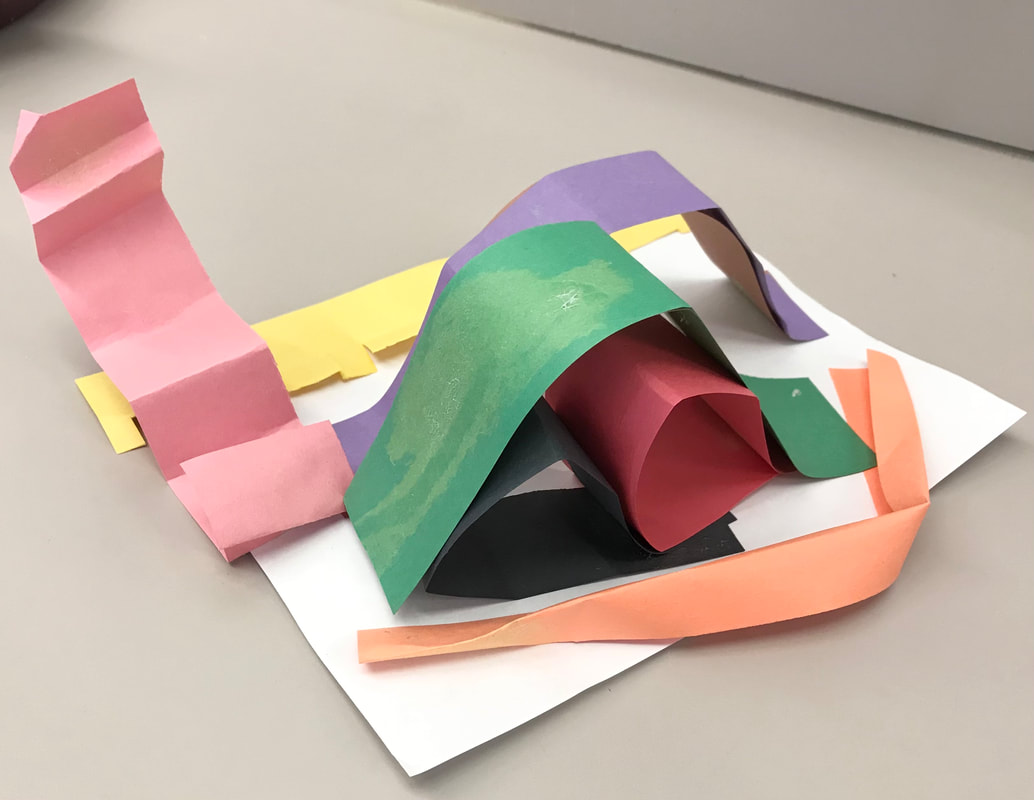
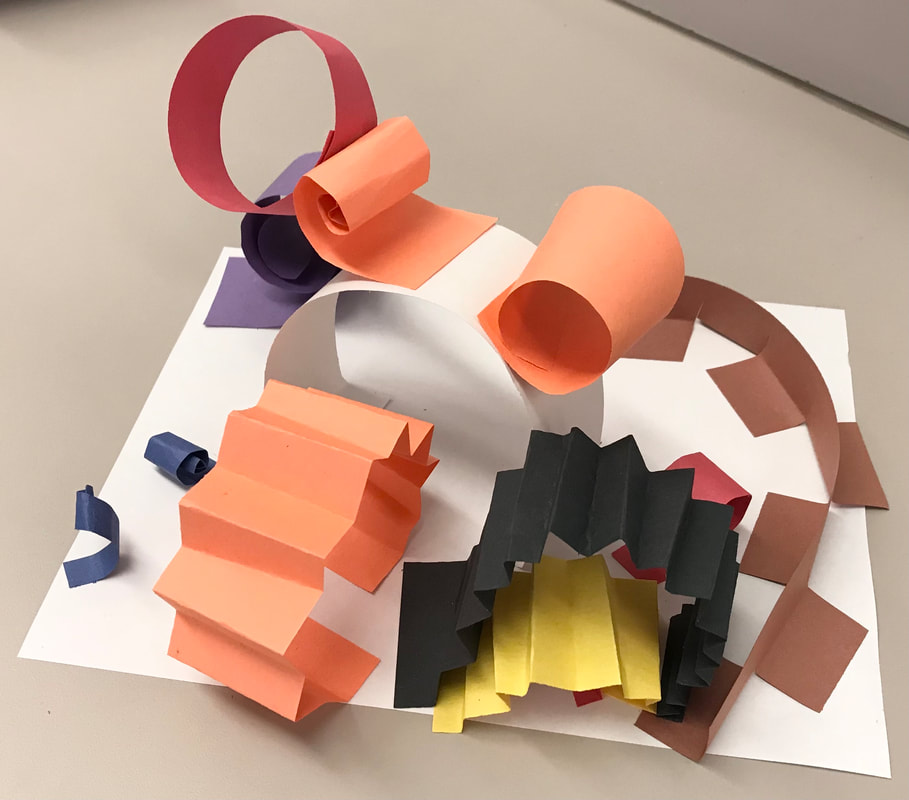
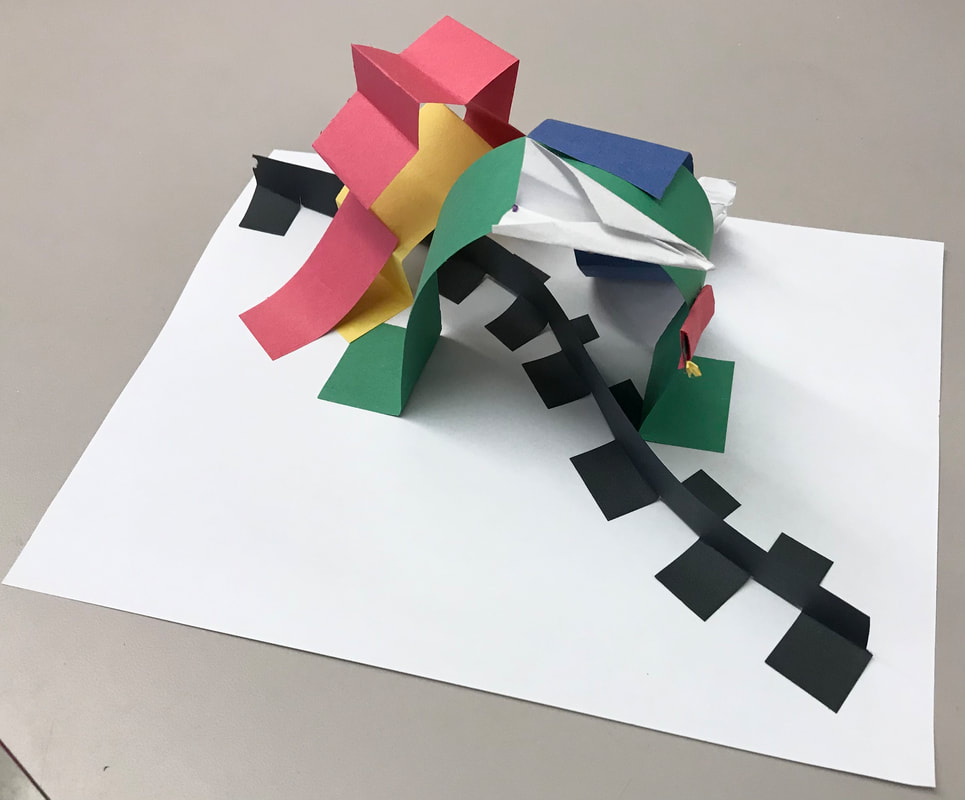
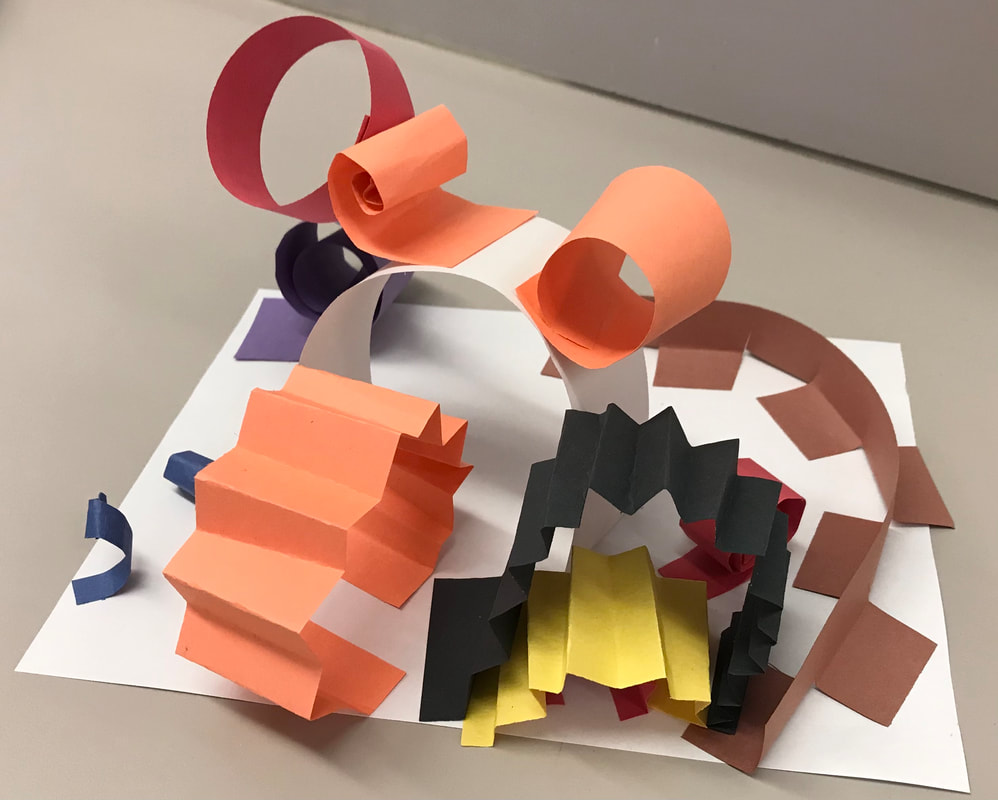
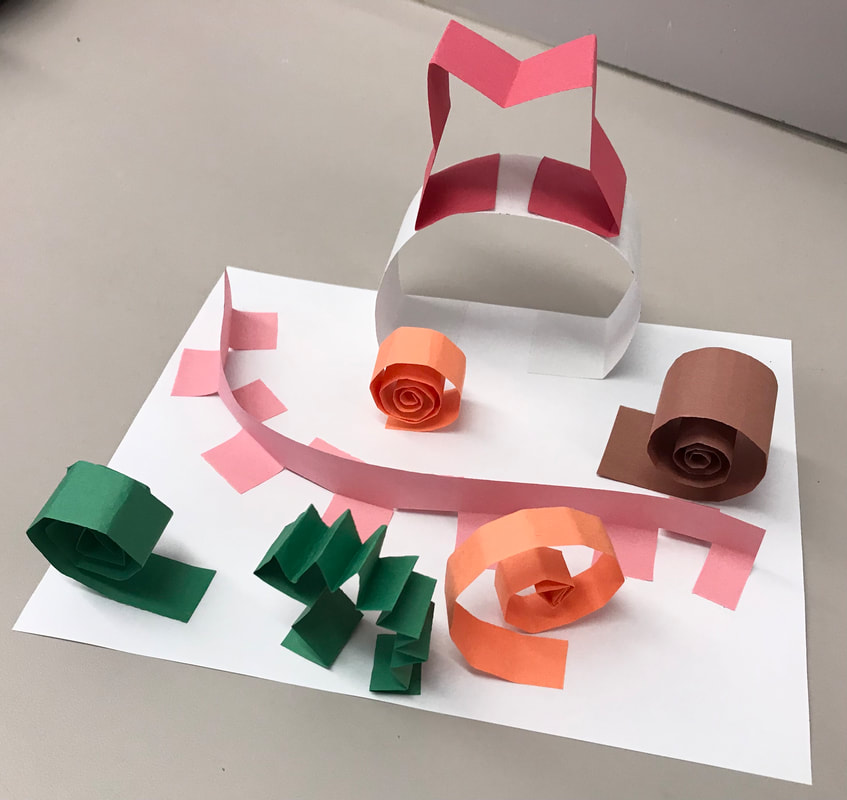
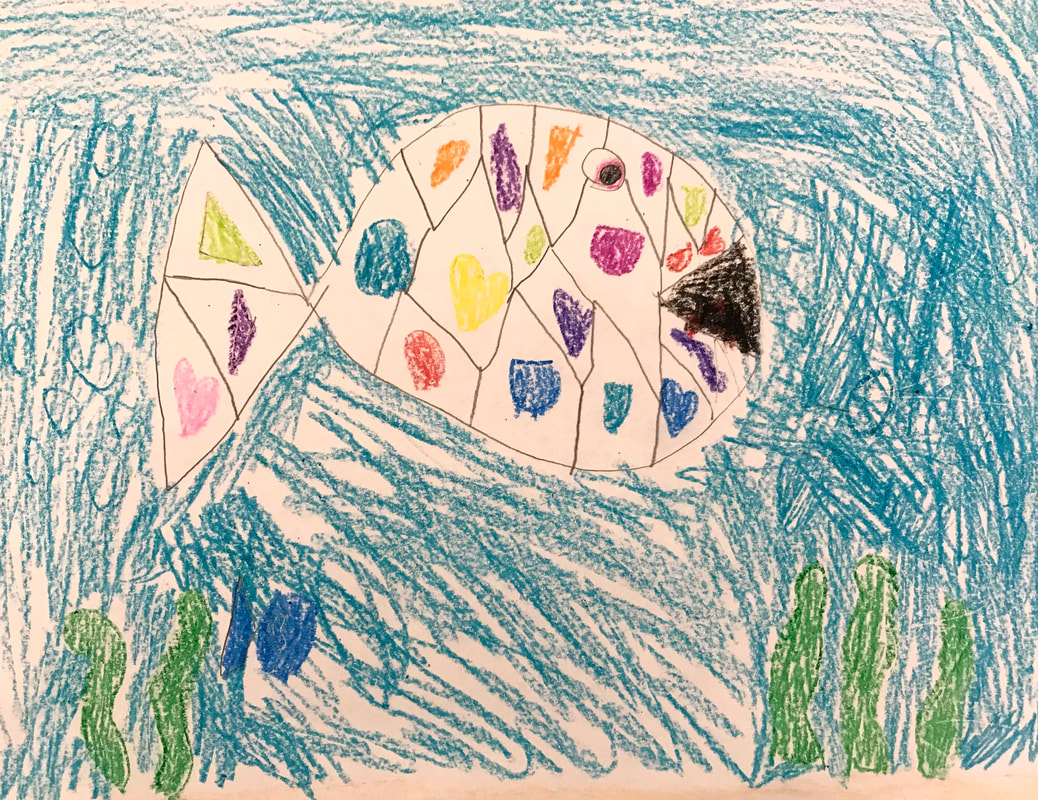
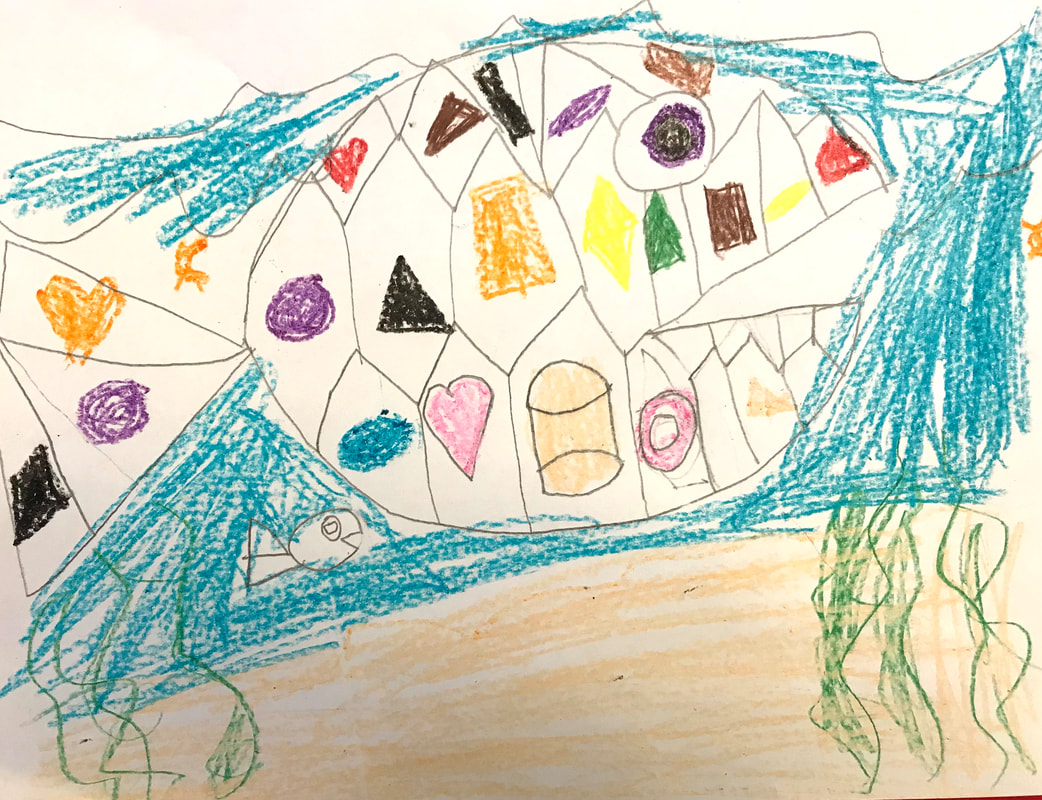
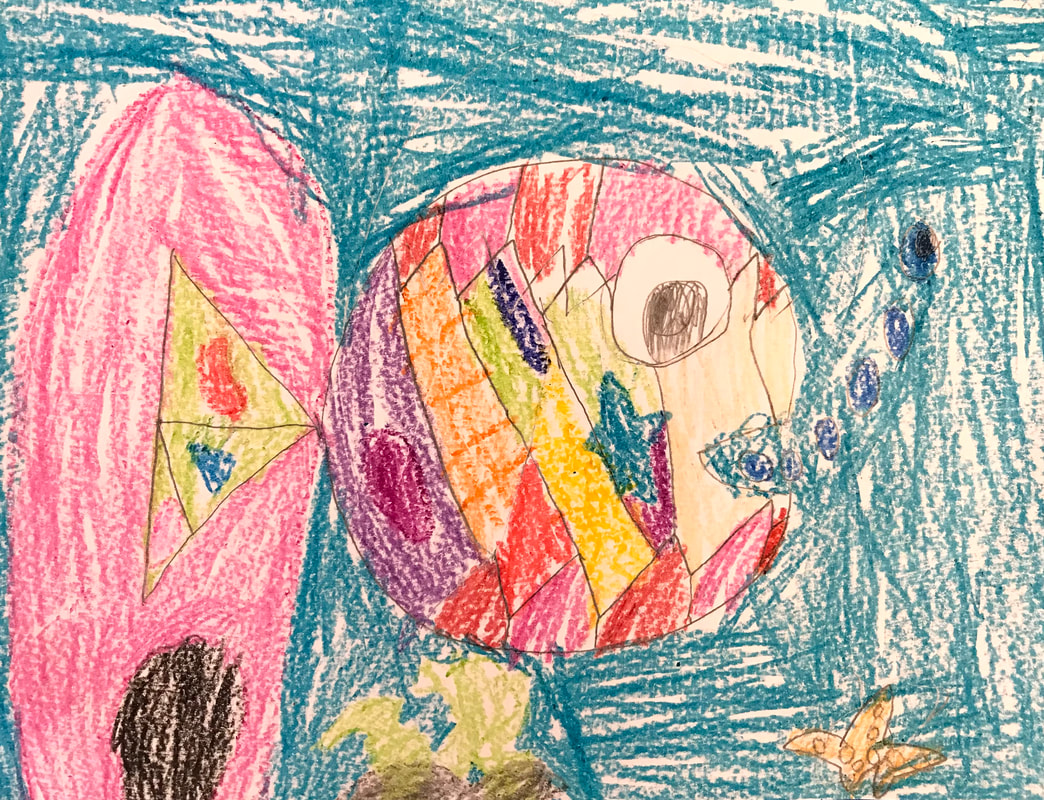
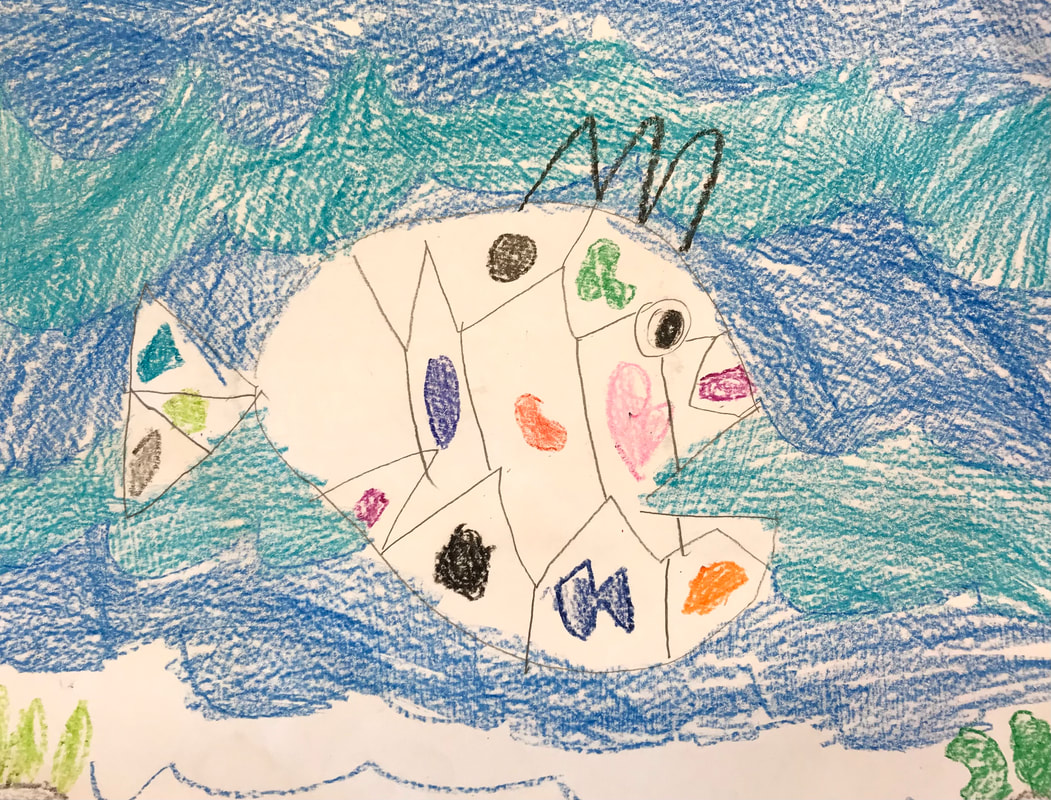
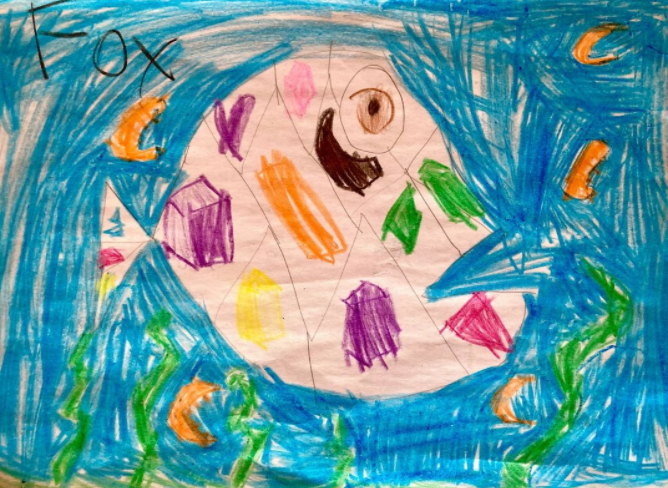
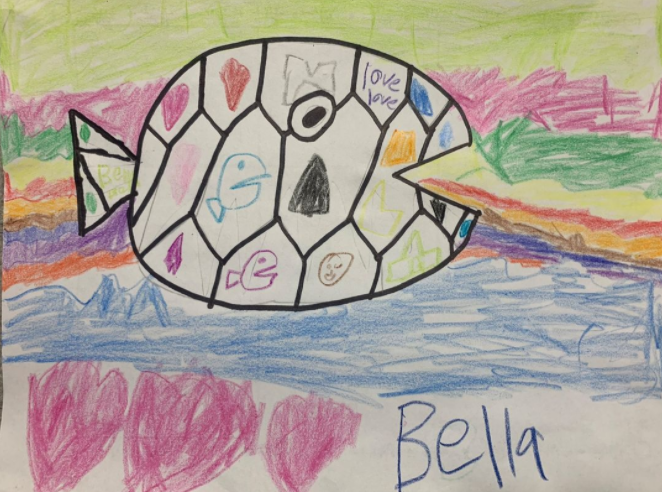
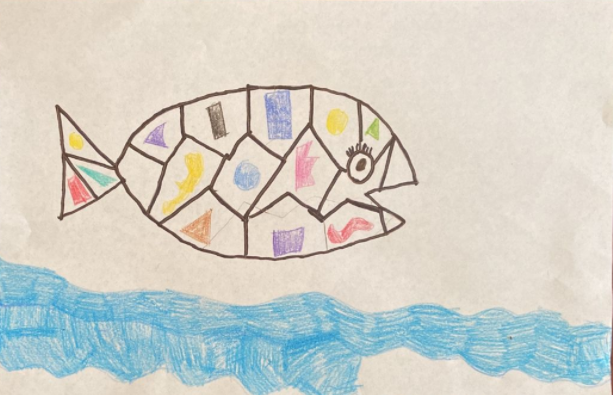
This lesson is for elementary school. It teaches line, shape, color, space, balance Materials: -Drawing paper -Pencil -Markers -Colored pencils -Crayons Teaching and Work Time: 1. Ask students who knows the difference between warm and cool colors. What colors do you think about when you’re warm and at the beach? What colors do you think about when you think of Winter and snow? 2. Model drawing a cat and a dog. Then model using lines to break up the background into shapes. Students will draw one of the two animals and use warm colors for either the animal or the background and cool colors for the other. They will fill in all the space to create balance. 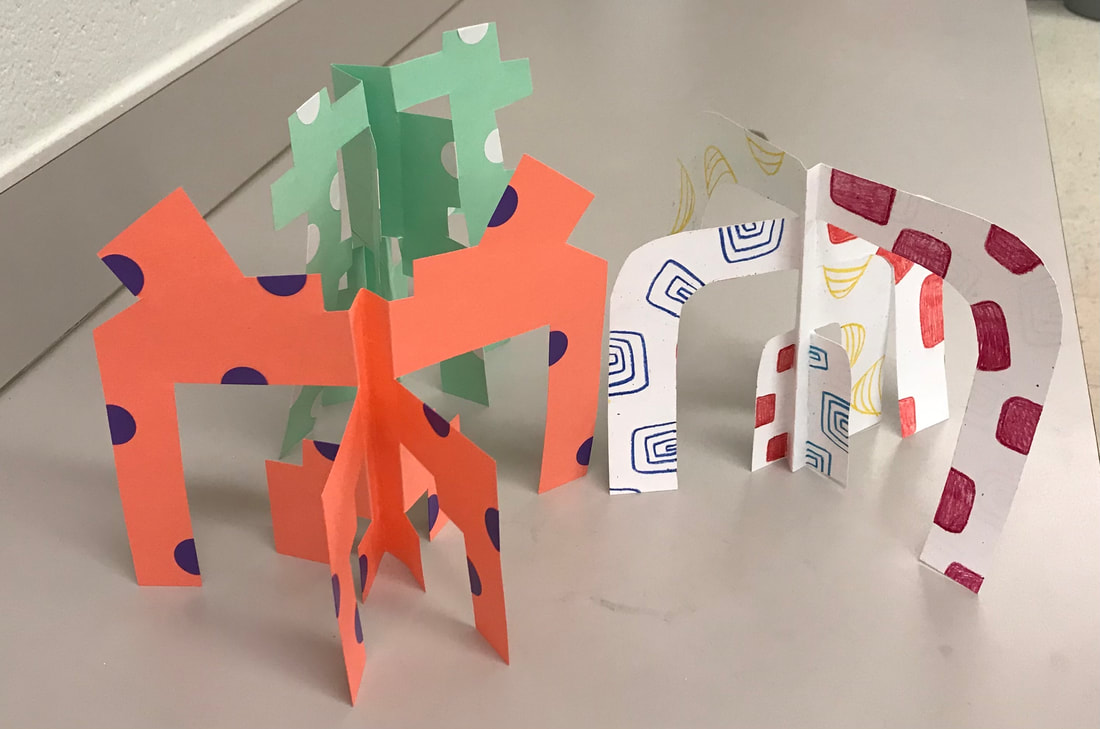 This lesson is for elementary or middle school. It teaches artist Alexander Calder, line, shape, form, color, space, balance, movement, unity, pattern Materials: -Colored cardstock -Pencil -Circle stickers -Scissors Teaching and Work Time: 1. Show students artworks by artist Alexander Calder and explain what a sculpture is. Then discuss what they notice about his sculptures: (what colors do you see? How does he use space in his sculptures? What about movement? etc.) Discuss the lines, form, balance, and unity. Watch a quick video showing more of his artwork. Alexander Calder's Happy Art - YouTube. Show students example of the sculpture they will be making. 2. Students in the classroom will have a piece of colored cardstock and some colored circle stickers. They will fold their cardstock and then draw lines on it to mark where they plan to cut. These will serve as a guide for cutting and will also help them plan their design. They may then apply their stickers to create a pattern. Once they are finished designing it, they will cut on their marked lines and then open it up and fold the pieces either front or back in an alternating fashion (this will help the sculpture to balance). Students on Zoom will be creating the same project, however, because they do not have the colored cardstock or stickers at home, they will follow along with a demo showing how to create the sculpture using a sheet of paper from home and coloring it in. The paper from home may not be as sturdy, so they may try folding the bottom of the pieces that stuck out so that the bottom is flat, this can then be glued down to another sheet of paper to help hold the sculpture sturdy. 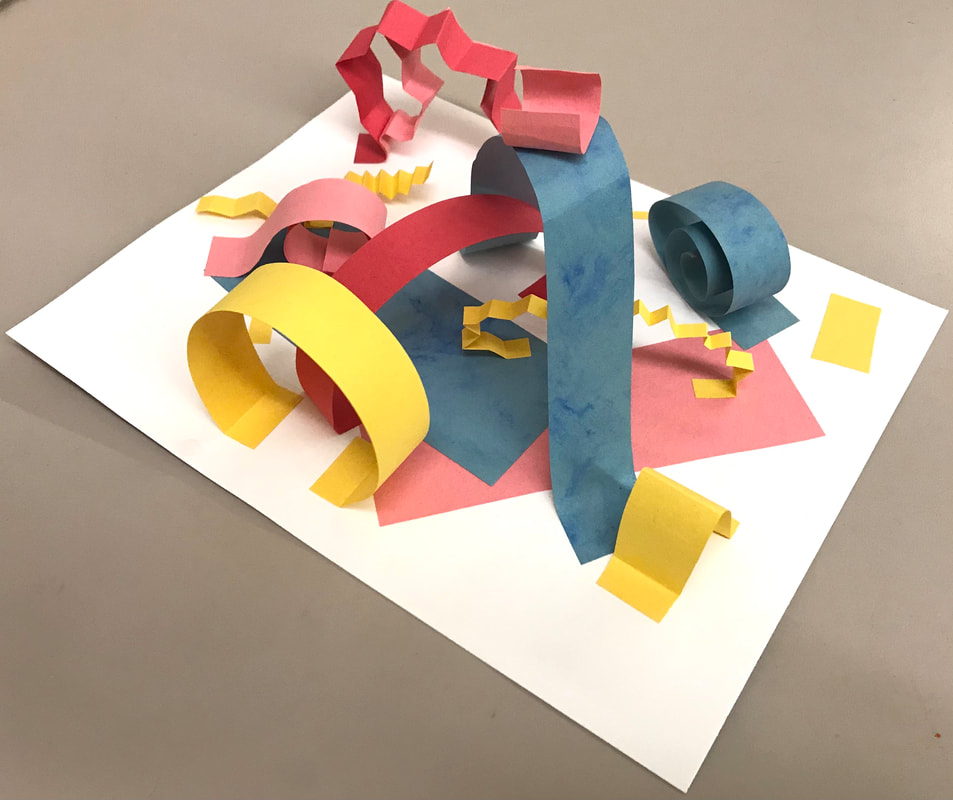 This lesson is for elementary or middle school. It teaches artist Alexander Calder, sculpture, line, form, color, space, balance, movement, unity, variety Materials: -White paper -Construction paper -Scissors -Glue Teaching and Work Time: 1. Show students artworks by artist Alexander Calder and explain what a sculpture is. Then discuss what they notice about his sculptures: (what colors do you see? How does he use space in his sculptures? What about movement? etc.) Discuss the lines, form, balance, and unity. Show students a quick demo/explanation on paper building techniques and show them the example of the sculpture they will be making. 2. Students in the classroom will have a piece of white cardstock and a few half sheets of colored construction paper. They will cut the construction paper into slips and fold, bend, overlap, and glue the strips into a balanced, unified, and dynamic sculpture. Students on Zoom will create the same sculptures, however, they will be using a sheet of paper from home for the base, and a sheet of paper that they will color (markers, colored pencils, crayons, etc) for their strips. 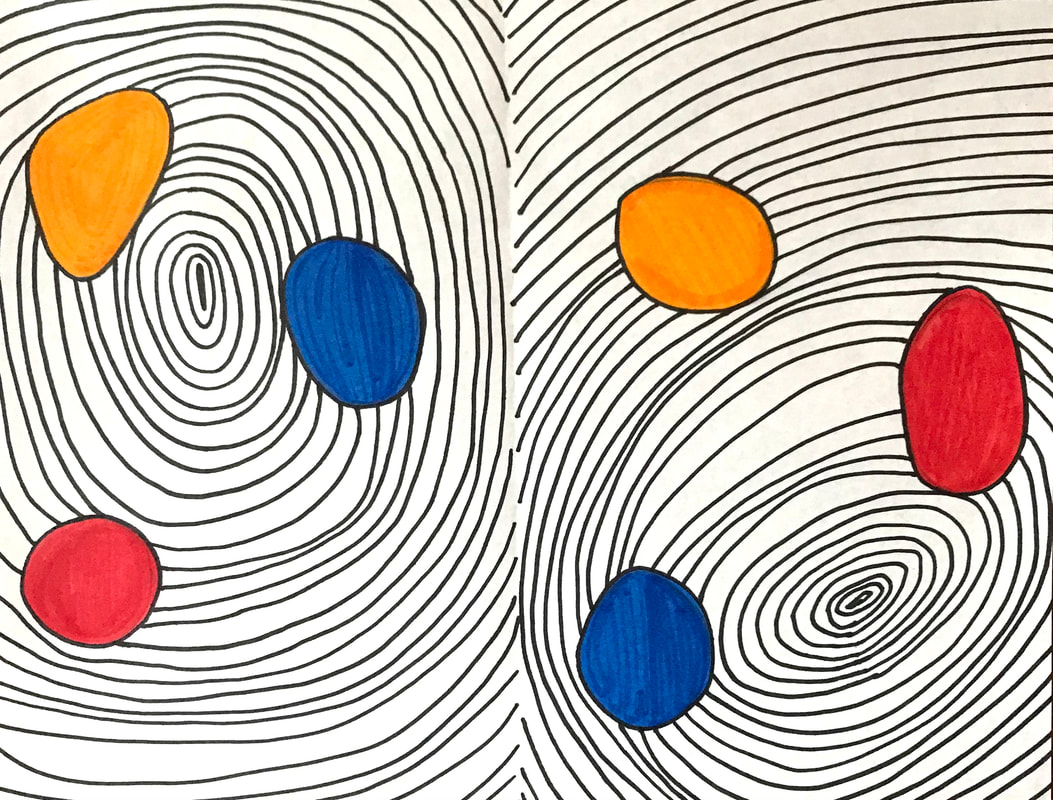 This lesson is for elementary or middle school. It teaches artist Alexander Calder, line, shape, color, balance, movement, unity, variety, repetition Materials: -Drawing paper -Pencil -Markers -Colored pencils -Crayons -Sharpie Teaching and Work Time: 1. Show PowerPoint including information on Alexander Calder and examples of his artwork. Discuss the variety of ways and styles in which he makes art. Have a class discussion asking the students what they notice about his art. (What lines do you see? What shapes are made with the lines? What about the colors—primary, etc.) Explain to the students how the artist uses space, balance, variety of colors, etc. 2. Students will split their paper into two (or more) sections and draw 3 circular shapes within each of the sections. They will color them in using the primary colors. They will use repetition then fill in all the extra remaining space within each section using tightly spaced circles drawn in black marker. 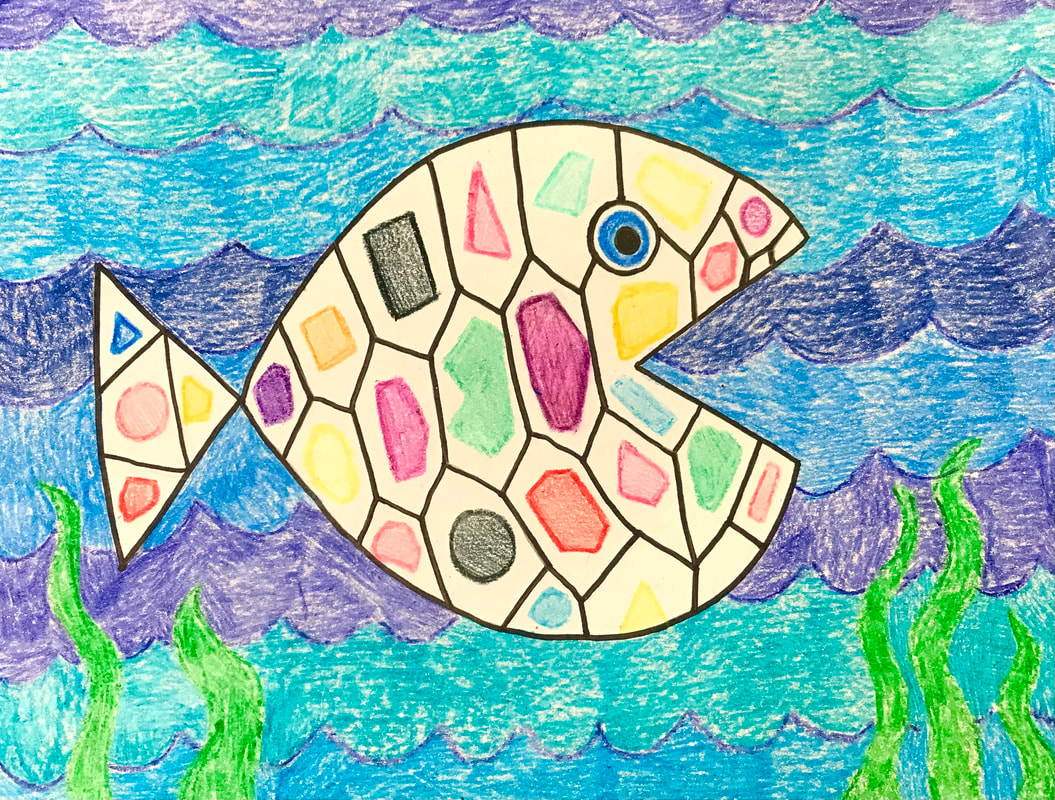 This lesson is for elementary school. It teaches artist Alexander Calder, shape, line, color, space, balance, variety Materials: -Drawing paper -Pencil -Markers -Colored pencils -Crayons Teaching and Work Time: 1. Show PowerPoint including information on Alexander Calder and examples of his artwork. Discuss the variety of ways and styles in which he makes art. Have a class discussion asking the students what they notice about his art. (What lines do you see? What shapes are made with the lines? What about the colors? Etc.) Explain to the students how the artist uses space, balance, variety of colors, etc. 2. Students will follow along with the guided drawing to create the shape of the fish and the lines to break up the space. The students will then fill in the little shapes within the fish with smaller colored shapes.
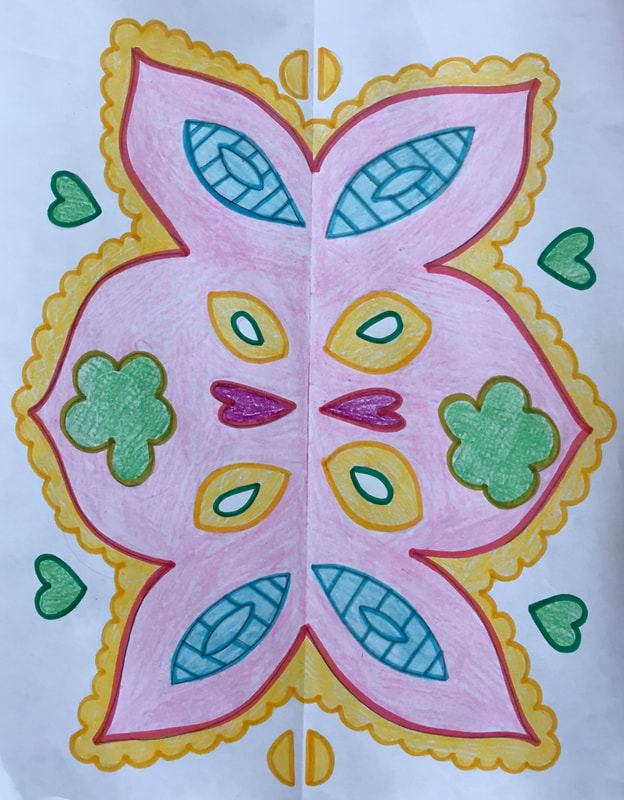
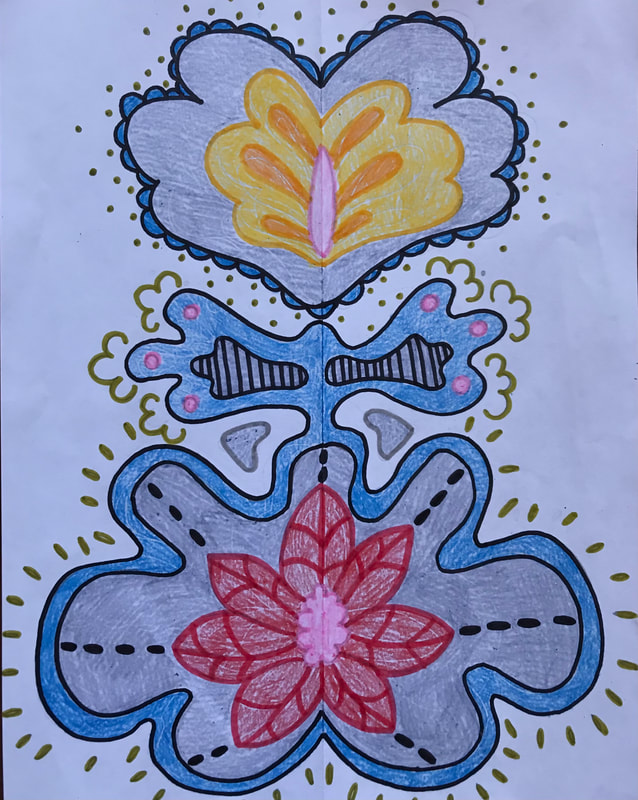
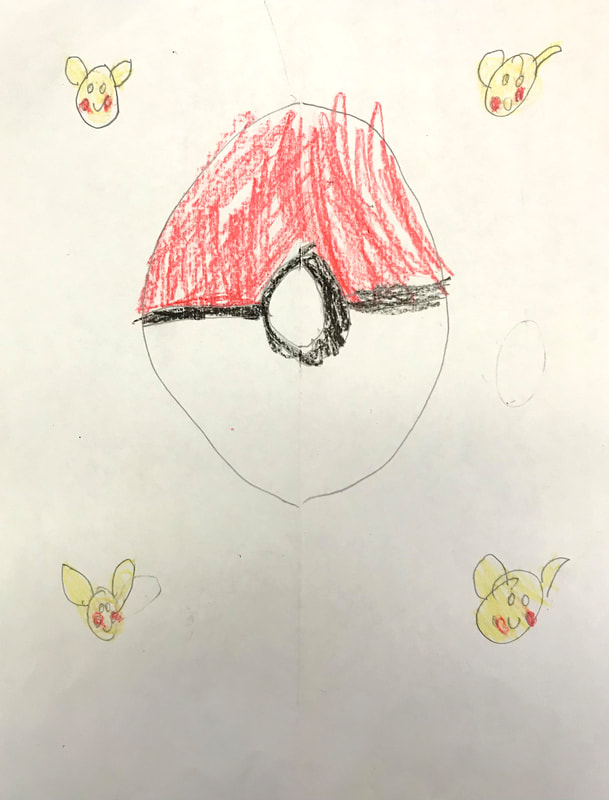
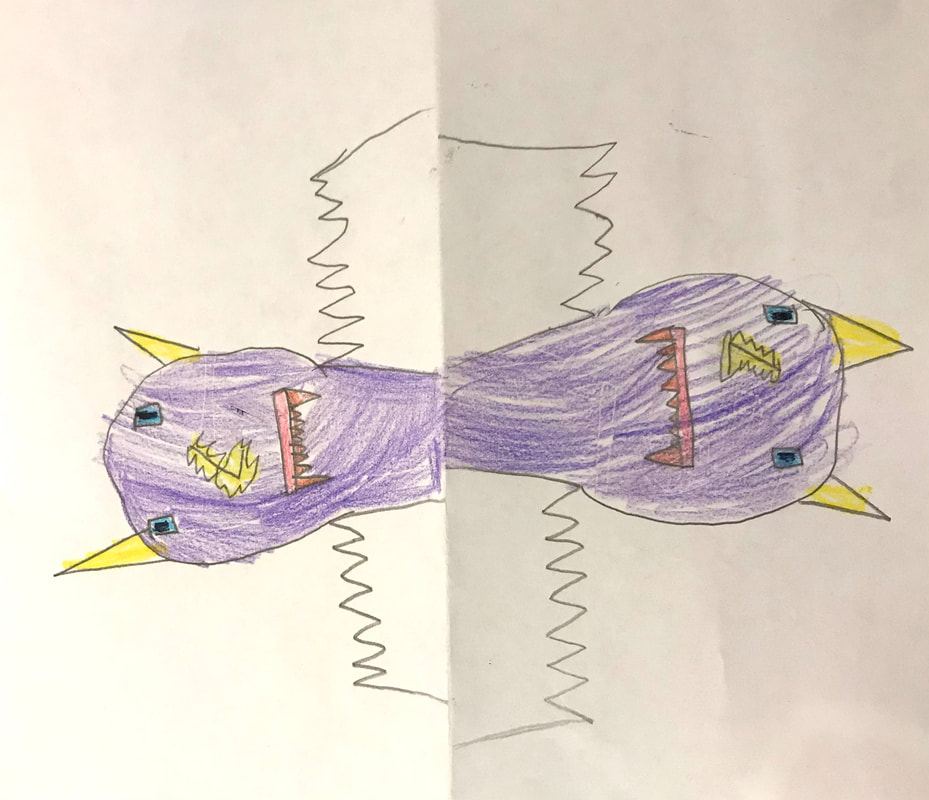
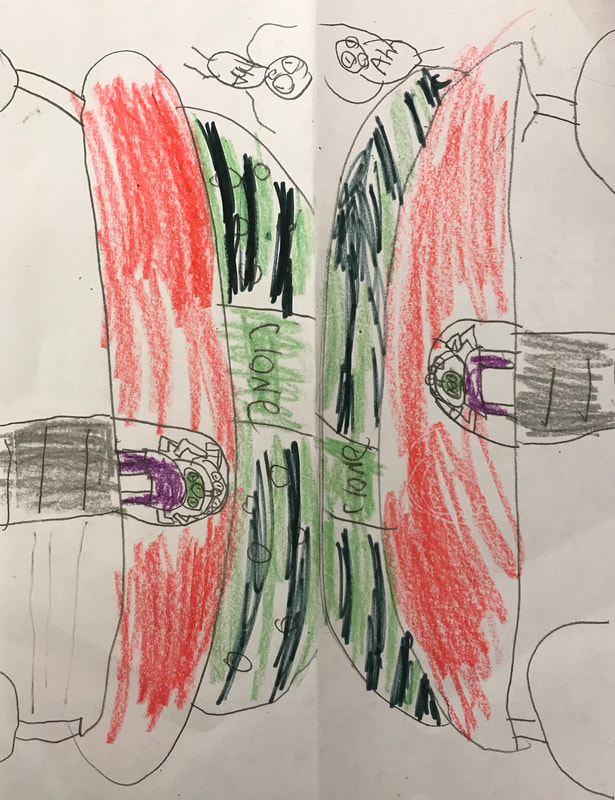
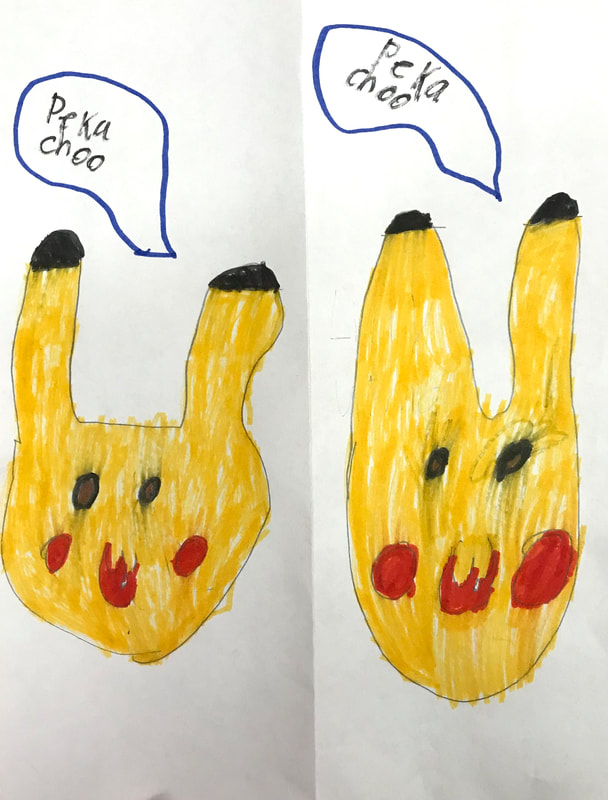
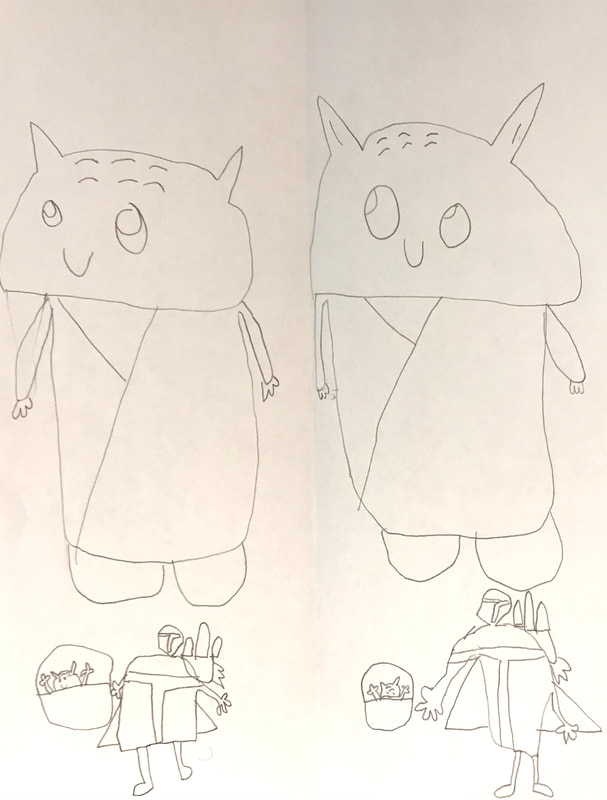
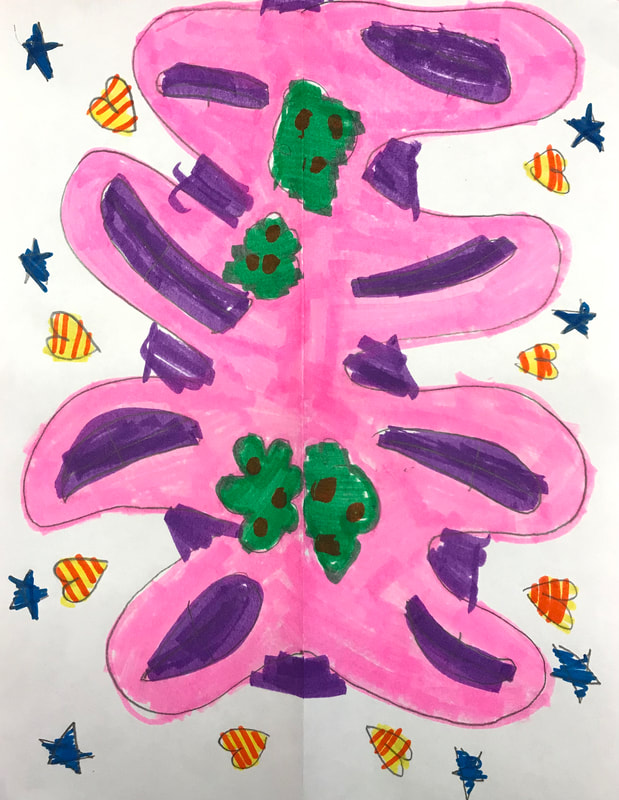
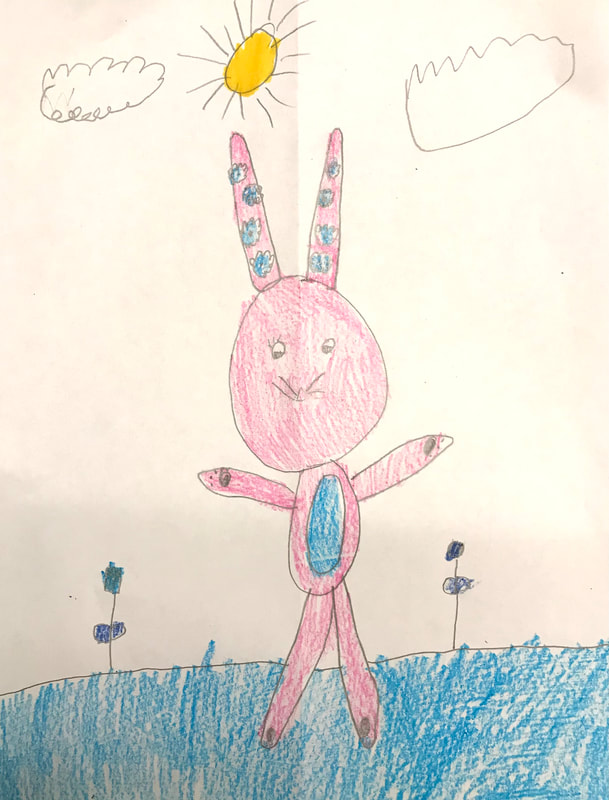
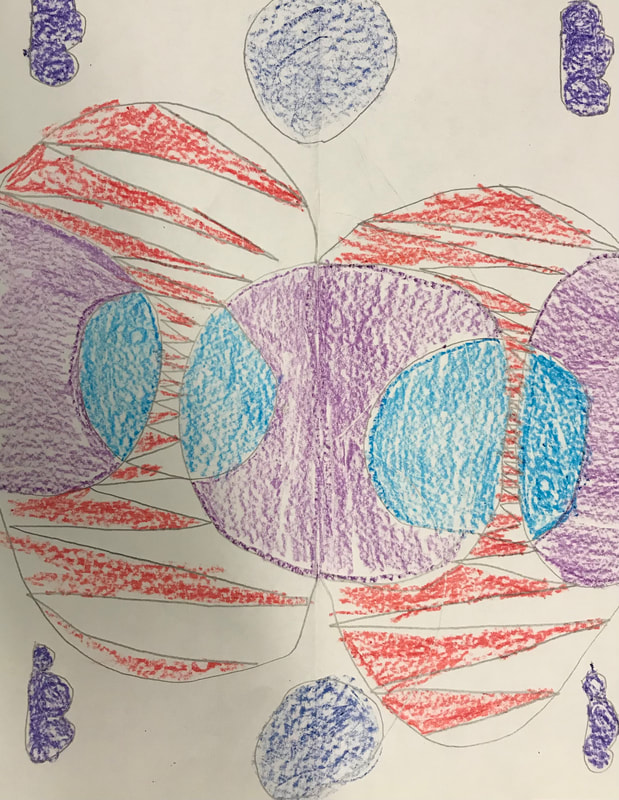
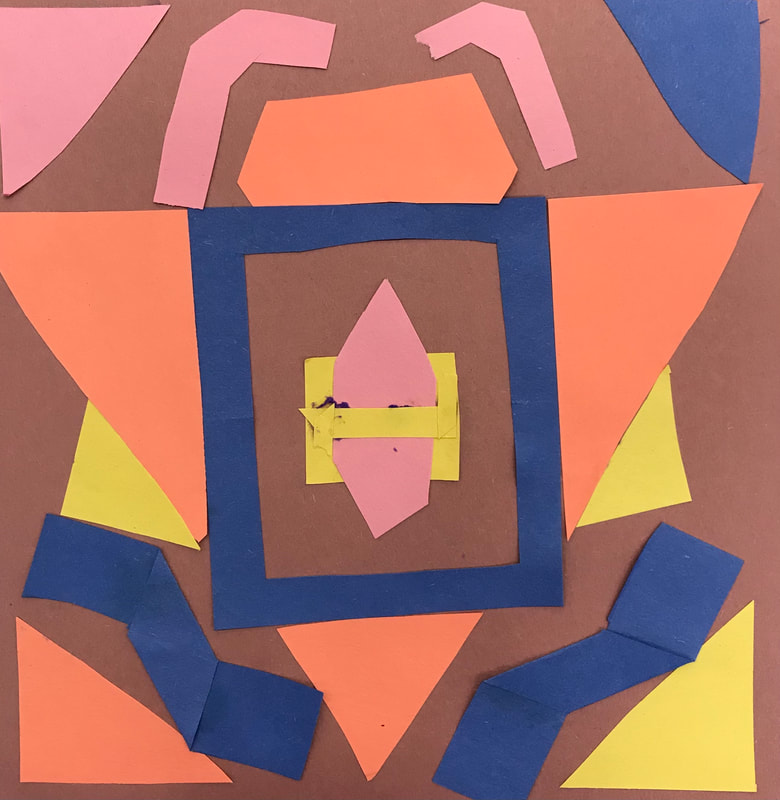
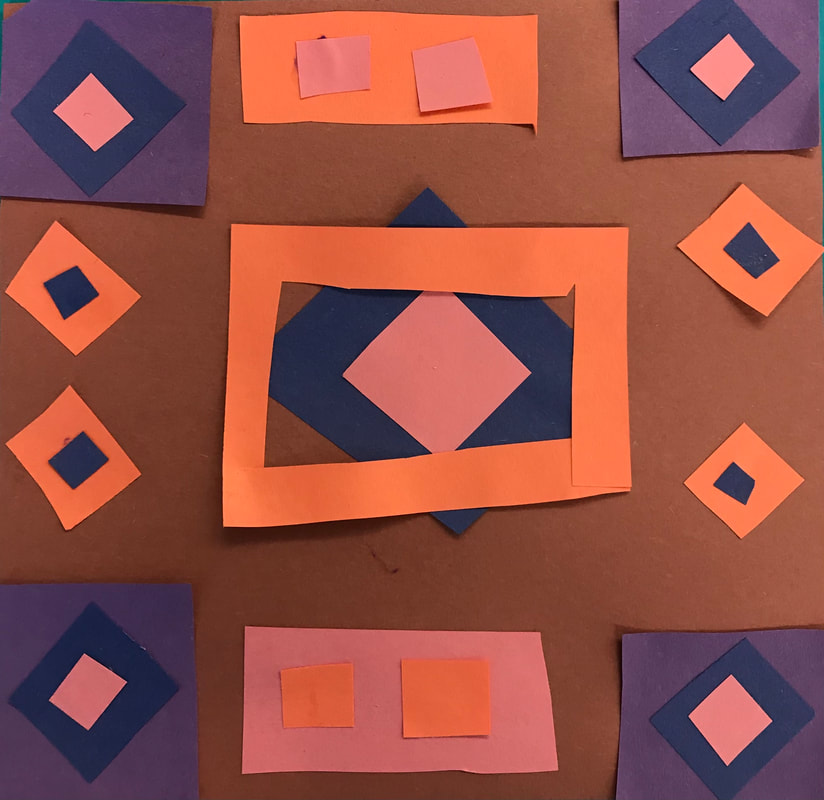
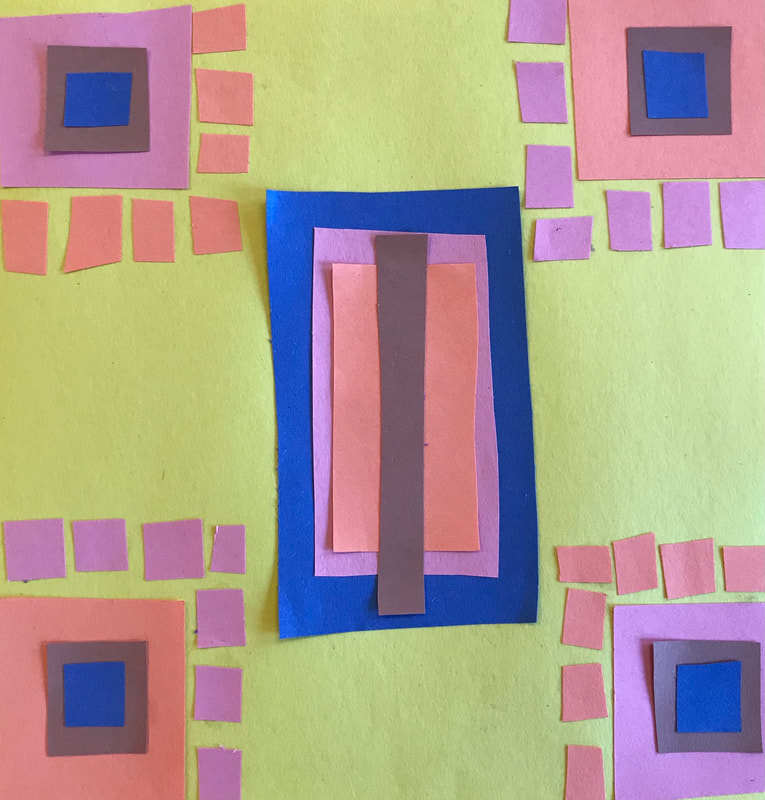
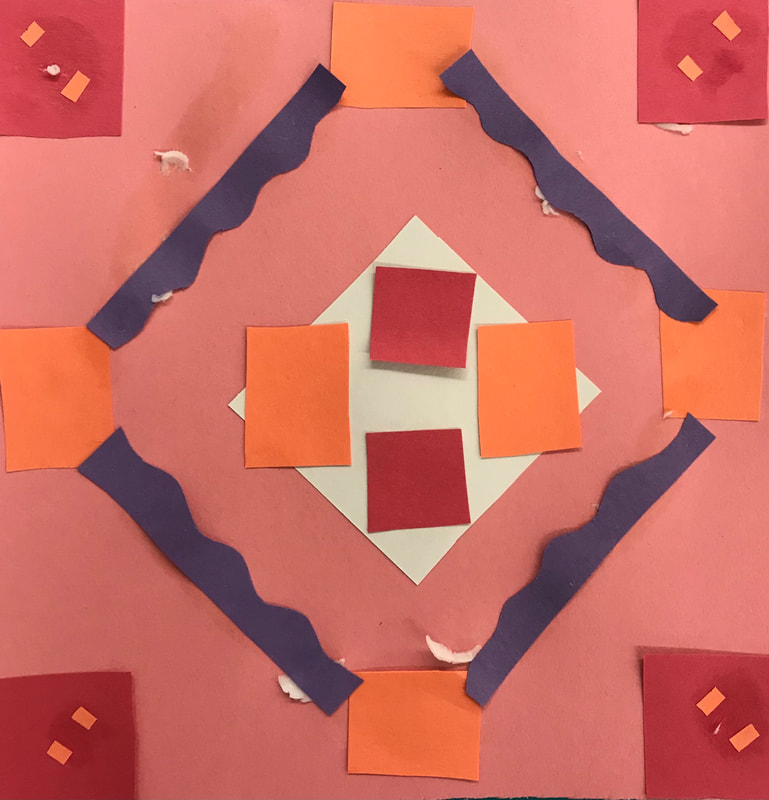
This lesson is for elementary or middle school. It teaches symmetry, line, balance, unity, shape, color, movement, variety, repetition Materials: -Drawing paper -Pencil -Markers -Colored pencils -Crayons Teaching and Work Time: 1. Students will be introduced to Minnie Evans and her symmetrical artworks. We will look at examples and discuss how they are symmetrical. We will look at how she uses line to create movement in her designs. Explain how she uses repetition to mirror her lines and colors onto the other side of the paper. Discuss the variety of shapes and colors. 2. Students will take their paper, fold it in half, and begin drawing their designs next to the folded side of the paper. They are encouraged to fill in the page so that it is balanced. After they finish the first half, they will open their paper back up and copy the same drawing, flipped, onto the other half of their paper. Finally, they will add color to their drawing. The drawing should display balance, symmetry, and unity. *Some student examples are unfinished due to my school's current COVID regulations on one-day projects* 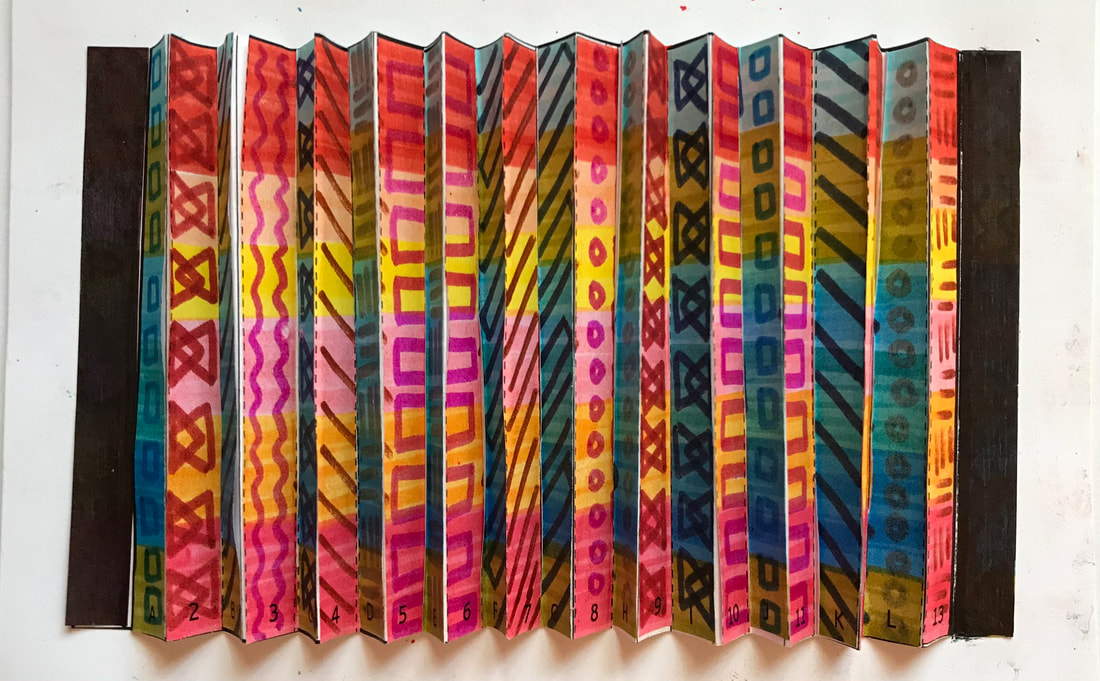
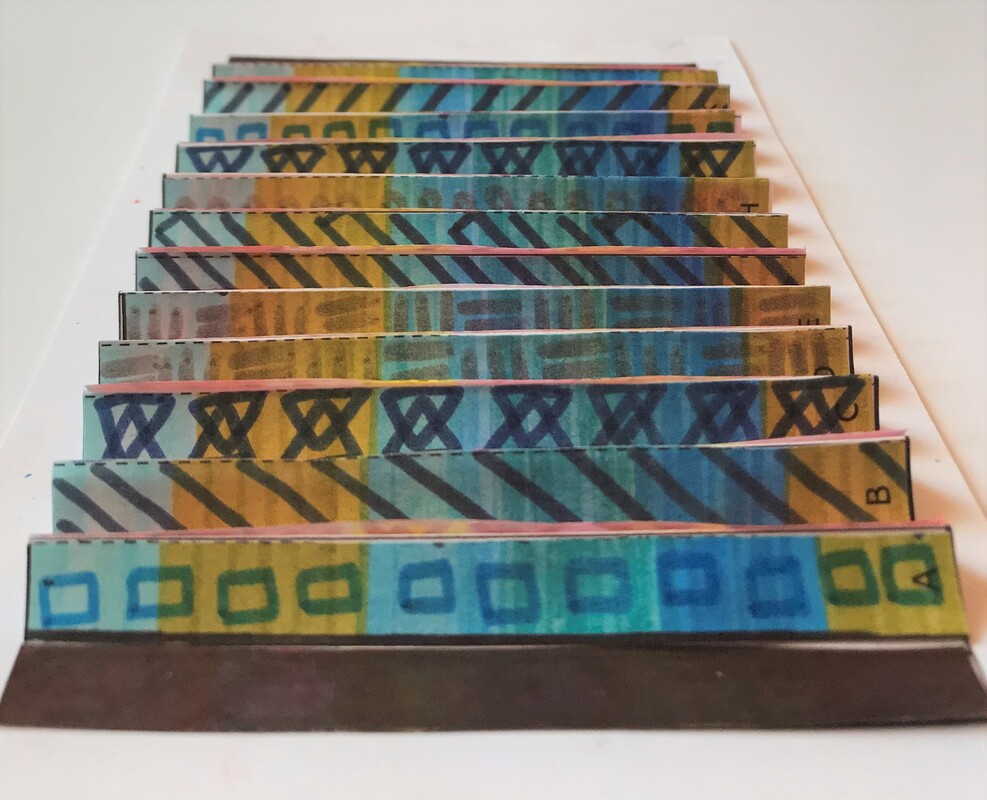
This lesson is for elementary or middle school. It teaches agamograph, line, form, movement, unity, color, balance, repetition, pattern
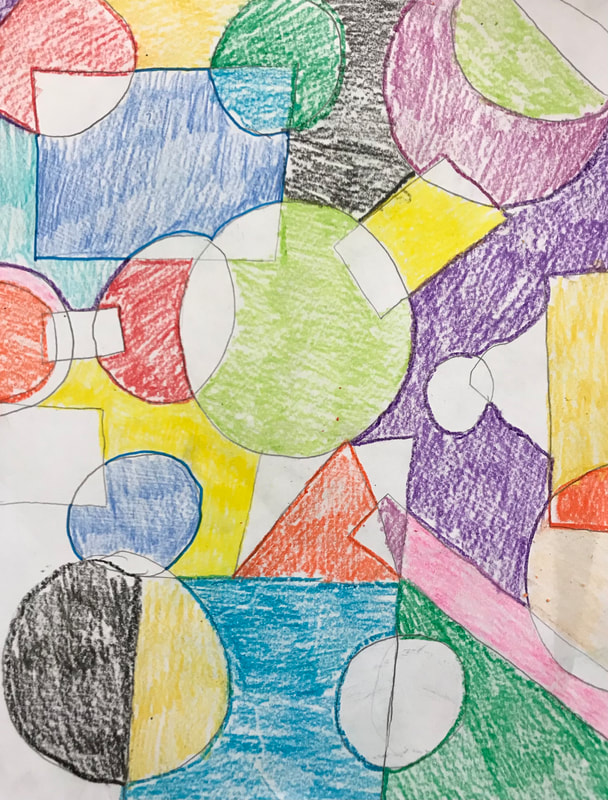
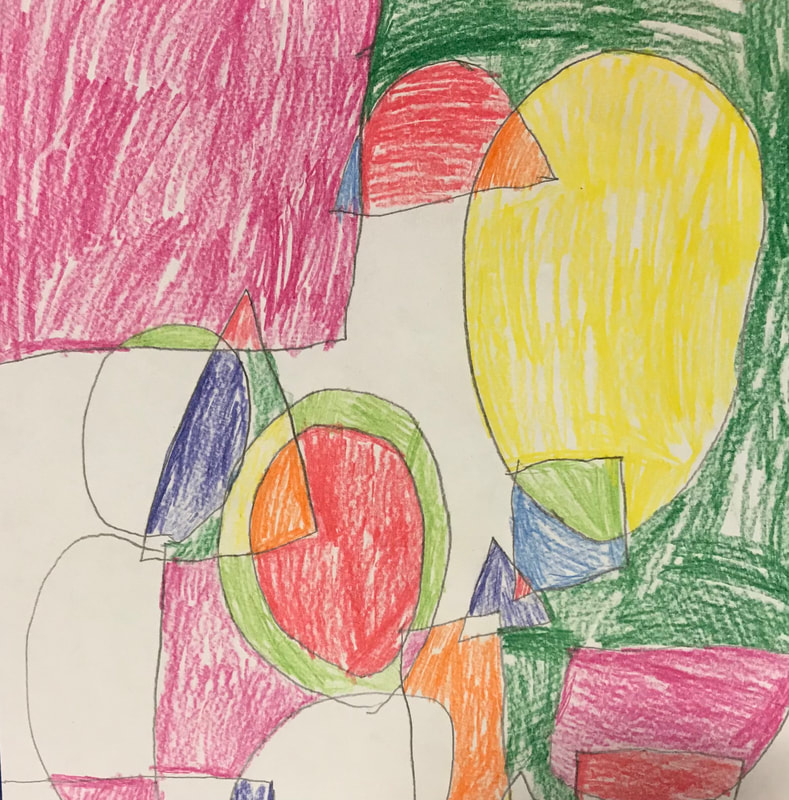
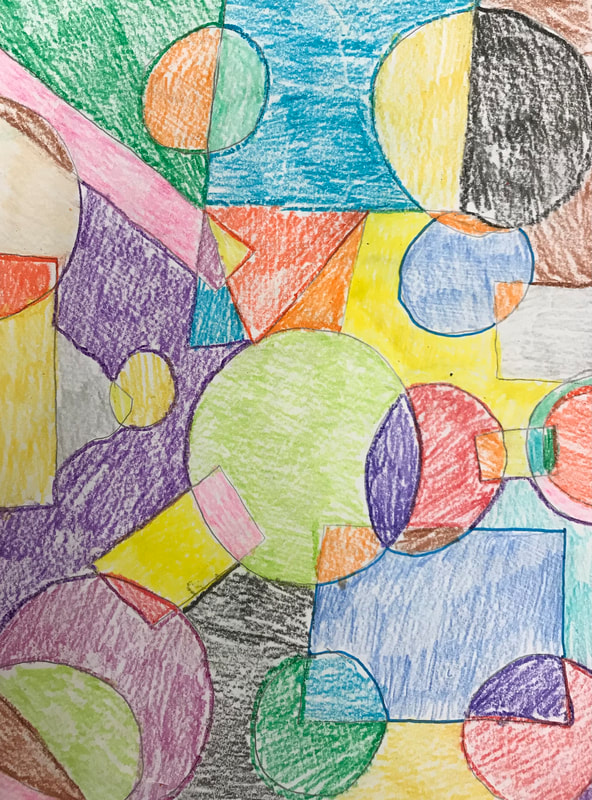
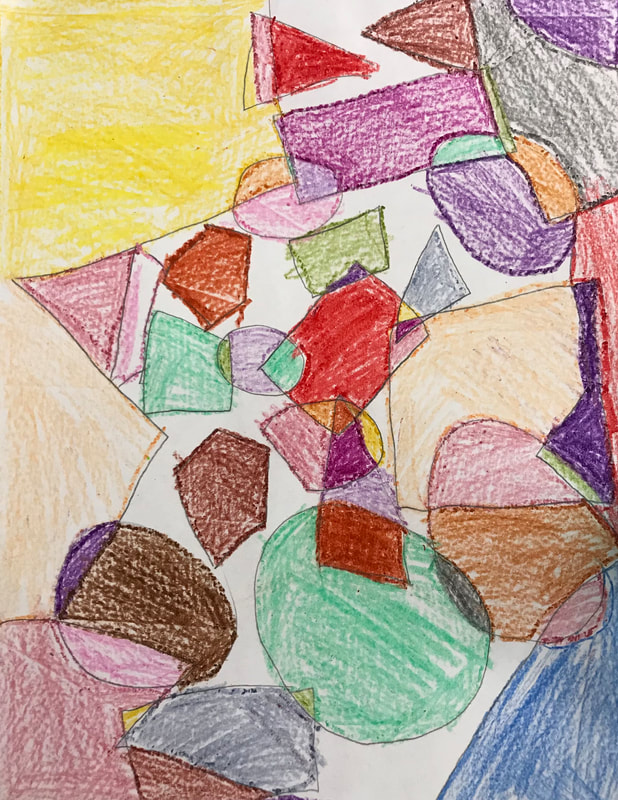
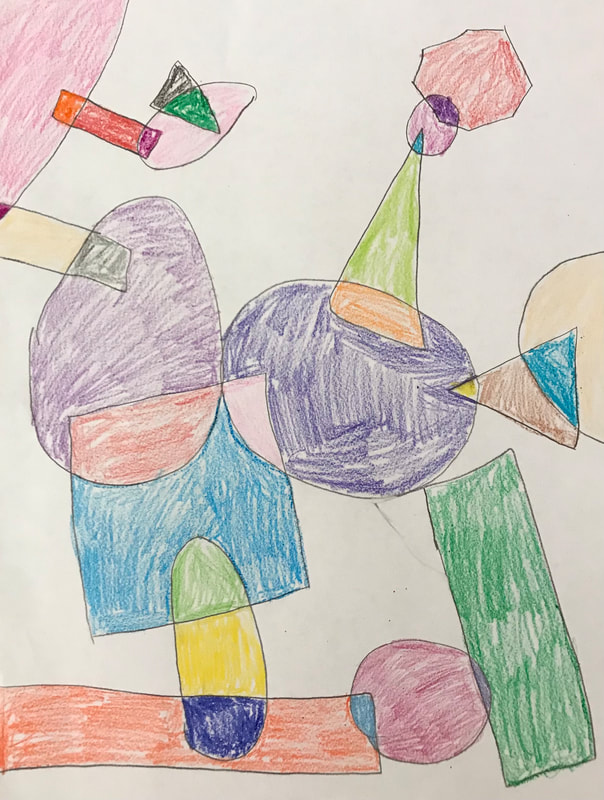
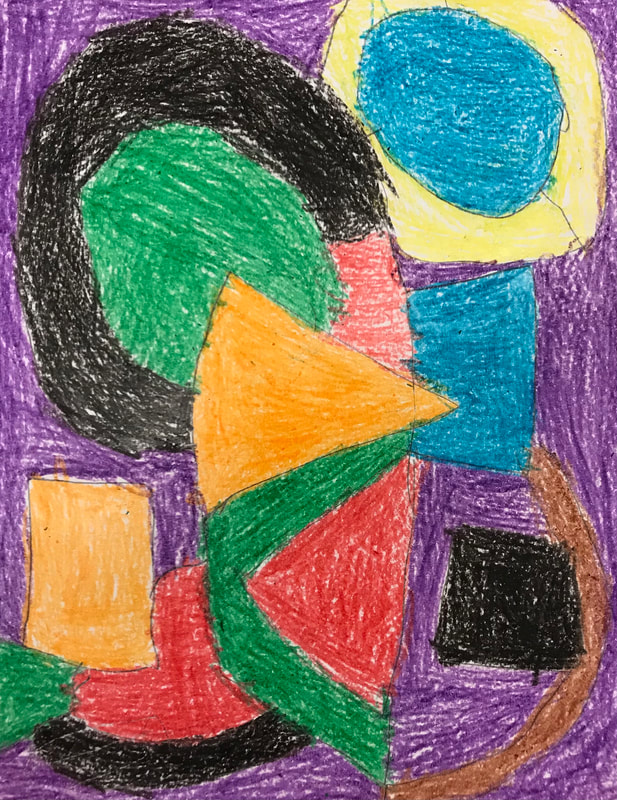
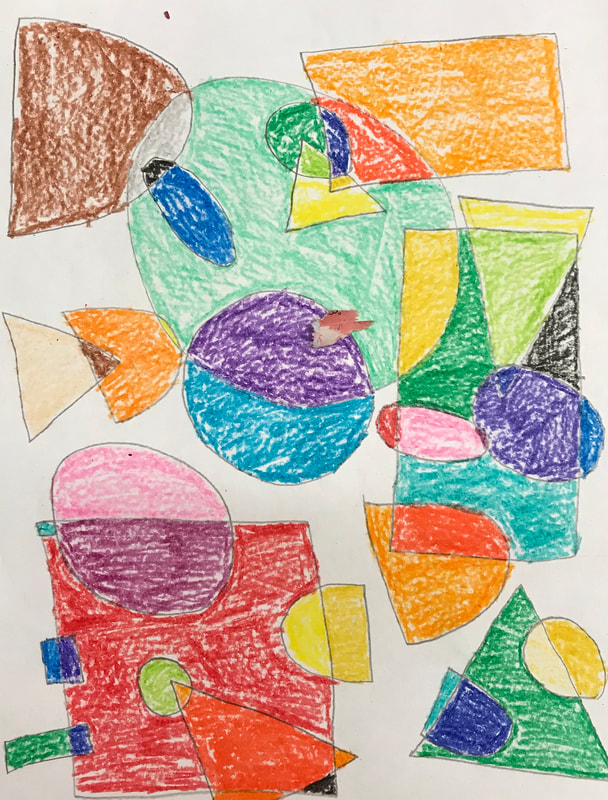
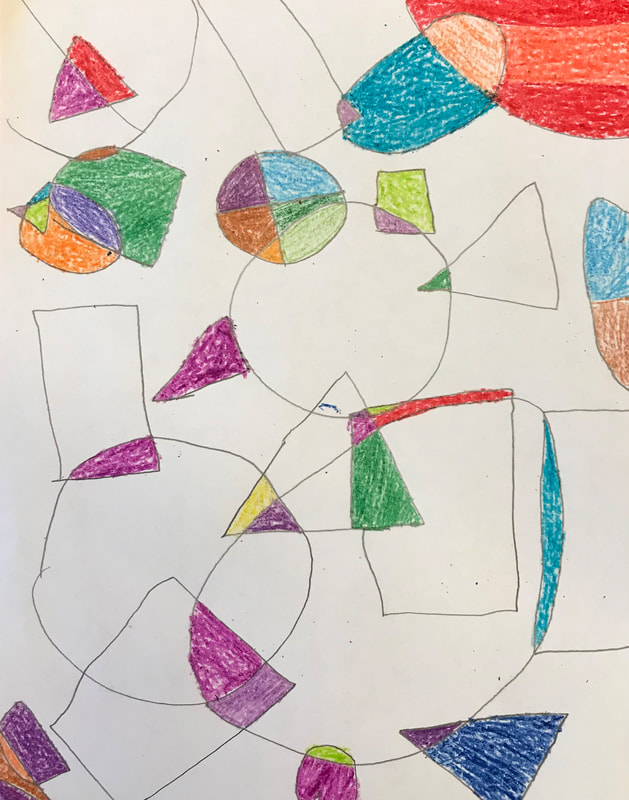
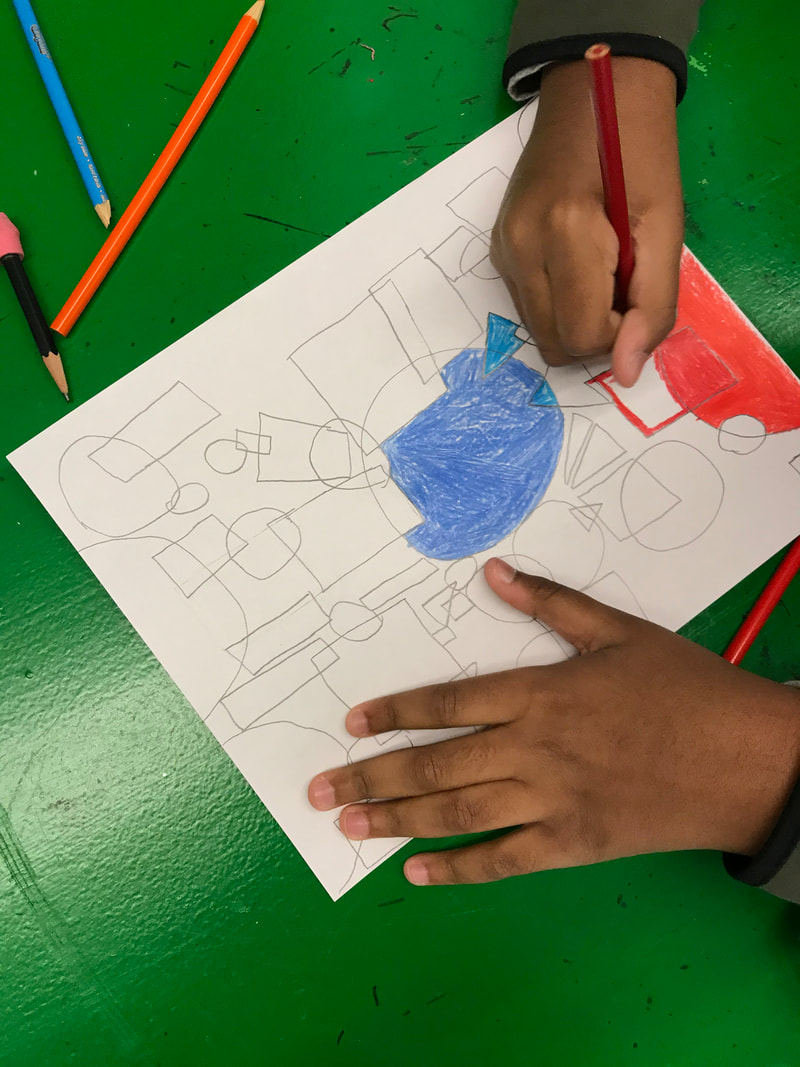
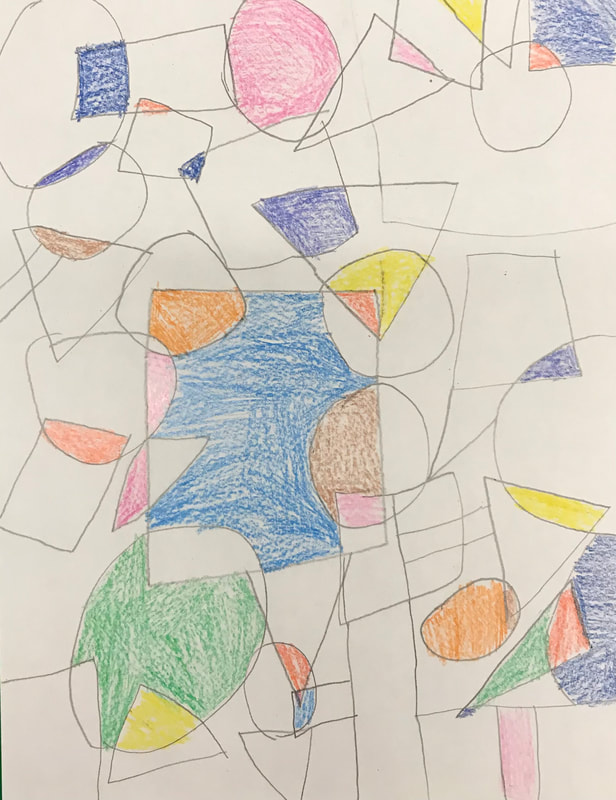
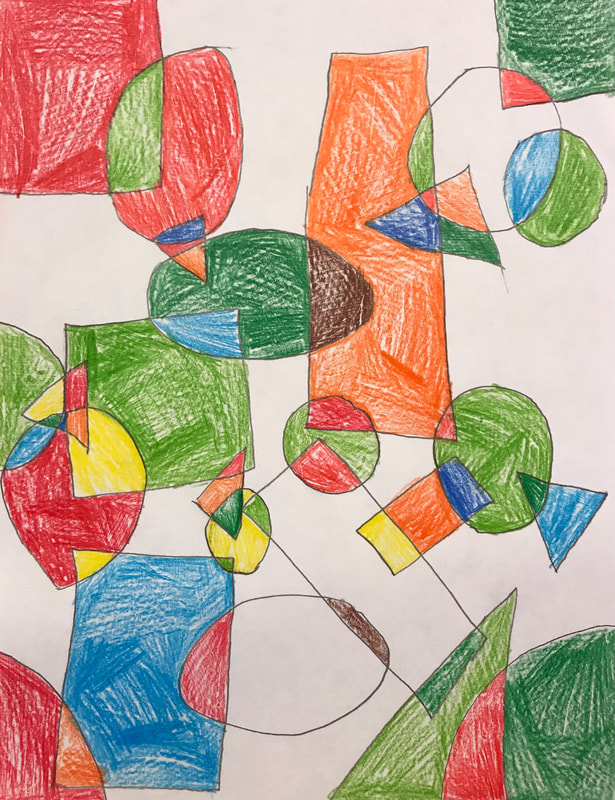
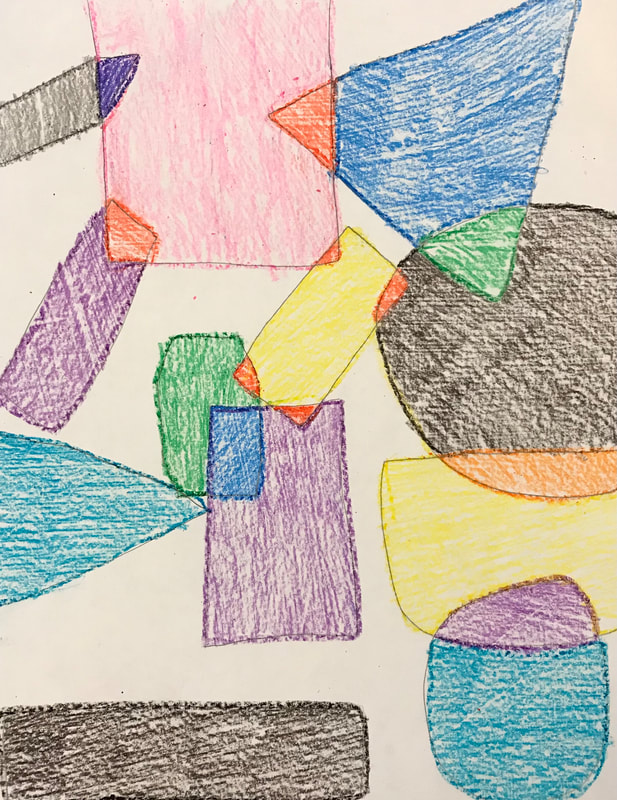
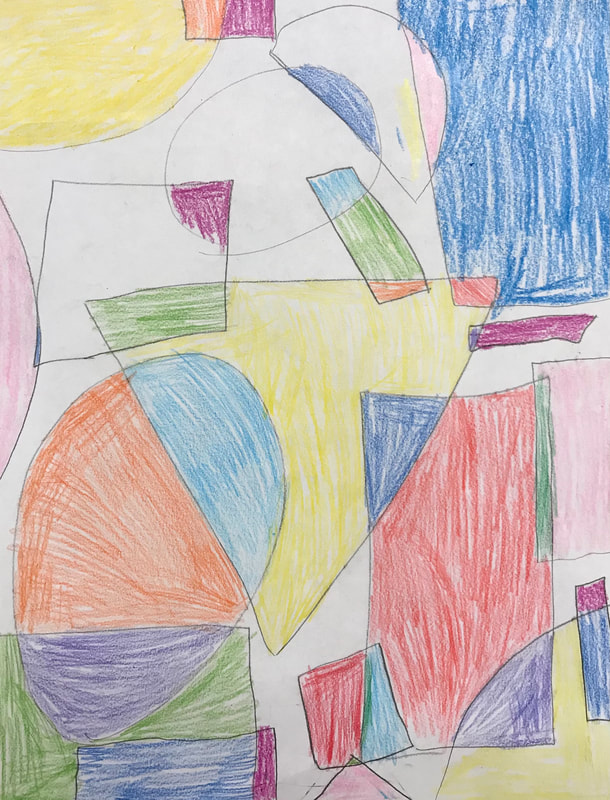
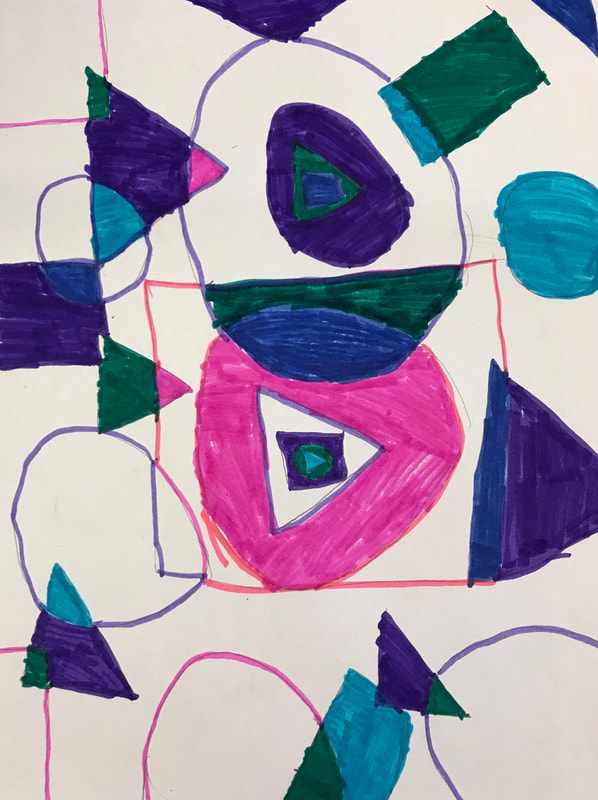
Materials: -Drawing paper or agamograph template -Pencil -Markers -Colored pencils -Crayons -Scissors -Glue -Cardstock Teaching and Work Time: 1. Students will be introduced to artist Yaacov Agam and his agamographs. They will look at examples of his artwork and we will discuss. What do you see? How do these artworks work? We will then look at examples made at home. Explain how the they work and how you can use color, line, and pattern to create the design. Explain the importance of the movement and form. 2. Students in the classroom will be given an agamograph template and be shown a demo on how to create their design. The students on Zoom will be shown how to make a template to use for their design. Students are encouraged to create balanced designs for both sides. The students will then create their designs, glue them onto the template, and fold them. the left and right sides will then be glued onto a small piece of cardstock to hold it in place. 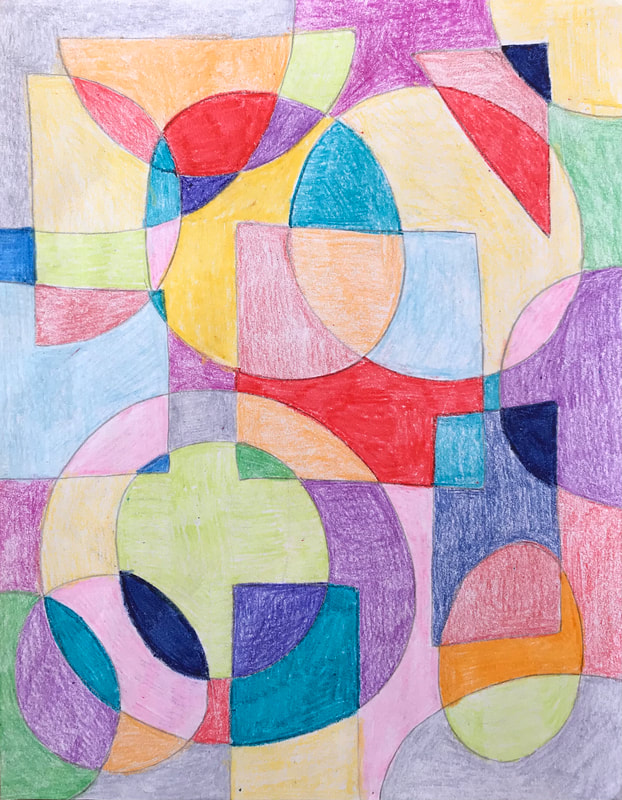 This lesson is for elementary or middle school. It teaches line, shape, color, balance, movement, unity, variety, repetition Materials: -Drawing paper -Pencil -Markers -Colored pencils -Crayons Teaching and Work Time: 1. Show students artworks by artist Sonia Delaunay and discuss. What do they notice? What shapes do you see? What do you notice about them? (overlapping, different colors, different sizes, etc). Explain how the broken up, variety of shapes creates movement. Discuss the balance and unity and repetition within the paintings. 2. Students will fill their paper with different geometric shapes. They will overlap them and use a variety of shapes and sizes. Students are encouraged to create balance and unity by filling in the page and using a variety of colors to fill it in. *Some student examples are unfinished due to my school's current COVID regulations on one-day projects*
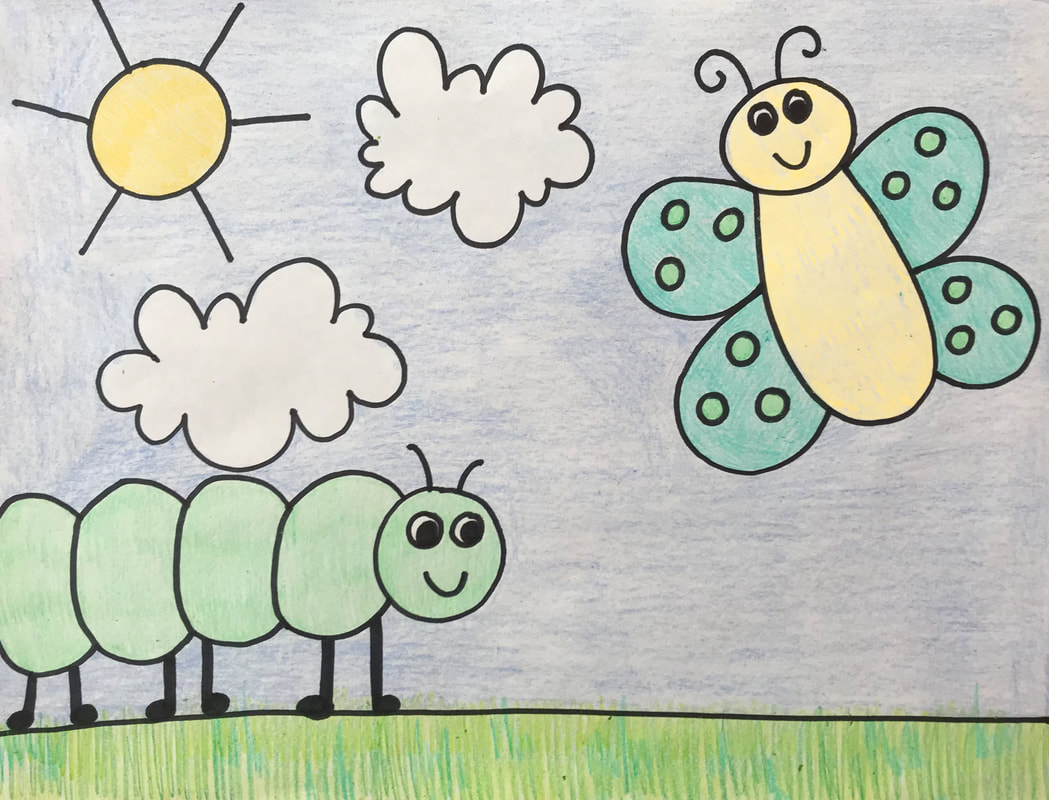
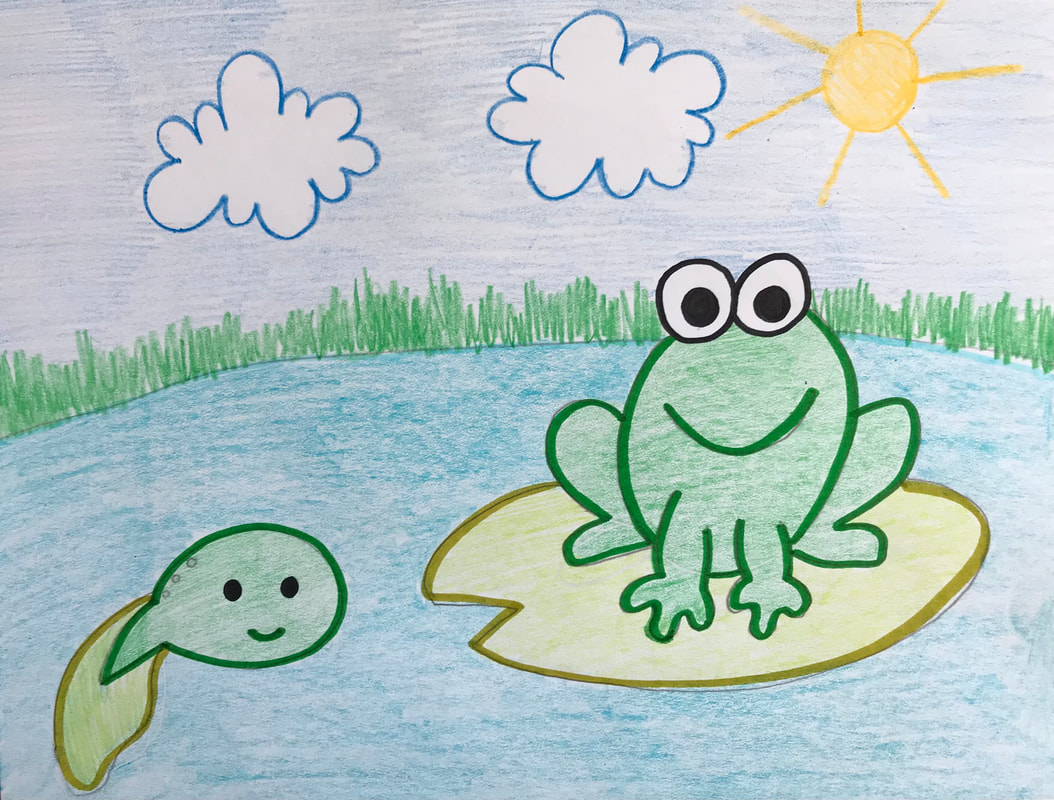
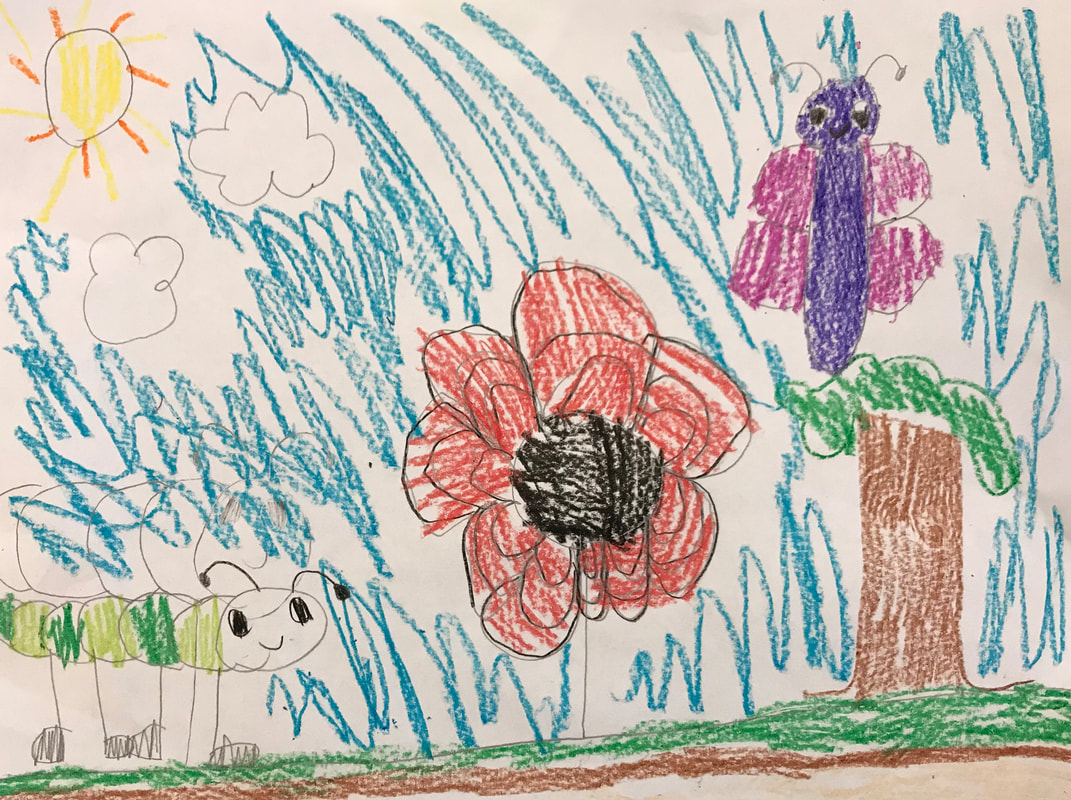
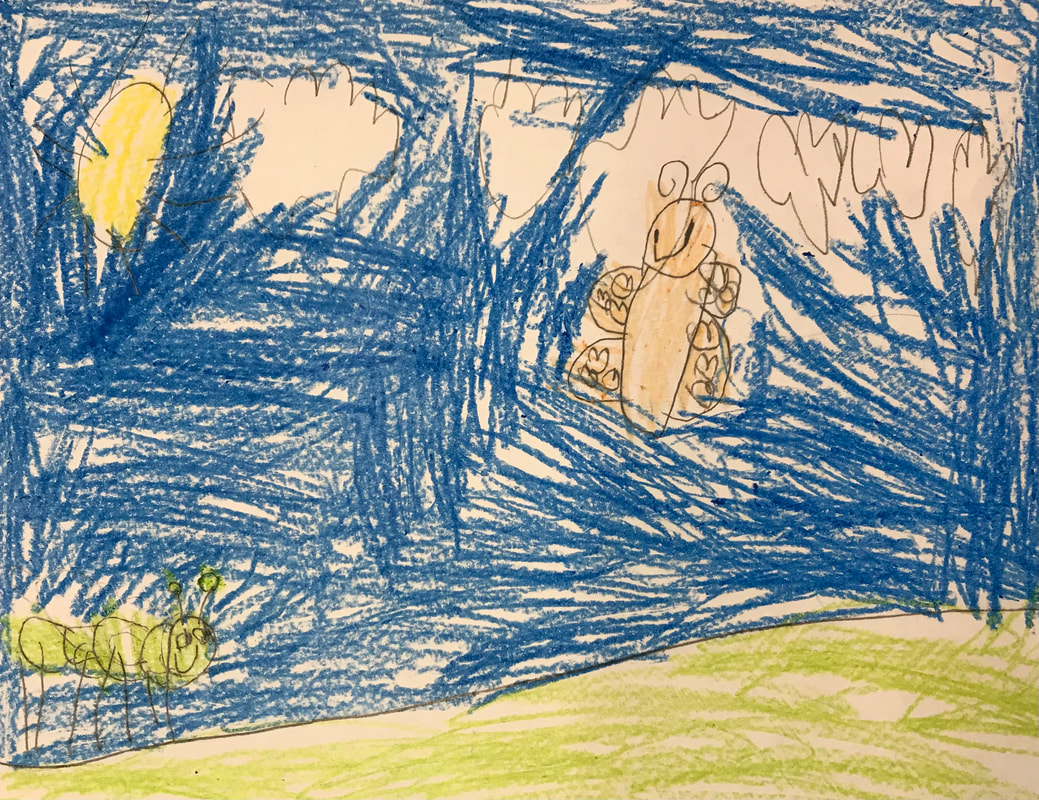
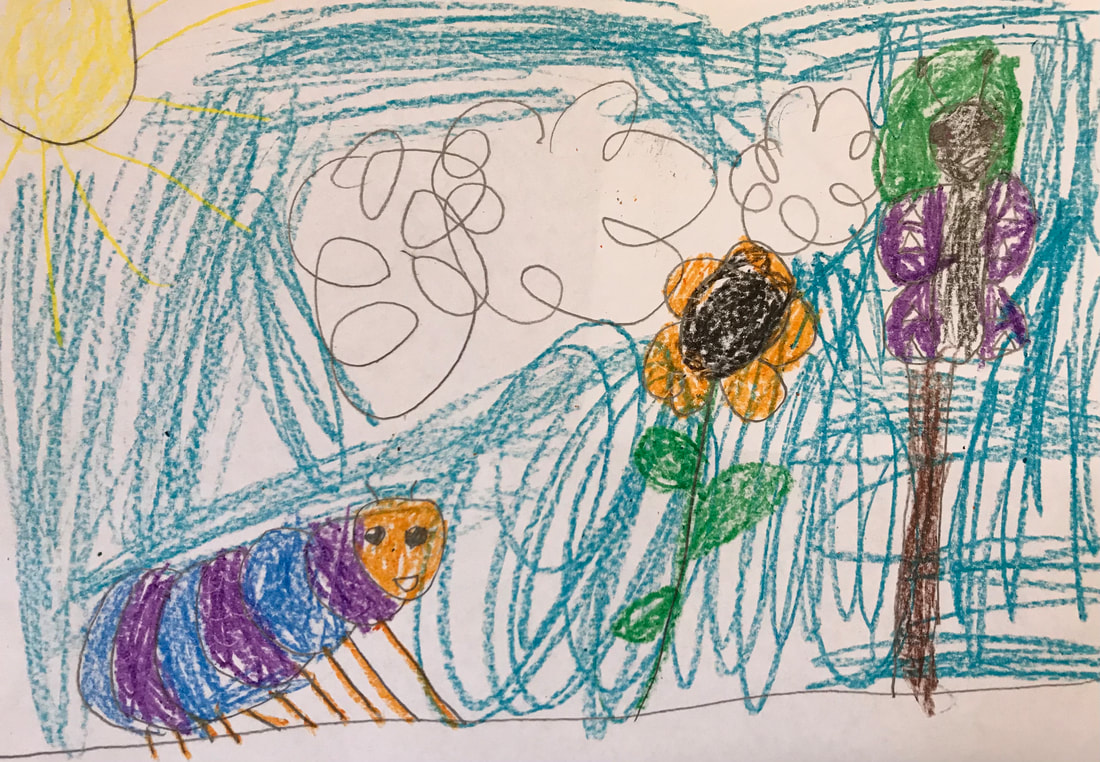
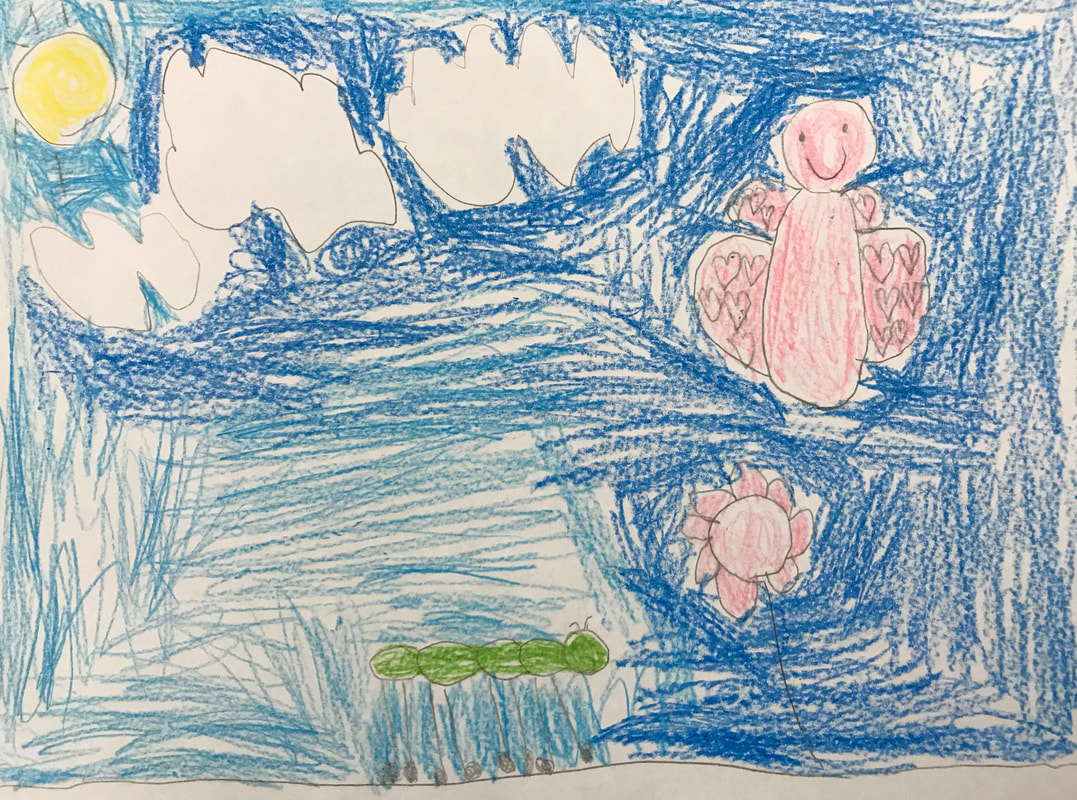
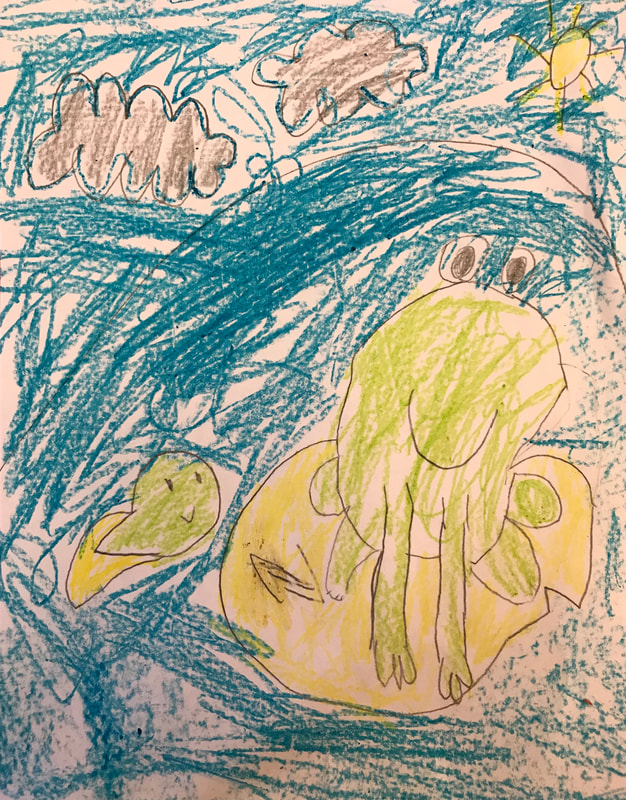
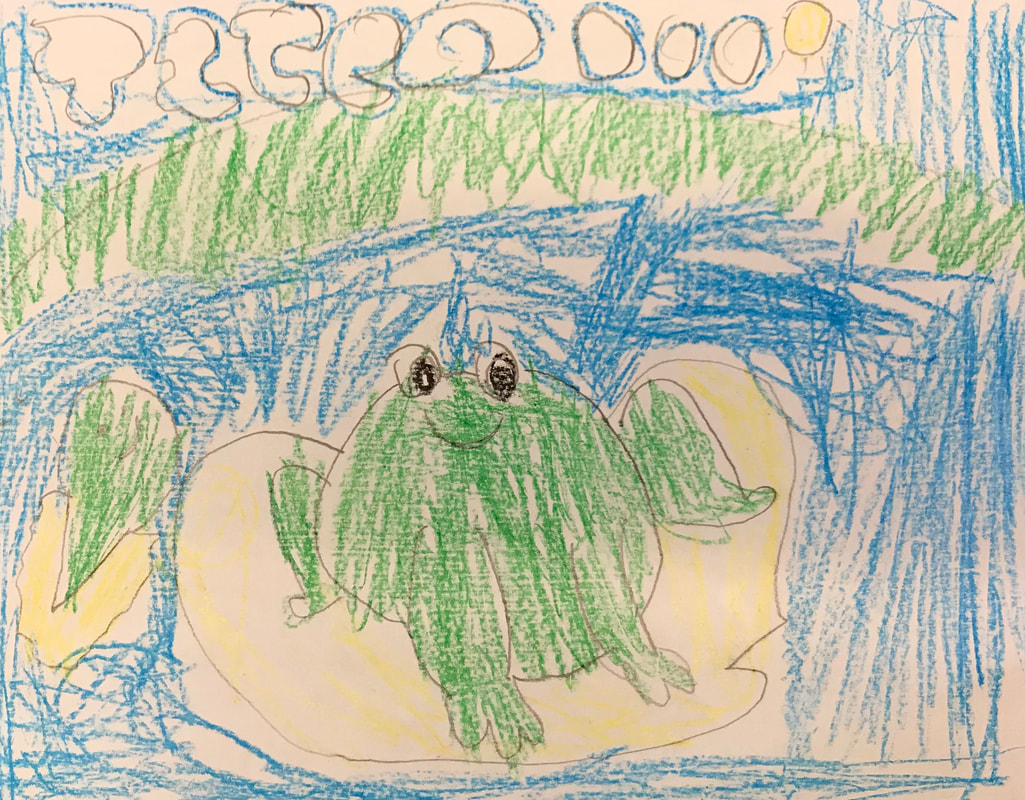
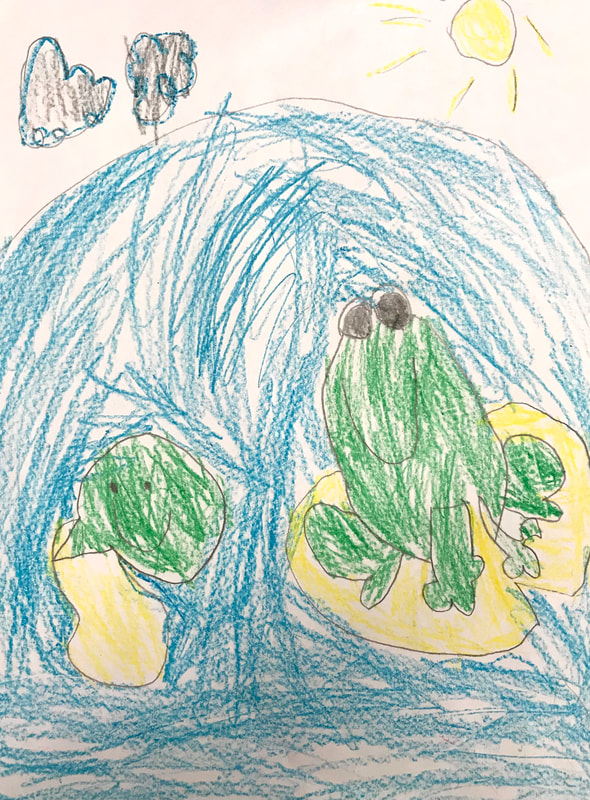
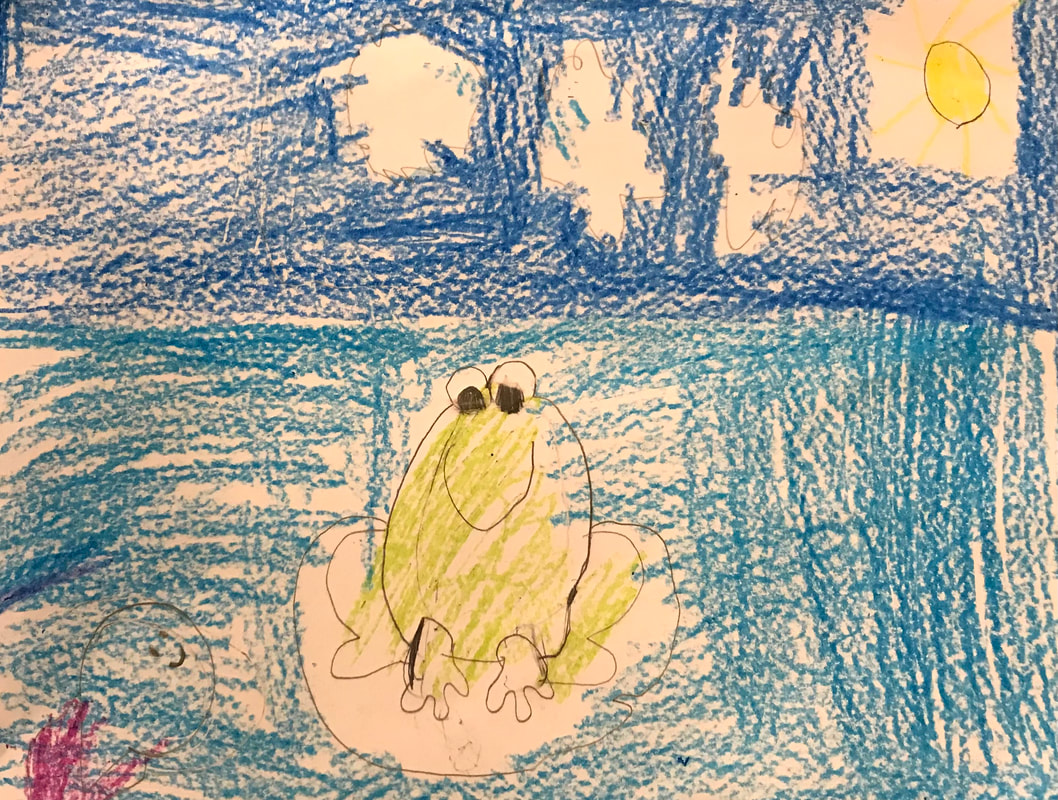
This lesson is for elementary school. It teaches metamorphosis, line, shape, space, color, balance Materials: -Drawing paper -Pencil -Markers -Colored pencils -Crayons Teaching and Work Time: 1. Play The Caterpillar and the Polliwog - YouTube. Talk to students about the process of metamorphosis. Explain assignment to the class. Guide the class in drawing either the polliwog and the frog or the caterpillar and the butterfly. 2. Students will follow along with the guided drawing. They will then fill in their details in the remaining space. Finally students will add color.
This lesson is for elementary or middle school. It teaches line, shape, space, color, balance, movement, variety
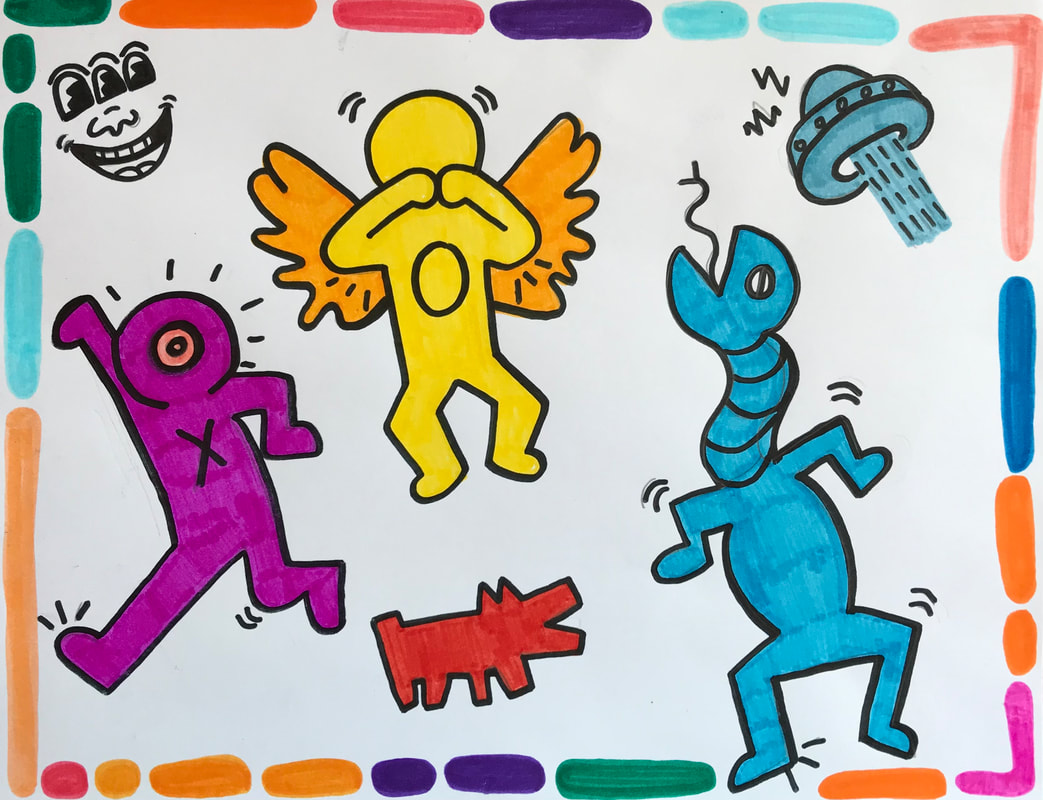
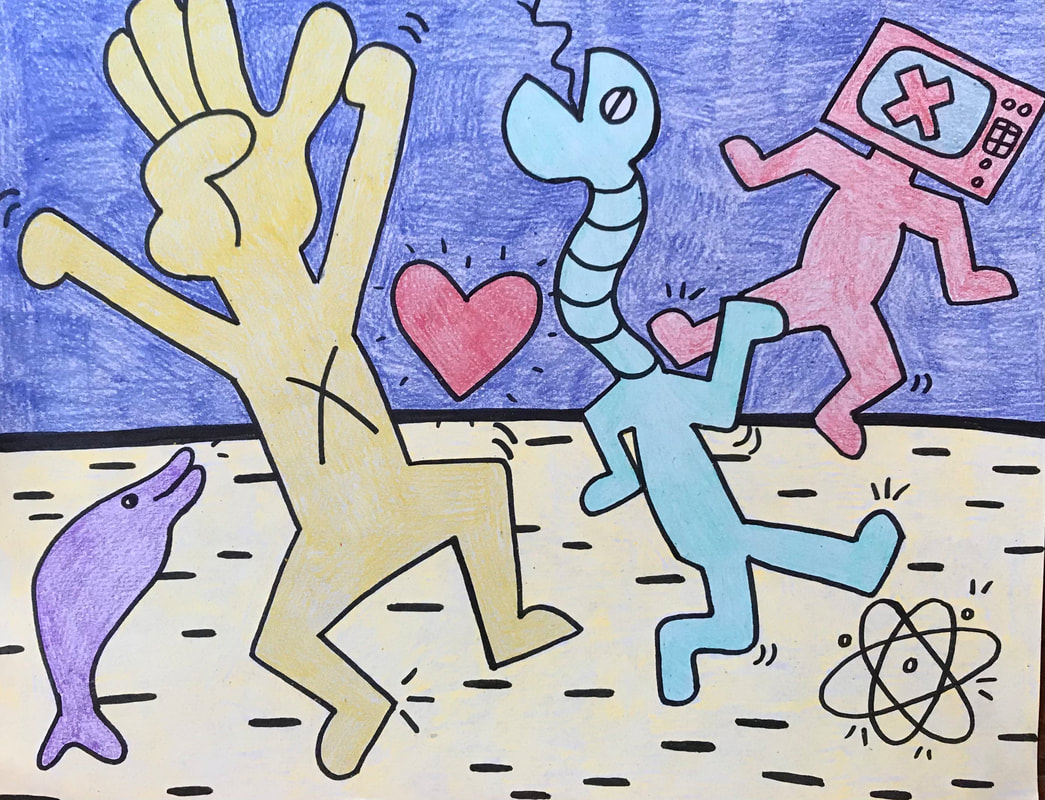
Materials: -Drawing paper -Pencil -Markers -Colored pencils -Crayons -Roll a Keith Haring handout -Dice Teaching and Work Time: 1. Present PowerPoint introducing Pop Art and Keith Haring. Explain to students what a mural is and look at example photos of Haring's murals. Discuss the colors and how he uses space to create movement and balance. Discuss the wide use of variety he incorporates in his artwork (colors, shapes, figures, etc.) Discuss how the use of line can communicate movement. Explain the assignment and show students the example. Walk them through how to use the Roll a Keith Haring handout. 2. Students will use their dice and Roll a Keith Haring sheet to compose their drawings. There will be 3 figures, 2 symbols, and 2 extras. Finally, students will outline in sharpie and then add bold colors to complete their mini murals.
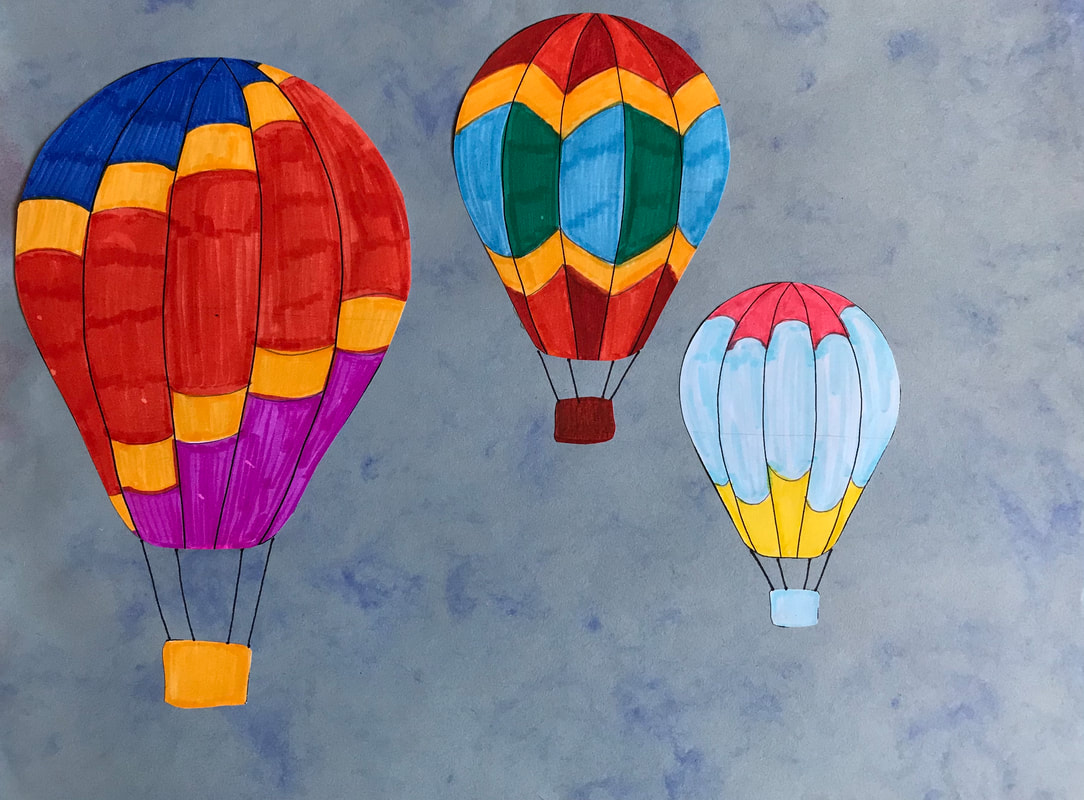
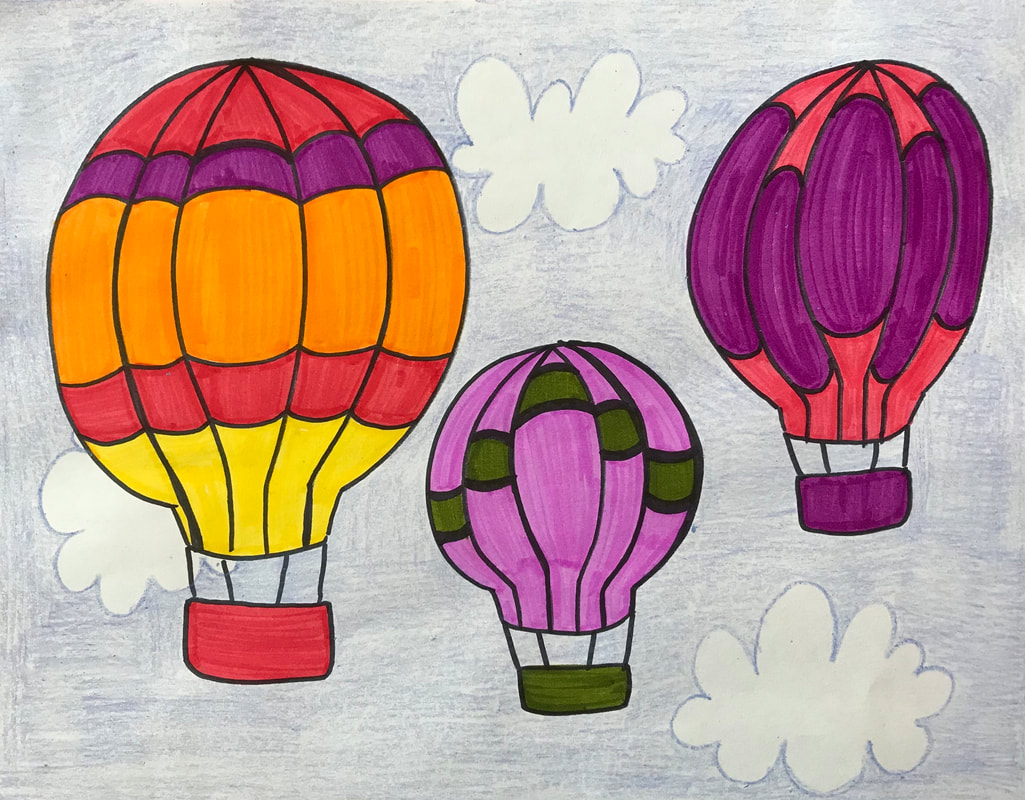
This lesson is for elementary school. It teaches color, pattern, balance, space, line, form.
Materials: -Hot air balloon template -Pencil -Markers -Colored pencils -Crayons -Scissors -Glue -Blue construction paper Teaching and Work Time: 1. Students will watch a video on hot air balloons. We will discuss the different colors, patterns, and shapes. We will also discuss depth and space and how things appear smaller when they are further away. Explain and model how the design lines follow the form of the balloon. 2. Students in the classroom will be given a template with 3 different size hot air balloons. They will create a different design for each of the 3 balloons. The balloons should be fully filled in with color and each should have a different design. Once they are colored in, they will be cut out and glued on a piece of blue construction paper. The students on Zoom will follow along as I model how to draw the hot air balloons on a sheet of white paper. They will still fill in their 3 designs and color them. Finally, they will add some clouds and color in their sky background. 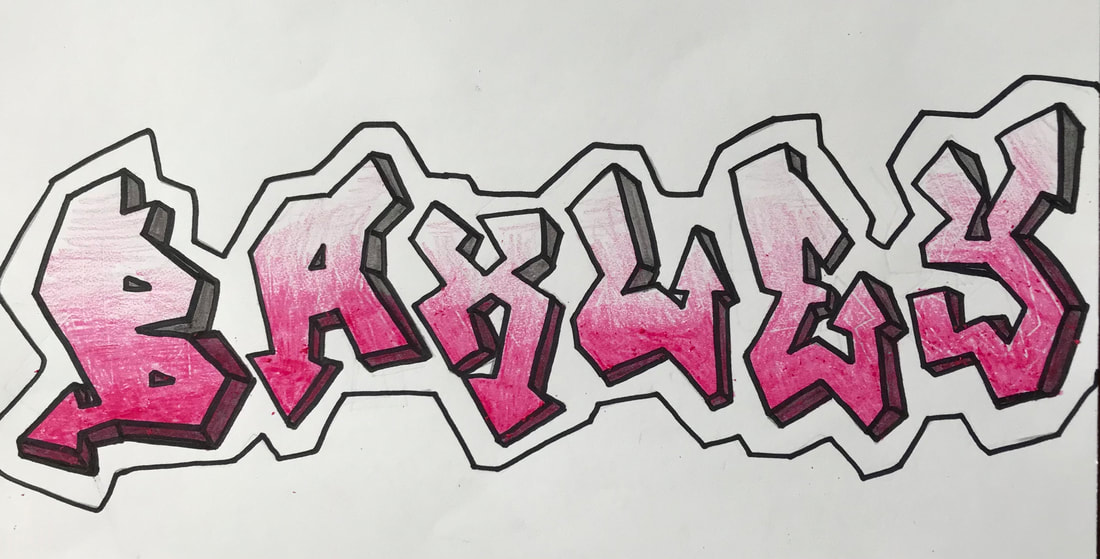 This lesson is for elementary or middle school. It teaches graffiti, line, shape, color, space, balance, emphasis, composition, movement, unity
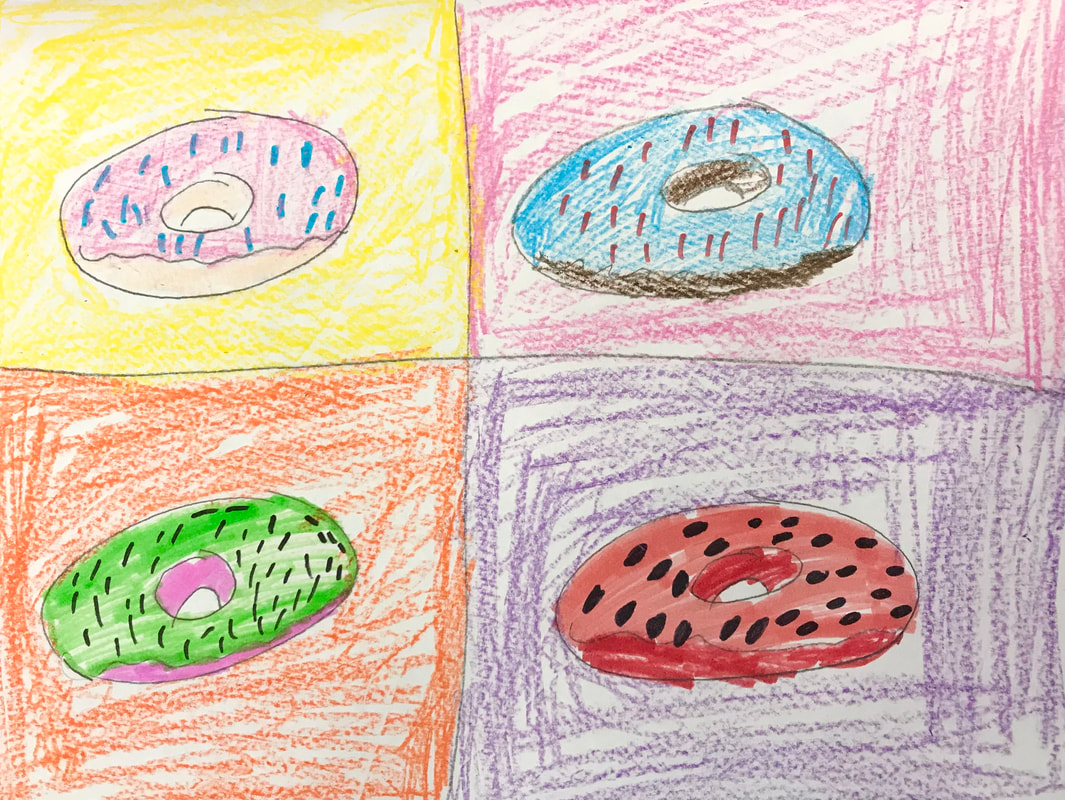
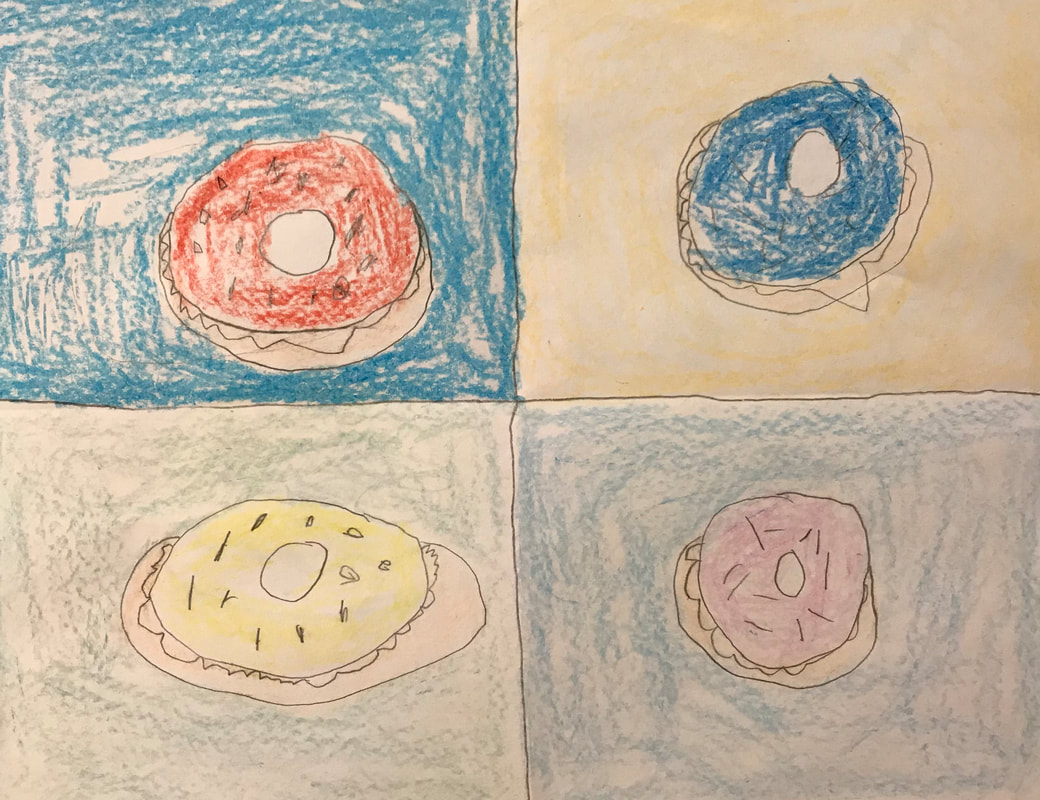
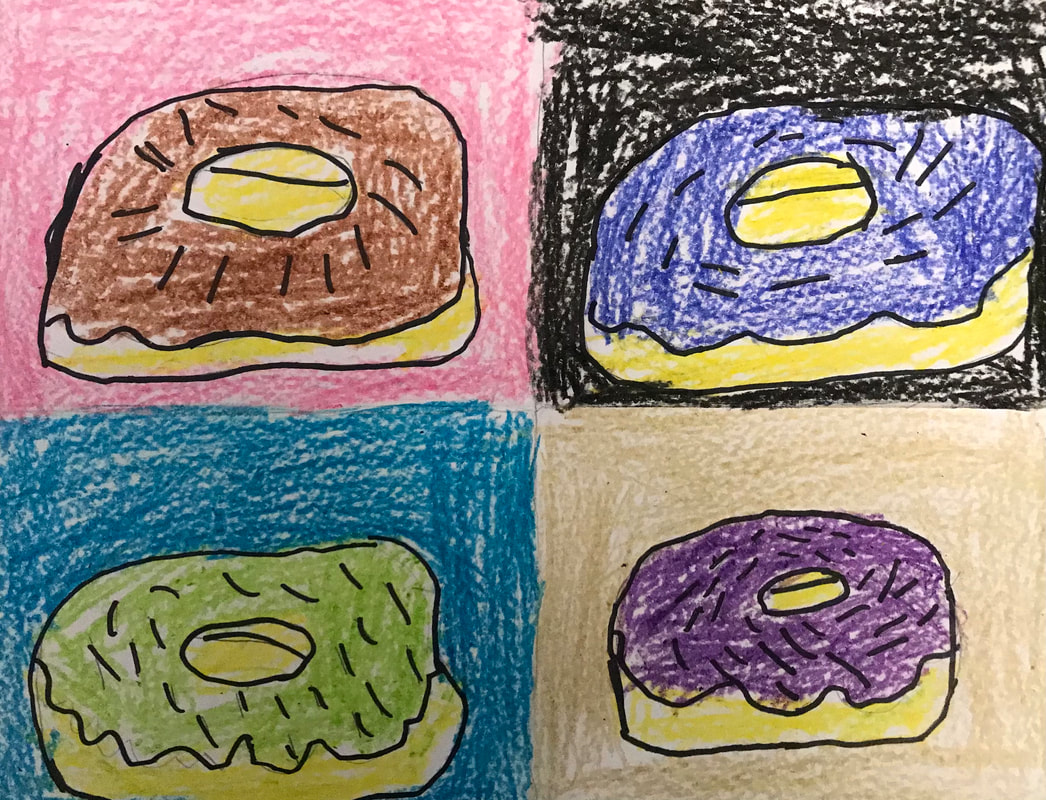
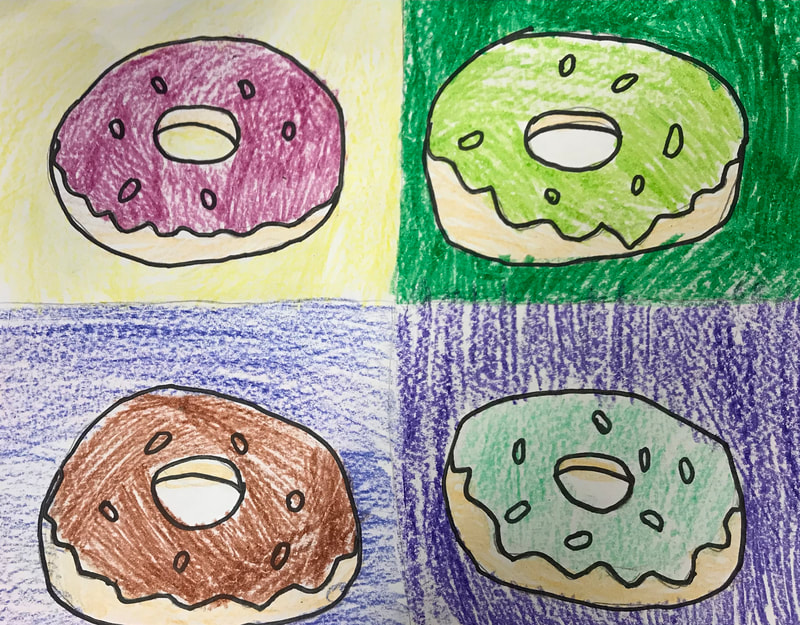
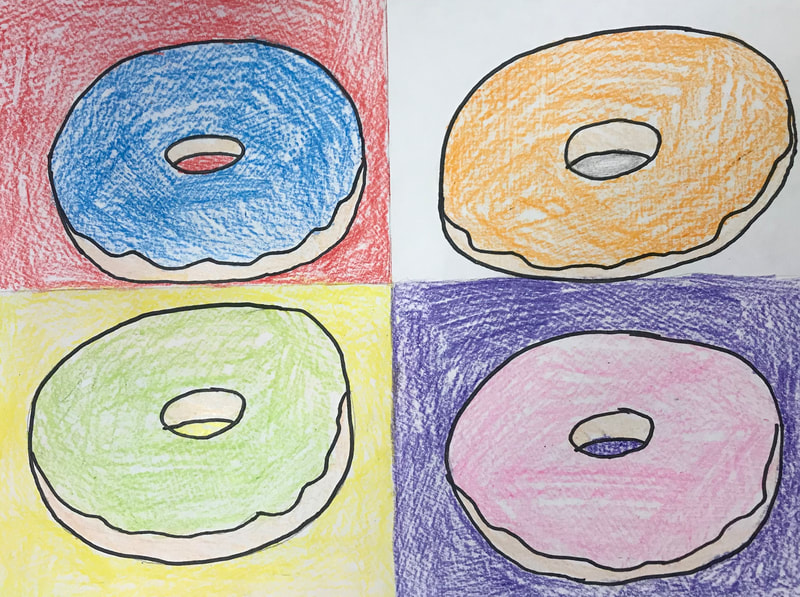
Materials: -Drawing paper -Pencil -Markers -Colored pencils -Crayons Teaching and Work Time: Day one: 1. Tell students what Graffiti is and have a class discussion. Include examples of when Graffiti can be legal vs. illegal. Play Graffiti: Art or vandalism? - YouTube. Show them photographs of illegal Graffiti and discuss how it can negatively affect the area when it’s done illegally. Then, show examples of legal Graffiti and discuss how when it’s done legally, it can brighten up, add color to, and improve the look of the area. While looking at Graffiti example photos, explain how emphasis and movement and unity can be created. Show students examples of different Graffiti fonts. 2. Students in the classroom will be given a packet containing practice sheets and pages showing different Graffiti fonts. Students will use class time to work on practice sheets and create a sketch of their name in their chosen font. Students on Zoom will be shown the practice sheets one at a time and teacher will work through them step-by-step. They will have access to the Graffiti font examples through CTLS and through shared screen. While practicing the letters, students will see demos on how to use line to create different shapes with the letters. Day two: 1. Ask students what they remember about legal vs. illegal Graffiti—quick recap class discussion. 2. Students who did not finish their practice sheets and name sketch will have time to finish. Once finished, they will redraw their name sketch large on a new sheet of paper. They will be encouraged to make it balanced and use up all the space on their paper to create a full and balanced composition. After drawing in pencil first, they can outline in sharpie (if they wish) and add color. 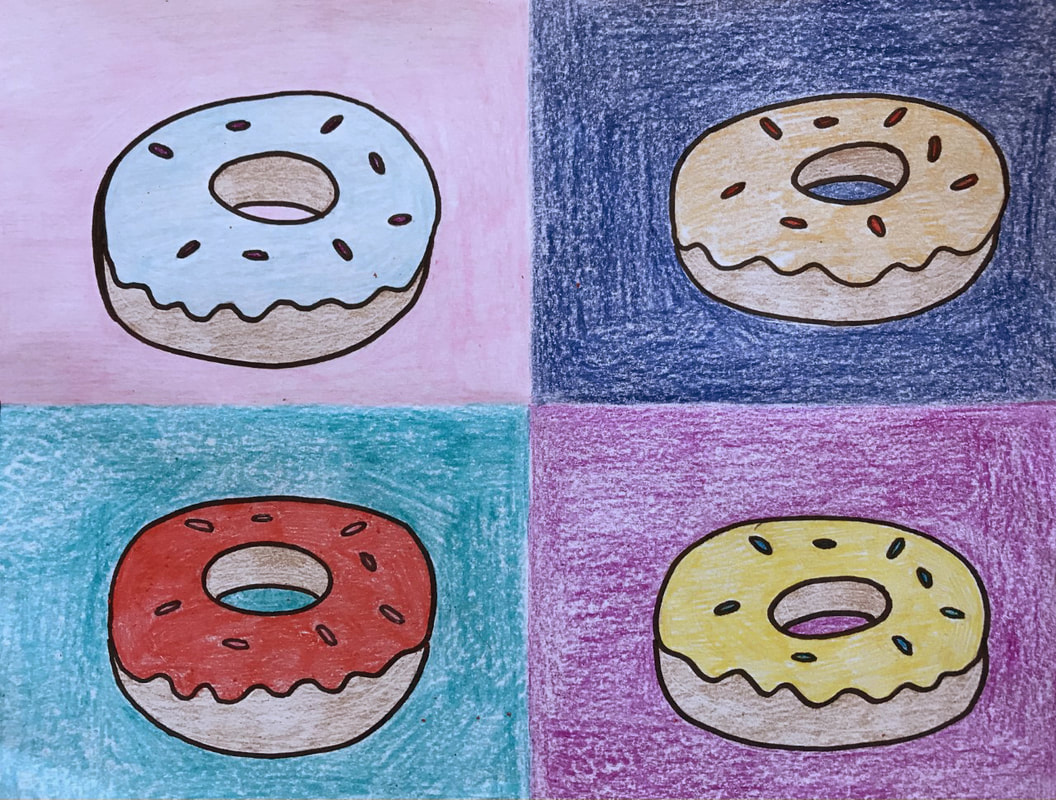 This lesson is for elementary or middle school. It teaches line, color, emphasis, unity, repetition. Materials: -Drawing paper -Pencil -Markers -Colored pencils -Crayons Teaching and Work Time: 1. Present PowerPoint introducing Pop Art and Andy Warhol. Explain how this style uses bold, contrasting colors. Discuss how the use of bold, contrasting colors creates emphasis. Introduce the assignment and show the example. Explain how there is unity created with the repetition of subject matter. 2. Have the students follow along while modeling how to fold the paper into 4 equal rectangles and then drawing a donut into each section. Once the drawings are all complete, students will use a different color to fill in each rectangle and a different color to fill in the icing and sprinkles on each donut. *Some student examples are unfinished due to my school's current COVID regulations on one-day projects* 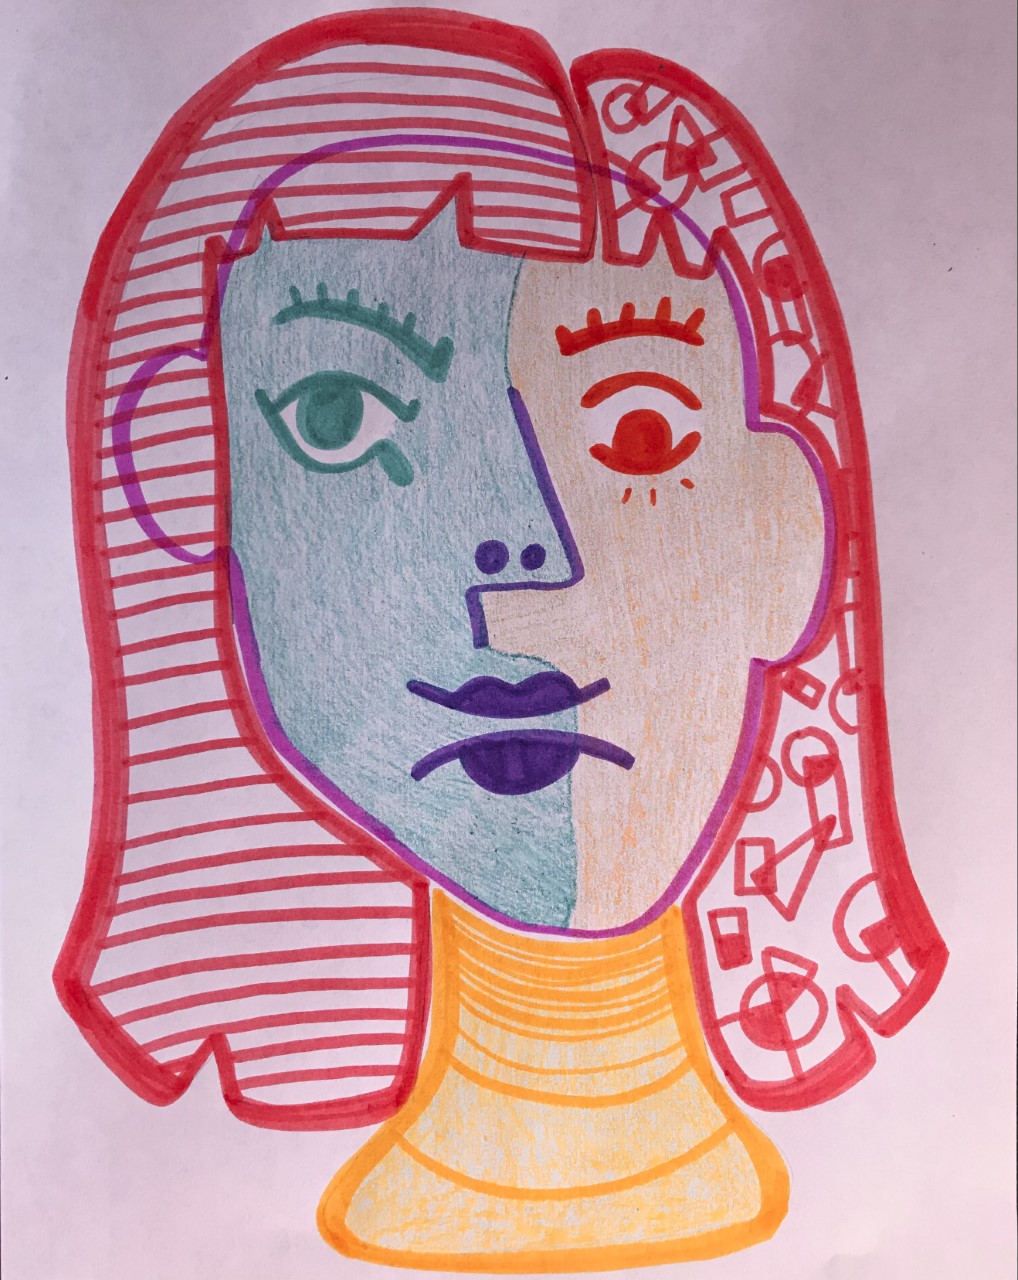 This lesson is for elementary or middle school. It teaches cubism, color, shape, line, variety, pattern.
Materials: -Drawing paper -Pencil -Markers -Colored pencils -Crayons -Dice -Roll a Picasso handout Teaching and Work Time: 1. Present PowerPoint introducing Pablo Picasso and Cubism. Have a class discussion. Ask students what they notice about the artwork shown. (What shapes do you see? What kind of colors did the artist use?) Talk to students about how the artist used a variety of lines and shapes. Explain the assignment to the students and show them the example. Model how to use the Roll a Picasso handout. 2. Students will use their dice and their handout to construct the face for their portrait. They will add in the shapes for the hair and neck and add some patterns in those shapes. Once their drawing is complete, they will add color. They are encouraged to separate the face into at least two sections and use a variety of colors.
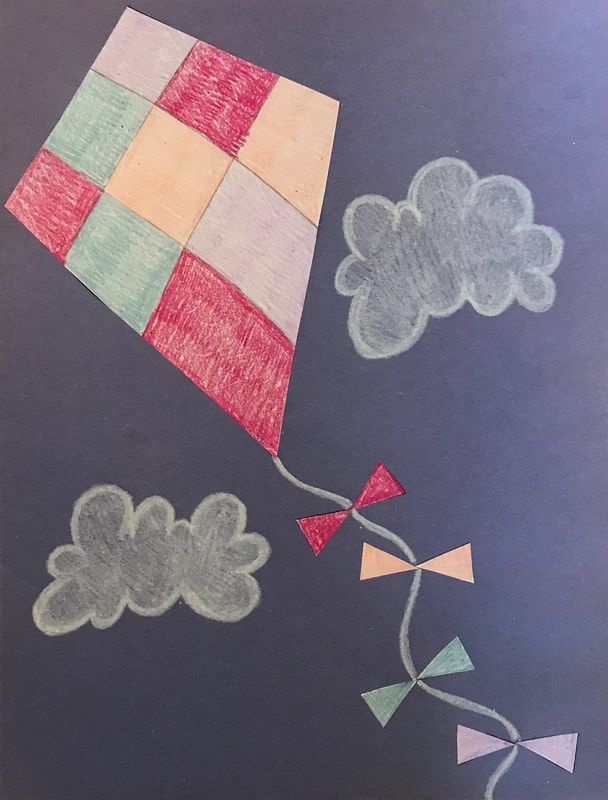
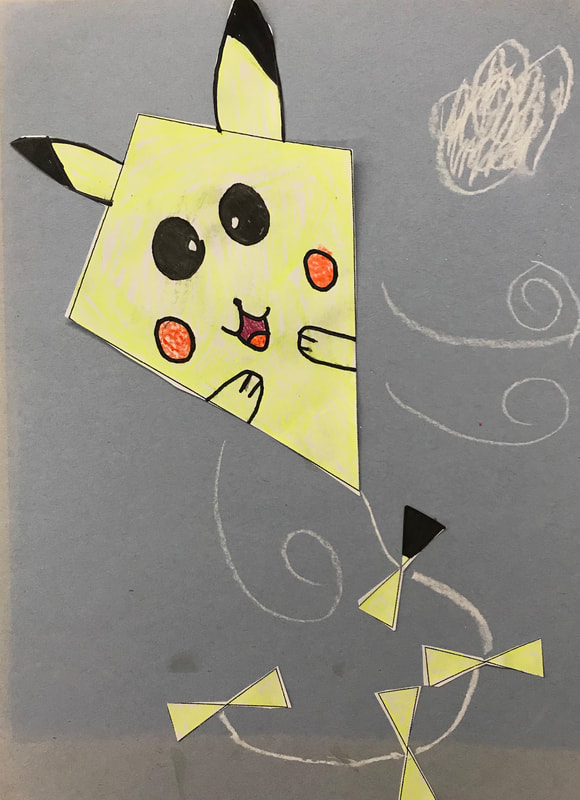
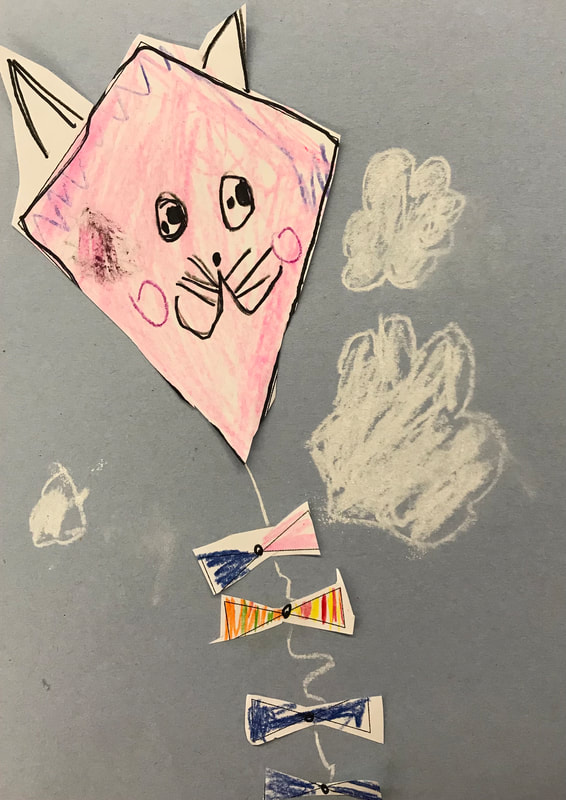
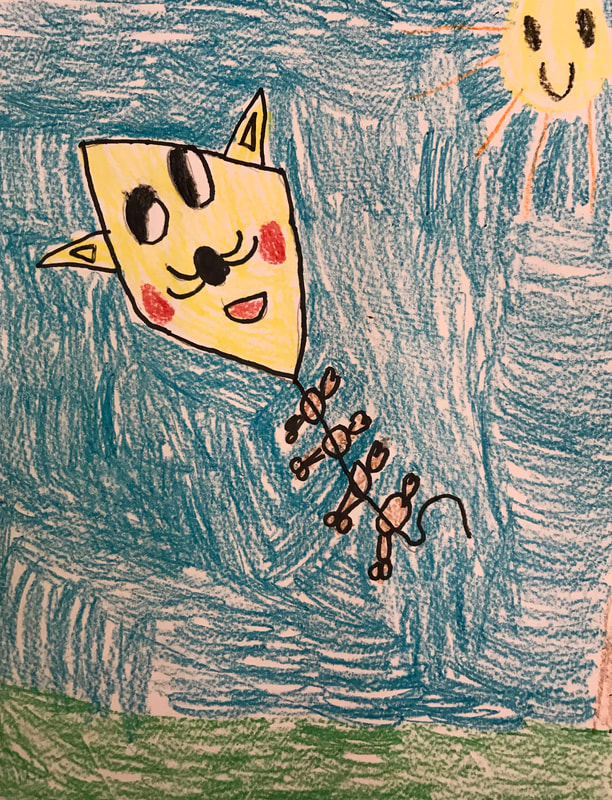
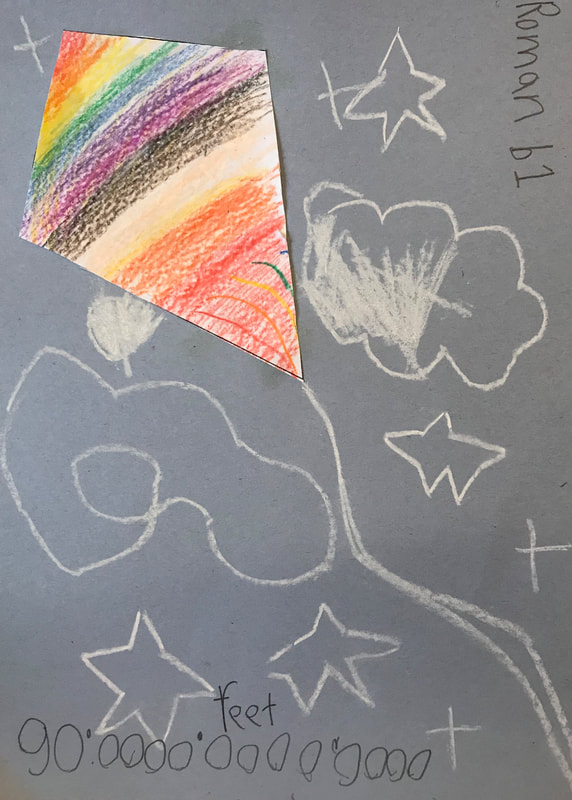
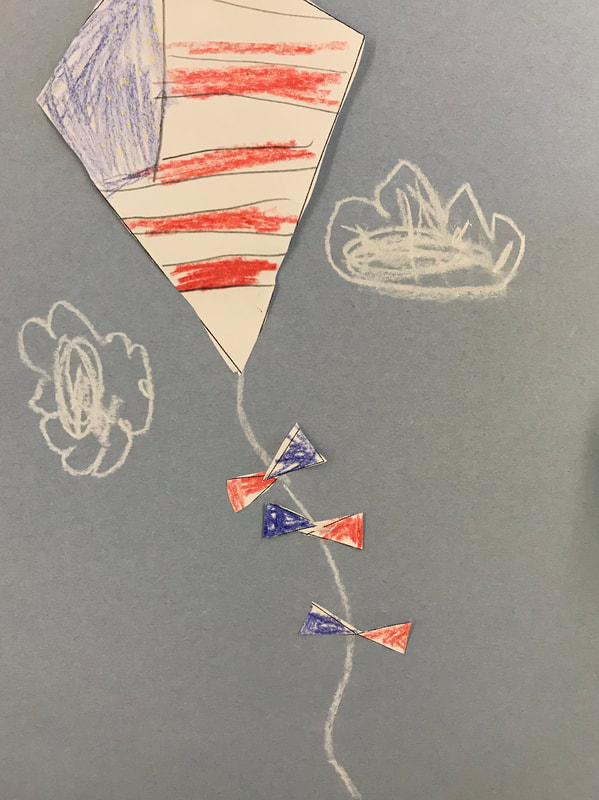
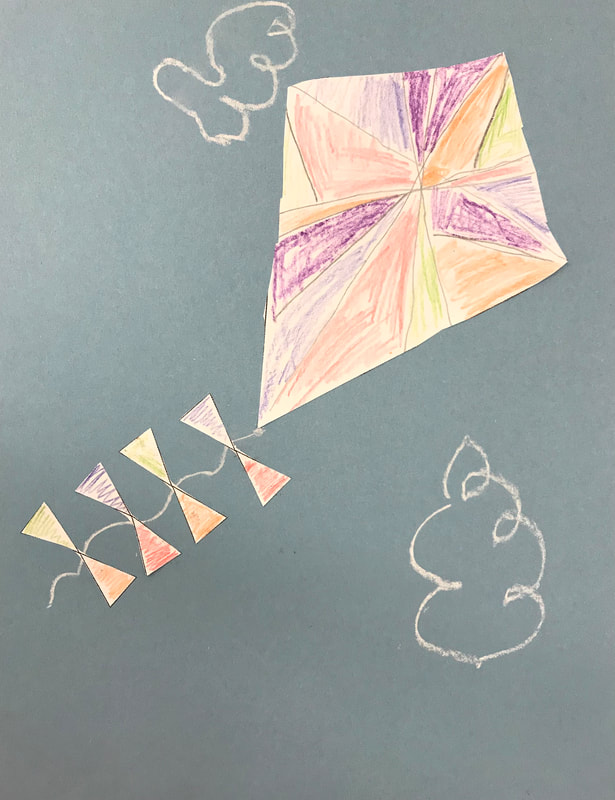
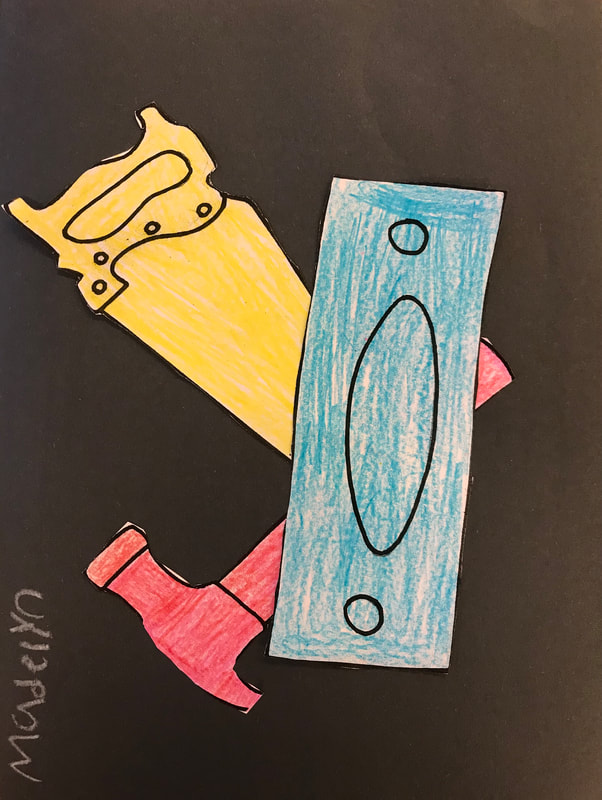
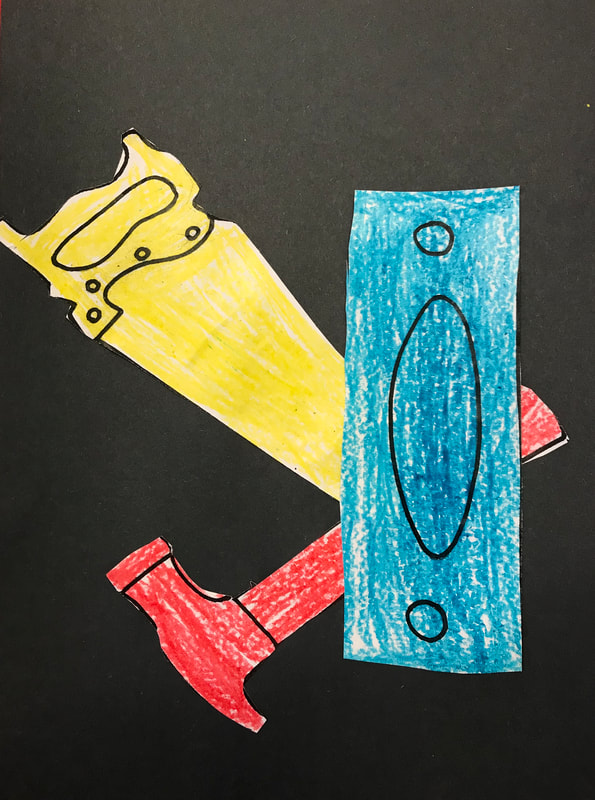
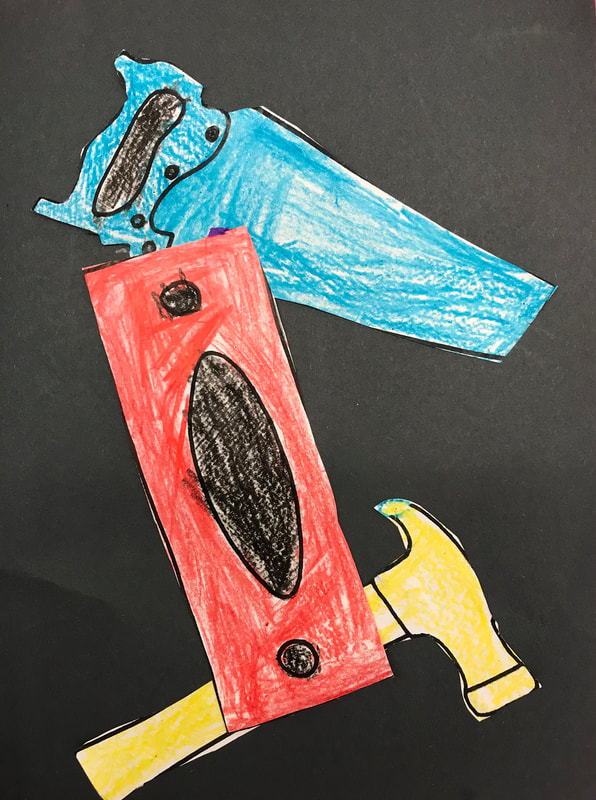
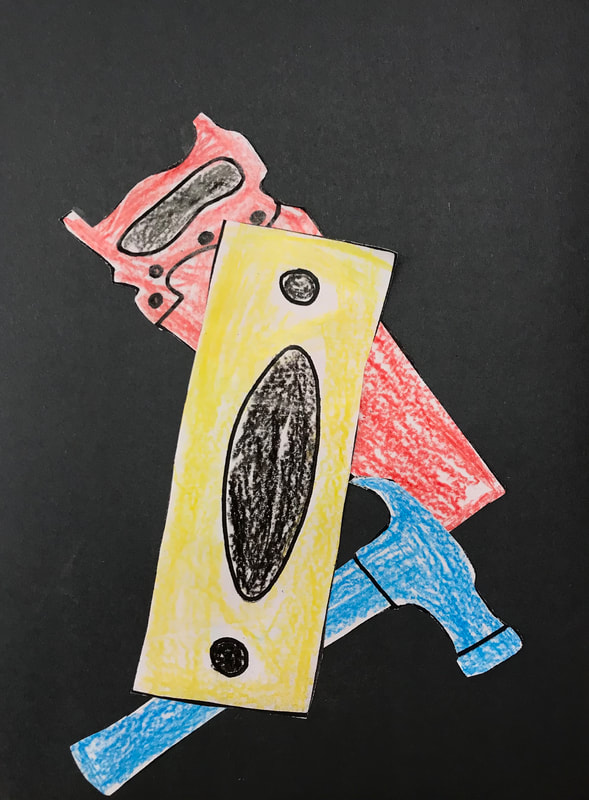
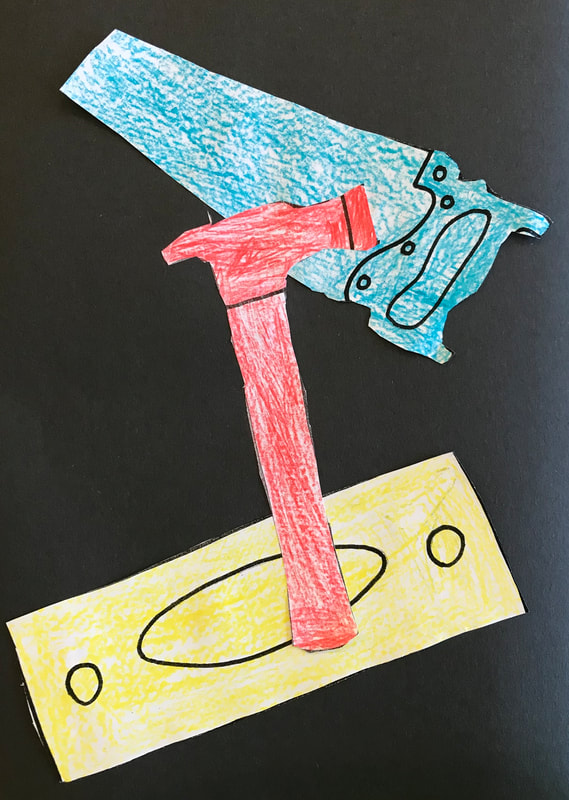
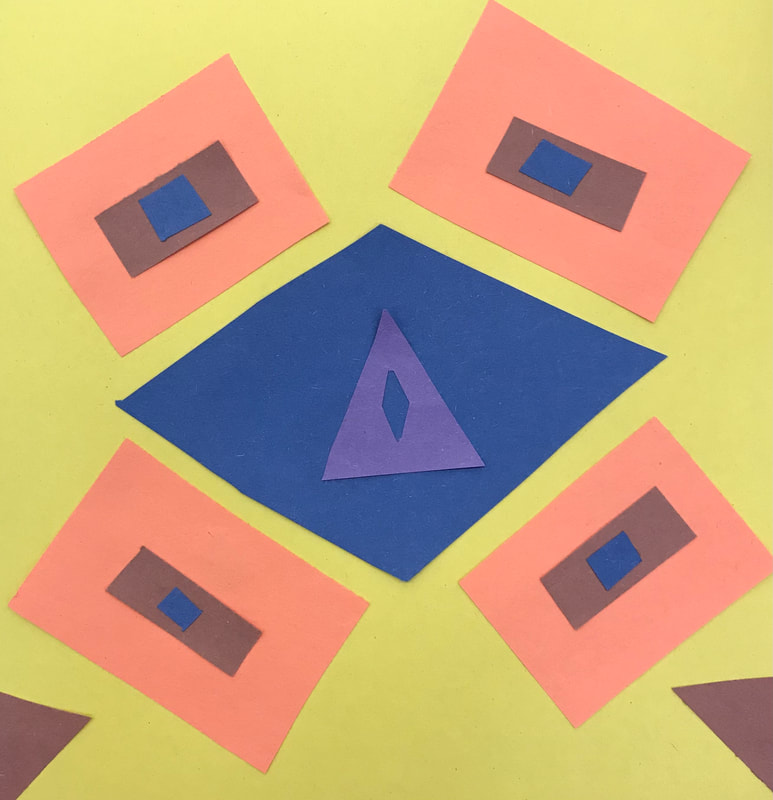
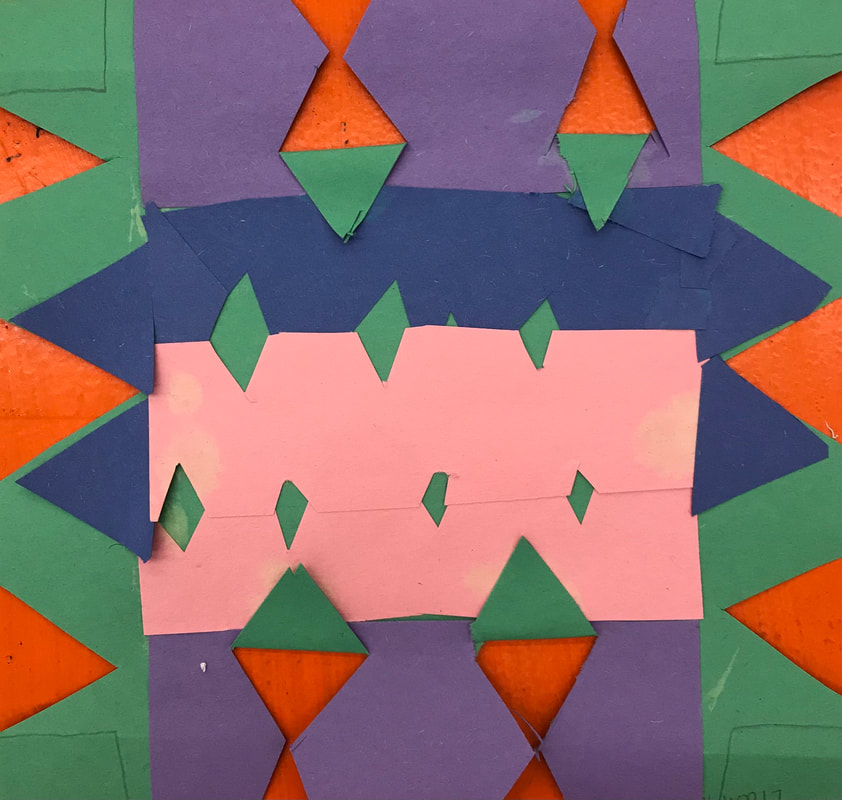
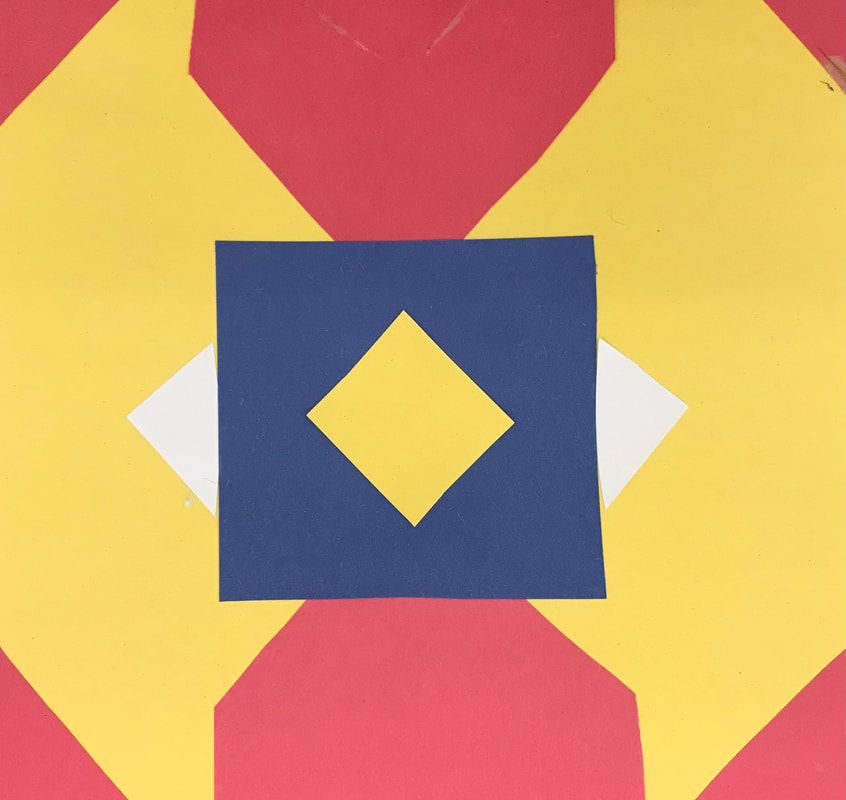
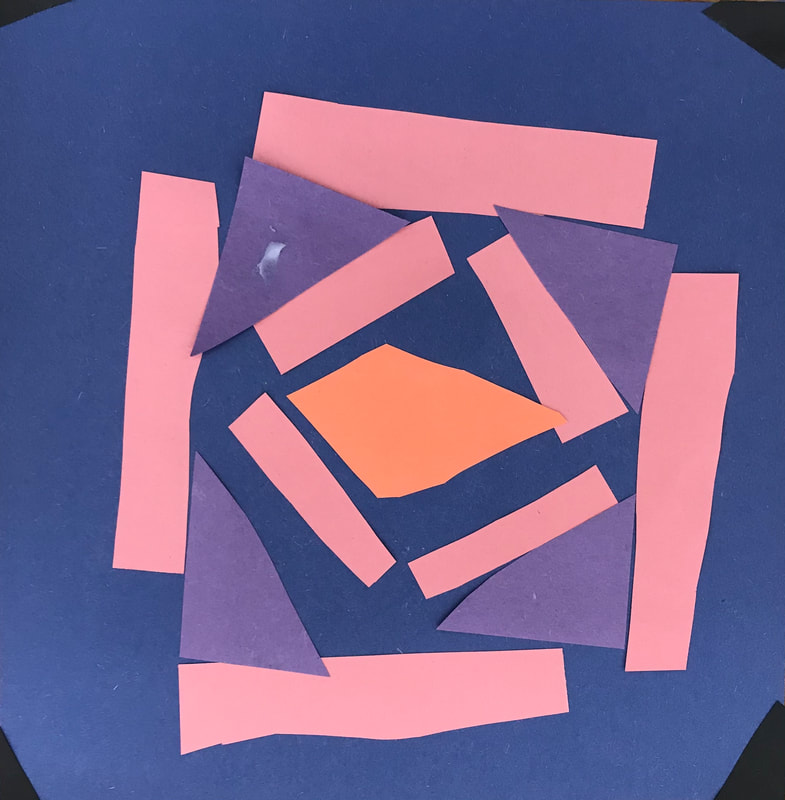
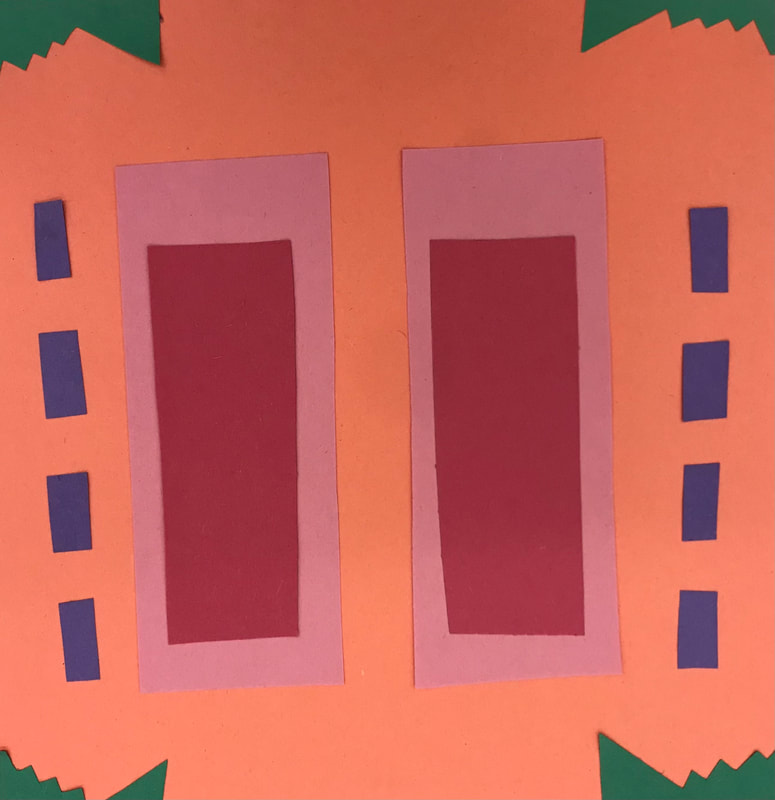
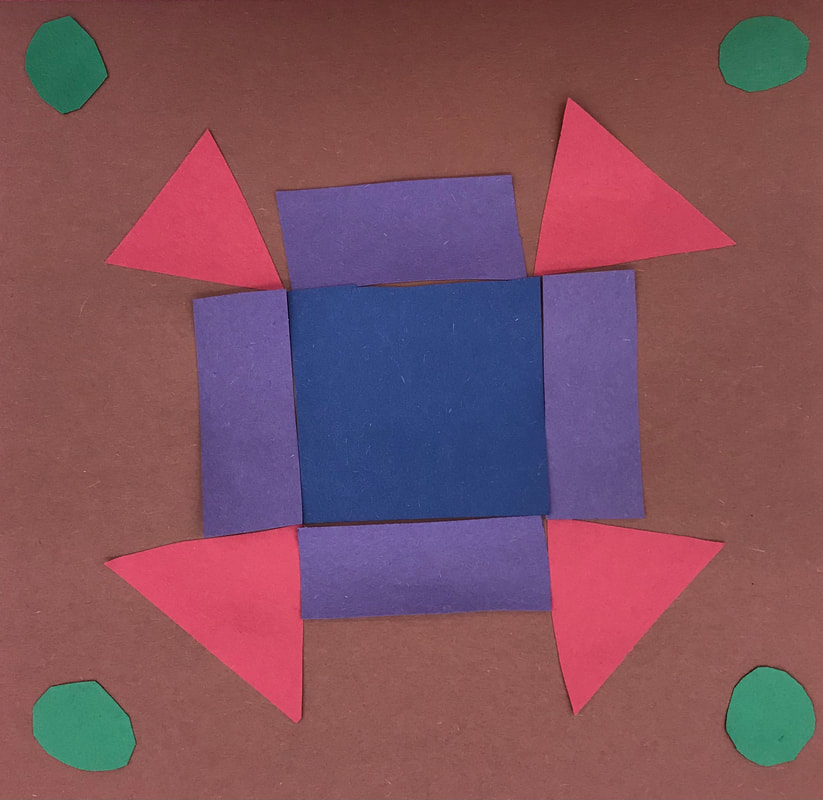
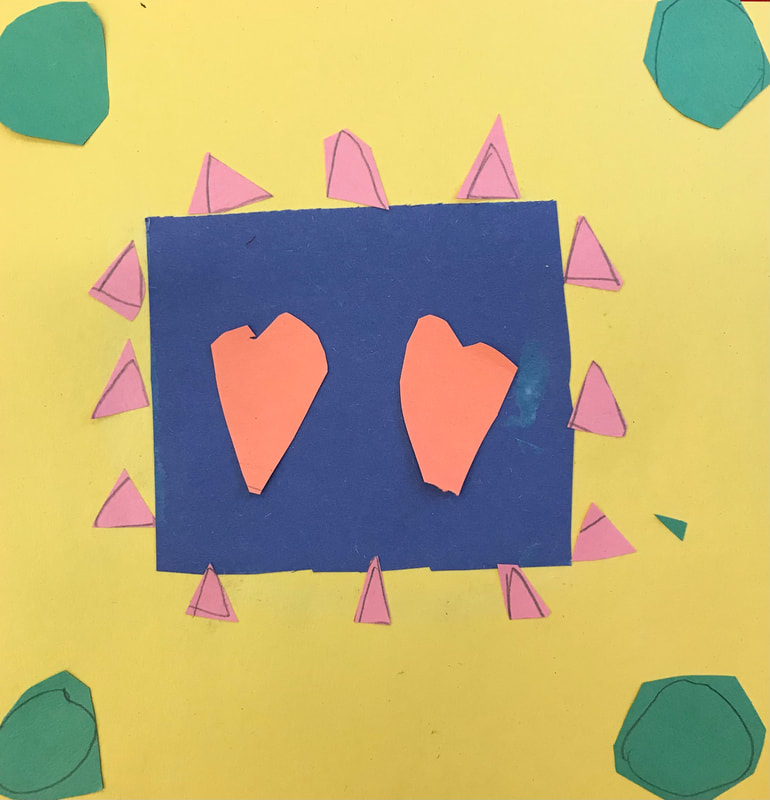
This lesson is for elementary school. It teaches line, color, space, balance, movement, repetition, shape. Materials: -Blue construction paper -Kite shape template -Markers -Colored pencils -Crayons -Scissors -Glue Teaching and Work Time: 1. Have a PowerPoint slide of colorful kites on the screen when students arrive. Point to the screen and ask students who knows what 'those' are called. Play a quick video and then have a class discussion about how kites work with the wind. Then discuss how the kites appear smaller when they're flying high in the sky (space)Model how to create a design on the kite template. 2. Students will have a kite template and begin creating their designs (as modeled previously). They will then cut out their kite and the bows and glue them onto a sheet of blue construction paper. Finally, they will use a white crayon, colored pencil, gel pen, or chalk to draw the string connecting their kite to the bows. They can also add in clouds with their white crayon/colored pencil/gel pen/chalk. Discuss how the placement of their bows under the kite and the connecting string create movement. *Some student examples are unfinished due to my school's current COVID regulations on one-day projects* 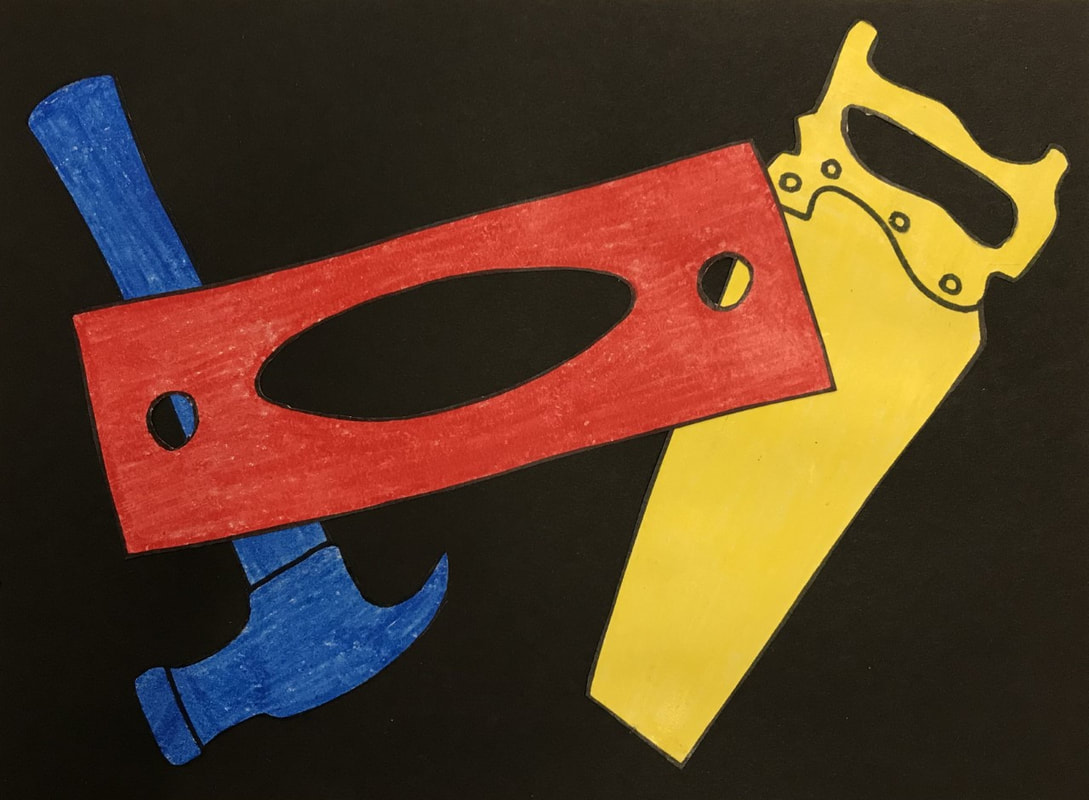 This lesson is for elementary school. It teaches freedom quilt, design, shape, balance. Materials: -Black paper -Drawing paper -Markers -Colored pencils -Crayons -Scissors -Glue Teaching and Work Time: 1. Show students artworks by American artist Jacob Lawrence and give them a brief background on the artist. What do they notice about his paintings? What details do they see? What are the people doing? What tools do they see? Discuss the subjects, symbols, and colors. 2. Students will choose 1-3 tools to draw. Original designs are encouraged but students may also use provided templates as guides. Draw this tool three times (or three different tools) on white paper using pencil. *Students may want to draw one tool, outline in black, cut, and then trace it two more times. Color tools with the primary colors - one red, one blue, and one yellow with crayon. Cut out shapes and arrange on a piece of black paper. Glue shapes in an interesting collage arrangement - some overlapping is encouraged to fill in the space to create balance. 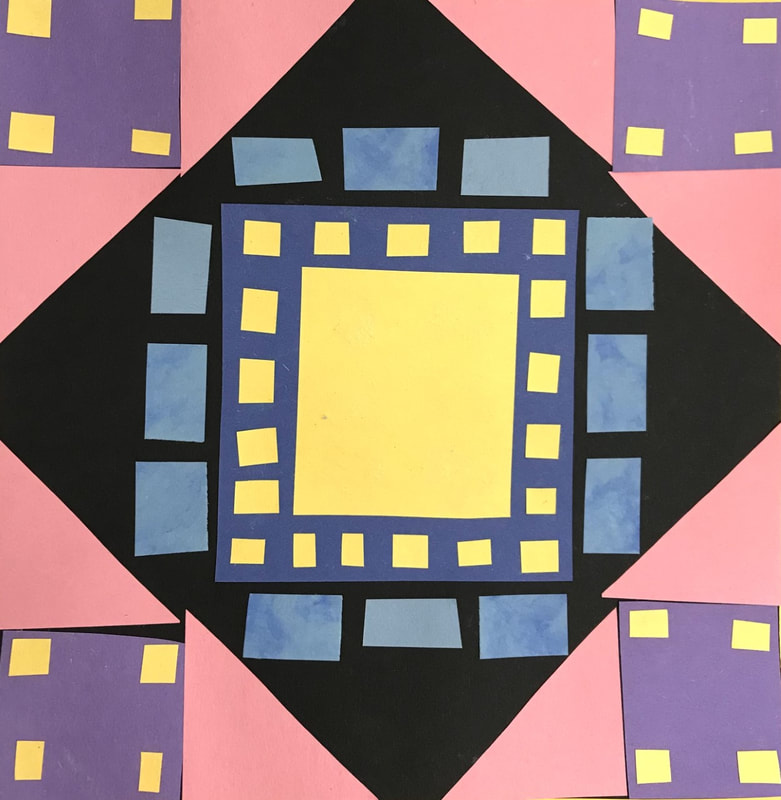 This lesson is for elementary school. It teaches freedom quilt, design, shape, balance. Materials: -Black paper -Construction paper -Scissors -Glue Teaching and Work Time: 1. Read The Patchwork Path: A Quilt Map To Freedom Bettye Stroud. Before reading, tell students to think of designs they might create if they were going to make a quilt. (What colors might you use? What shapes do you notice in many of the quilt designs?) Show students example picture of a quilt and then show them the chart with different freedom quilt designs. 2. Students will cut out shapes from the construction paper and glue them into a design on their black paper. This will be their quilt square design. |